


5
Illustrated Parts Catalog
In This Section
Mechanical and System Components.............................................................................................
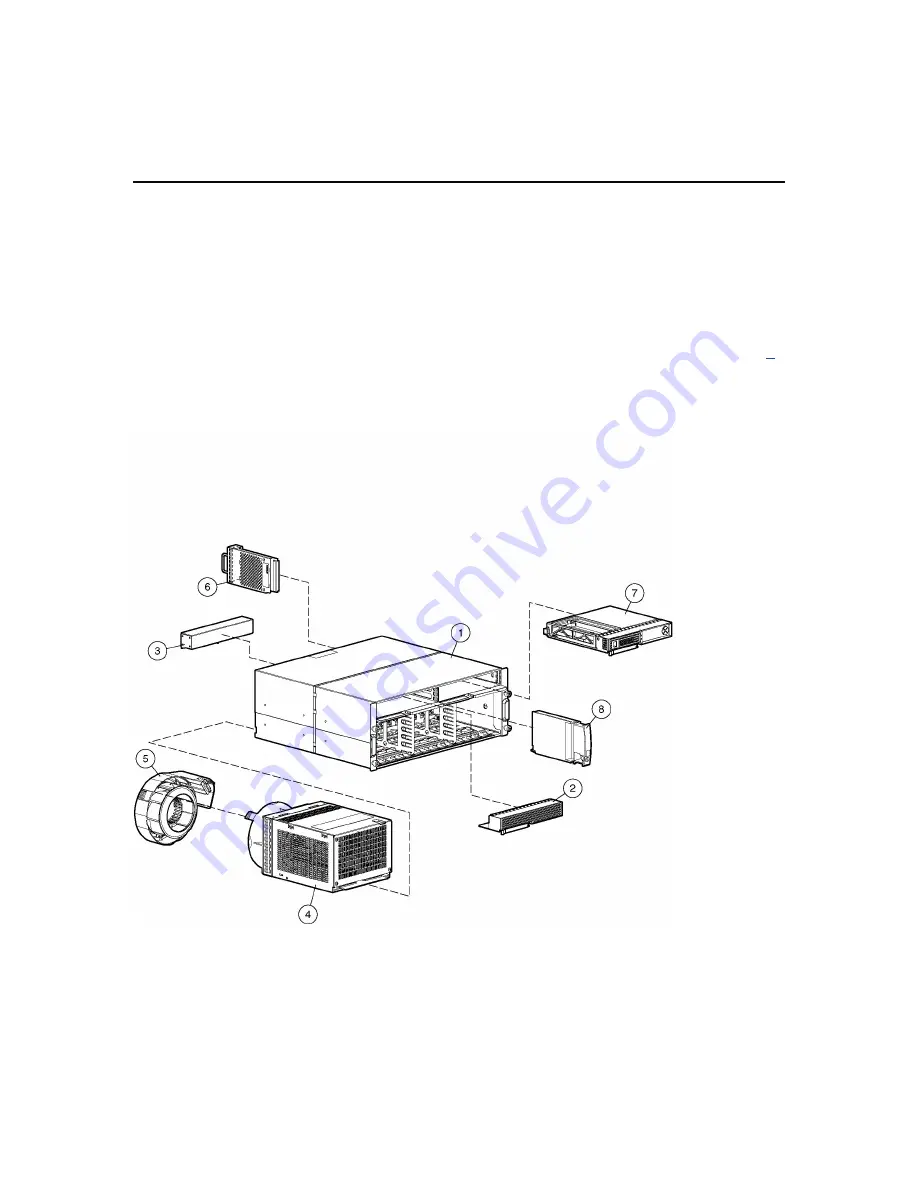
Mechanical and System Components
5
Illustrated Parts Catalog
In This Section
Mechanical and System Components.............................................................................................
Mechanical and System Components