background image

6

Installing the Power Supply

3.

Tighten the four retaining screws

 that hold the power supply in place 

until the screws are secure, as shown in the next illustration. The screws 
can be tightened with either a flat-bladed or Torx T-10 screwdriver. Be 
careful not to overtighten the screws.

Figure 4.

Fully installed power supply

4.

Connect the power cord

 supplied with the power supply to the power 

connector, and then into a properly grounded electrical outlet. To provide 
true redundancy, the second power supply should be connected to a 
different AC power source from the other supply. Then, if one AC power 
source fails, the switch will continue to run.

Tighten the four screws

Summary of Contents for procurve switch zl

Page 1: ...Installation Guide www procurve com ProCurve Switch zl Internal Power Supply ...

Page 2: ......

Page 3: ...ProCurve Switch zl Internal Power Supplies Installation Guide ...

Page 4: ... services Nothing herein should be construed as constituting an additional warranty HP shall not be liable for technical or editorial errors or omissions contained herein Hewlett Packard assumes no responsibility for the use or reliability of its software on equipment that is not furnished by Hewlett Packard Warranty See the Customer Support Warranty booklet included with the product A copy of the...

Page 5: ...tion 11 Informations concernant la sécurité 12 Hinweise zur Sicherheit 13 Considerazioni sulla sicurezza 14 Consideraciones sobre seguridad 15 Safety Information Japan 16 Safety Information China 17 EMC Regulatory Statements 18 U S A 18 Canada 18 Australia New Zealand 18 Japan 18 Korea 19 Taiwan 19 European Community Declaration of Conformity 19 Recycle Statements 20 Waste Electrical and Electroni...

Page 6: ......

Page 7: ... both of the power supplies hot swap operation you can add or replace one of the Power Supplies without having to shut down or reboot the switch automatic fault detection if the power supply encounters a problem the Switch can immediately detect the condition and report it by way of the Power Status and Fault LEDs on the switch and the Fault LED on the power supply Event messages will also be disp...

Page 8: ...e 2 The J8713A power supply Line 50 60 Hz 100 127V 11 5A 11 5A 200 240V 5 7A 5 7A Made in India 7019 Unit provides 273 W for PoE ProCurve Switch zl 875W Power Supply J8712A PoE Unit provides 900 W for PoE ProCurve Switch zl 1500W Power Supply J8713A PoE ...

Page 9: ... d Wa r n i n g J8712A Power Supply J8713A Power Supply Region Cable Region Cable Australia New Zealand China Continental Europe Denmark Japan Switzerland United Kingdom Hong Kong Singapore United States Canada Mexico South Africa Taiwan 8120 5335 8121 1034 8120 5336 8120 5340 8120 5342 8120 5339 8120 5334 8121 0973 8120 5341 8121 0941 Australia New Zealand China Continental Europe Denmark Japan S...

Page 10: ...ings are usually printed on the devices near their AC power connectors Do not install the power supply into a switch that is in an environment where the operating ambient temperature might exceed 55 C 131 F 1 If the power supply is installed in an 8200zl chassis the ambient temperature must not exceed 40 C 104 F Make sure the air flow around the sides and back of the switch is not restricted Make ...

Page 11: ... Insert the power supply into the opening making sure it is centered in the opening This will assure that the guide rails on the bottom of the power supply engage the rails on the bottom of the switch Then slide the power supply all the way in until its bulkhead contacts the back face of the switch Figure 3 Installing a power supply N ot e Although the illustration shows a 5406zl switch the instal...

Page 12: ...crewdriver Be careful not to overtighten the screws Figure 4 Fully installed power supply 4 Connect the power cord supplied with the power supply to the power connector and then into a properly grounded electrical outlet To provide true redundancy the second power supply should be connected to a different AC power source from the other supply Then if one AC power source fails the switch will conti...

Page 13: ...ries 5400zl Switch Figure 5 Switch Power Status and Fault LEDs The Power Status LED for the power supply you have just installed will be flashing simultaneously with the Fault LED until that new power supply is connected to an AC power source Once it is connected to AC power the Power Status LED will be on continuously and not flashing and the Fault LED will stop flashing If the Power Status LED a...

Page 14: ...er supply Ca ut ion Make sure the AC power cord is disconnected from the supply before removing and reinstalling the supply If the power source and power cord are OK and this condition persists the switch power supply may be faulty Call your HP authorized LAN dealer or use the electronic support services from ProCurve to get assistance See the Customer Support Warranty booklet supplied with the po...

Page 15: ...ing Started Guide for your switch Width 20 1 cm 7 9 in Depth 15 0 cm 5 9 in Height 12 8 cm 5 1 in Weight 1 5 kg 3 3 lbs J8712A J8713A AC voltage 100 127 volts 200 240 volts 200 240 volts Maximum current 12 A max 5 A max 10 A max Frequency range 50 60 Hz 50 60 Hz 50 60 Hz PoE output wattage 273 W 273 W 900 W Operating Non Operating Temperature 1 0 C to 55 C 32 F to 131 F 40 C to 70 C 40 F to 158 F ...

Page 16: ...10 Specifications Safety EN60950 CSA 22 2 No 60950 IEC 60959 UL 60950 ...

Page 17: ...such as lightning or disturbances in the electrical utilities power grid Handle exposed metal components of the network with caution Servicing There are no user serviceable parts inside these products Any servicing adjustment maintenance or repair mustbe performed only by service trained personnel These products do not have a power switch they are powered on when the power cord is plugged in Docum...

Page 18: ...dangereuses telles que la foudre ou des perturbations dans le réseau d alimentation public Manipulez les composants métalliques du réseau avec précautions Aucune pièce contenue à l intérieur de ce produit ne peut être réparée par l utilisateur Tout dépannage réglage entretien ou réparation devra être confié exclusivement à un personnel qualifié Cet appareil ne comporte pas de commutateur principal...

Page 19: ...dhabung exponierter Metallbestandteile des Netzwerkes Vorsicht walten lassen Dieses Gerät enthält innen keine durch den Benutzer zu wartenden Teile Wartungs Anpassungs Instandhaltungs oder Reparaturarbeiten dürfen nur von geschultem Bedienungspersonal durchgeführt werden Dieses Gerät hat keinen Netzschalter es wird beim Anschließen des Netzkabels eingeschaltet Symbol für Dokumentationsverweis Wenn...

Page 20: ...casionalmente andare soggetti a pericolose tensioni transitorie ad esempio provocate da lampi o disturbi nella griglia d alimentazione della società elettrica siate cauti nel toccare parti esposte in metallo della rete Nessun componente di questo prodotto può essere riparato dall utente Qualsiasi lavoro di riparazione messa a punto manutenzione o assistenza va effettuato esclusivamente da personal...

Page 21: ...la LAN se vean sometidos de vez en cuando a voltajes momentáneos que entrañen peligro rayos o alteraciones en la red de energía eléctrica Manejar con precaución los componentes de metal de la LAN que estén al descubierto Este aparato no contiene pieza alguna susceptible de reparación por parte del usuario Todas las reparaciones ajustes o servicio de mantenimiento debe realizarlos solamente el técn...

Page 22: ...16 Safety Information Japan Safety Information Japan Ja pa n P o w er C o r d Wa r n i n g ...

Page 23: ...17 Safety Information China Safety Information China ...

Page 24: ...ronment This equipment generates uses and can radiate radio frequency energy and if not installed and used in accordance with the instruction manual may cause interference to radio communications Operation of this equipment in a residential area may cause interference in which case the user will be required to correct the interference at his own expense Canada This product complies with Class A Ca...

Page 25: ...iwan European Community Declaration of Conformity This product is designed for operation with the ProCurve zl Switches Please see the Declaration of Conformity included in the Installation and Getting Started Guide included with the switch ...

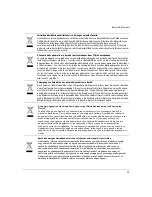
Page 26: ...rer at udstyret genvindes på en måde der beskytter både mennesker og miljø Yderligere oplysninger om hvor du kan aflevere kasseret udstyr til genvinding kan du få hos kommunen den lokale genbrugsstation eller i den butik hvor du købte produktet Seadmete jäätmete kõrvaldamine eramajapidamistes Euroopa Liidus See tootel või selle pakendil olev sümbol näitab et kõnealust toodet ei tohi koos teiste ma...

Page 27: ... gemäße Entsorgung Ihrer Altgeräte trägt zur Erhaltung der natürlichen Ressourcen bei und garantiert eine Wiederverwertung die die Gesundheit des Menschen und die Umwelt schützt Informationen dazu wo Sie Rücknahmestellen für Ihre Altgeräte finden erhalten Sie bei Ihrer Stadtverwaltung den örtlichen Müllentsorgungsbetrieben oder im Geschäft in dem Sie das Gerät erworben haben Απόρριψη άχρηστου εξοπ...

Page 28: ...lai nolietotās iekārtas tiktu nodotas speciāli iekārtotos punktos kas paredzēti izmantoto elektrisko un elektronisko iekārtu savākšanai otrreizējai pārstrādei Atsevišķa nolietoto iekārtu savākšana un otrreizējā pārstrāde palīdzēs saglabāt dabas resursus un garantēs ka šīs iekārtas tiks otrreizēji pārstrādātas tādā veidā lai pasargātu vidi un cilvēku veselību Lai uzzinātu kur nolietotās iekārtas va...

Page 29: ...ým odpadom Povinnosťou spotrebiteľa je odovzdať vyradené zariadenie v zbernom mieste ktoré je určené na recykláciu vyradených elektrických a elektronických zariadení Separovaný zber a recyklácia vyradených zariadení prispieva k ochrane prírodných zdrojov a zabezpečuje že recyklácia sa vykonáva spôsobom chrániacim ľudské zdravie a životné prostredie Informácie o zberných miestach na recykláciu vyra...

Page 30: ......

Page 31: ......
Page 32: ... Copyright Hewlett Packard Company 2005 2007 Printed in Singapore August 2007 Manual Part Number 5991 8553 5991 8553 ...

Reviews: