


1-4
Hardware Installation
Installing the MSM765zl
Verifying the MSM765zl is Installed Correctly
When the MSM765zl is installed properly, it undergoes a self test that takes a
few seconds. This happens both when the switch is powered on after installing
the MSM765zl, and when the MSM765zl is installed while the switch already
has power. The LEDs help determine if the MSM765zl has passed the self test,
as described in the following table.
Error Conditions
Error conditions indicated by the MSM765zl LEDs are described in
“Front
Panel Port and LEDs” on page C-1
.
N o t e
Allow sufficient time for the MSM765zl to start up, or you will receive an error
message.
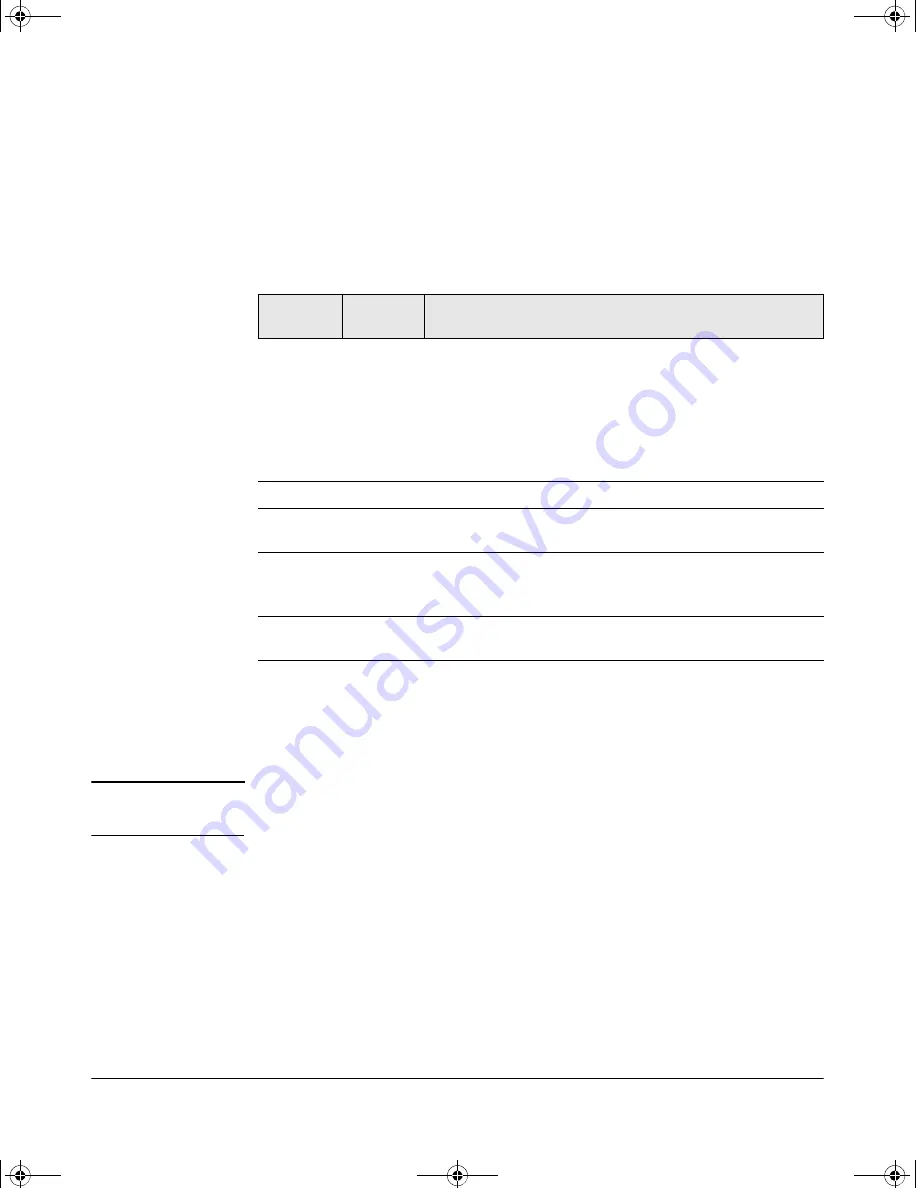
LED
Location
of LED
Display for a Properly Installed MSM765zl
Test
Switch
ON briefly while the MSM765zl is undergoing self test, then OFF.
Note:
If the MSM765zl was installed with the switch powered off,
and then the switch was powered on, the Test LED will stay ON
for the duration of the switch self test.
Figure 6 on page C-4
and
Figure 7 on page C-4
show the location
of the Test, Fault, and MSM765zl Status LEDs on a 5400zl or 8212zl
series switch, respectively.
Fault
Switch
OFF
Module
Status
Switch
The LED goes ON as soon as the MSM765zl is installed and the
switch is powered on, and stays ON steadily.
Module
Status
MSM765zl
The LED blinks green during initialization. Solid green means that
MSM765zl is operational.
Figure 1 on page 1-1
shows the location of all MSM765zl LEDs.
HDD and CF
Status
MSM765zl
The LED goes ON when HDD/CF initialization was successful. It
is OFF by default.
MSM765-IGSG-5992-5964.book Page 4 Thursday, April 2, 2009 6:48 PM


