


HP Omnibook XE4400
Removal and Replacement
2-33
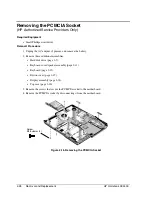
Removing the CPU Module
(HP Authorized Service Providers Only)
Required Equipment
•
Small flat-blade screwdriver.
Removal Procedure
1.
Unplug the AC adapter, if present, and remove the battery.
2.
Remove these additional assemblies:
•
Hard disk drive (page 2-7).
•
Keyboard cover/speaker assembly (page 2-11).
•
Keyboard (page 2-13).
•
Button cover (page 2-15).
•
Display assembly (page 2-18).
•
Top case (page 2-20).
•
Heatsink (page 2-31).
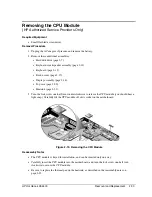
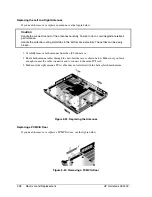
3.
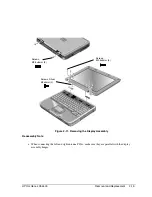
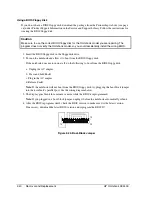
Turn the lock screw one-half turn counterclockwise to release the CPU module (you should hear a
light snap). Carefully lift the CPU module off of its socket on the motherboard.
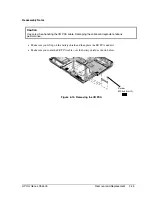
Figure 2-19. Removing the CPU Module
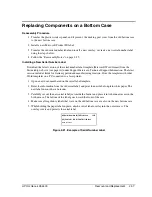
Reassembly Notes
•
The CPU module is keyed for installation, and can be inserted only one way.
•
Carefully insert the CPU module into the motherboard, and turn the lock screw one-half turn
clockwise to secure the CPU module.
•
Be sure to replace the thermal pad on the heatsink, as described in the reassembly notes on
page 2-32.
Summary of Contents for OmniBook XE4400
Page 1: ... HP Omnibook XE4400 Technology Code KD Service Manual ...
Page 8: ......
Page 22: ......
Page 94: ...4 2 Replaceable Parts HP Omnibook XE4400 Figure 4 1 Exploded View ...
Page 100: ......
Page 105: ......
Page 106: ...Part Number F4665 90024 Printed in U S A 4 02 ...


