H
P
N
E
T
S
T
O
R
A
G
E
6
0
0
0
Connect the Unit
A.
Connect a network cable to the network interface card (NIC) port.
B.
Remove the protective cap from the primary and secondary
sockets on the back of the unit. Connect both power cables.
NOTE:
Although the unit can operate with only the primary socket
connected, using only one power cable will generate an error.
C.
Power on the unit.
D.
Press the alarm-reset button on the front panel to turn off
the alarm.
NOTE:
The normal boot process takes several minutes. At times,
the LCD panel will display initializing messages or go blank, and
the system status lights will flash.
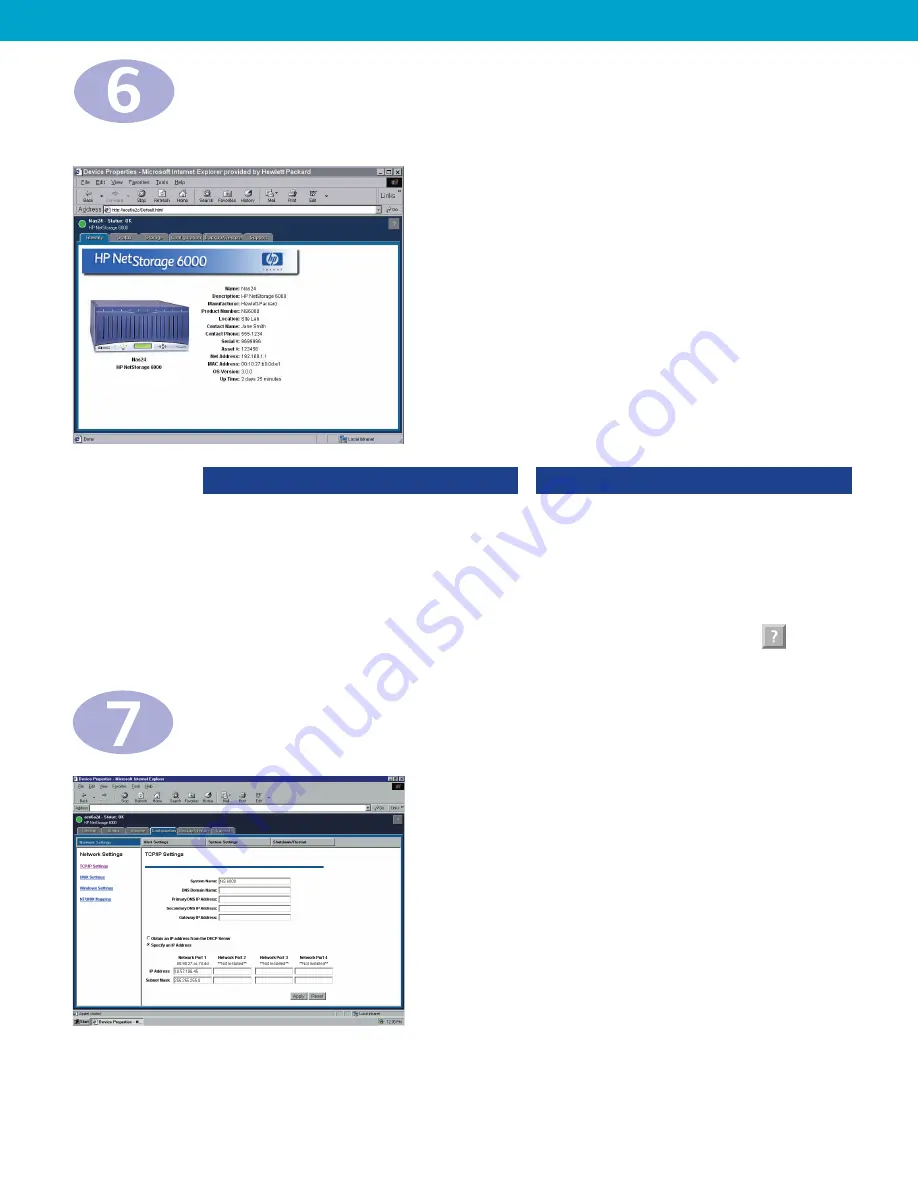
Use a Web Browser to Configure
Network Settings
Enter Network Configuration Information
A.
Using a computer on the network, open a web browser and
type the unit’s IP address in the address or location field.
You will need to use Internet Explorer 4.01 or later, or
Netscape 4.51 or later. If you have trouble connecting, try
enabling the option to bypass the proxy server for local
addresses.
NOTE:
Depending on the level of security you have set on
your browser, security warning dialog boxes may appear.
You must accept content from, or grant privileges to,
Hewlett-Packard Company. If you do not, the
HP NetStorage 6000 pages will not display properly.
B.
Select
Configuration > Network Settings > TCP/IP Settings
.
C.
Create a new System Name. If necessary, fill in the DNS fields
and make changes to the NICport information. Click
Apply
.
NOTE:
If your system supports UNIX and Windows users and you wish to share files, several
mapping options are available by selecting
Network Settings > NT/UNIX Mapping
. For more
information on network settings, see the HP NetStorage 6000 User’s Guide, or click in the
upper right corner of the web interface.
Set System and Alert Settings
In the
Configuration
tab:
A.
Select
System Settings > Informational Settings
.
• Fill in the unit's contact information, location, and asset
number and click
Apply
.
B.
Select
System Settings > Date and Time
.
• Select the current date, time and time zone, and click
Apply
.
C.
Select
System Settings > Administrative Password
.
• Click the box if you are using a UPS with your system,
and click
Apply
.
D.
Several optional alert setting configurations are also
available:
• SMTP/email
• SNMP/Network Management
• Syslog
To configure these settings, select
Alert Settings
, click on the
desired link, fill in each field, and click
Apply
.
A
B
C
Place the Unit in a Rack
(optional)
NOTE:
The unit comes with two sets
of rack mounting hardware. Use the set
that works best with your rack. To mount
the unit, you will need the following
tools:
•
Flathead screwdriver
•
11/32" wrench
•
Torx-25 screwdriver (HP racks)
•
Phillips screwdriver (Rittal racks)
A.
Adjust the rail assemblies to fit the
depth of your rack by loosening the
screws and sliding the rear bracket.
B.
Using the template at the side of this
poster, determine where to mount
the rails. Assemble the nut fasteners
to the rack in the positions indicated
on the template.
C.
Screw the front and rear of the rail to
the rack.
D.
Repeat steps A-C for the second rail
assembly.
E.
Slide the unit into the mounted rails.
WARNING:
The unit is heavy.
Have someone help you place it on
the rack.
F.
If desired, secure the unit by
inserting a system retainer screw.
NOTE:
The rails are equipped with
safety latches to prevent inadvertent
removal of the unit. To disengage,
press the metal spring clip at the front
of each rail.
D
Primary
Secondary
Hard Drive LED (
No light:
empty,
Green:
unit functional but inactive,
Blinking green:
drive active,
Blinking amber:
drive rebuilding,
Red:
fault)
Network
Indicator
Fan Fault
Indicator
Alarm Reset
Power Supply Fault Indicator
General Fault
Indicator
LCD Panel
B
A
C
F
•
navigates through menus
•
moves cursor to the left
•
exits the current menu selection
without saving
Front panel arrow buttons navigate through the LCD menus when
setting network configuration information.
•
scrolls up/down through menu items
•
increases/decreases values
•
navigates through menus
•
moves cursor to the right
•
saves characters and returns to
previous menu
Configuring With DHCP
A.
When the NIC 1 information appears on the LCD
panel, write down the IP address.
NOTE:
On units with more than one NIC port, the
LCD panel displays DHCP offers in ascending order,
and returns to NIC 1 when completed.
B.
Press the
button to continue. The LCD panel
displays a temporary name:
N1234567890
CPU: 0% [ --
>
Menu]
C.
Move to the computer that manages the
HP NetStorage 6000, and proceed to Step 6.
NOTE:
If DHCP is unsuccessful, follow the
instructions for configuring without DHCP.
Configuring Without DHCP
A.
After initialization, the LCD panel displays:
DHCP Discovery NIC 1
No offers
B.
Press any button to get to the LCD panel menu,
and select
Set Static IP
.
C.
Enter or accept the following values, and move
the cursor to the far right to save them:
• IP address
• Subnet mask
• Broadcast address
• Gateway address (if necessary)
D.
When the LCD panel displays a temporary
name, move to the computer that manages the
HP NetStorage 6000, and proceed to Step 6.
Determine whether your network uses DHCP and follow the appropriate instructions.
If Supporting UNIX Users:
A.
Select
UNIX Settings
.
B.
Fill in the NIS and Management
information and click
Apply
.
If Supporting Windows Users:
A.
Select
Windows Settings
.
B.
Fill in the Network Neighborhood and
WINS fields, then select the Security
Mode.and click
Apply
.
LCD Selector
Buttons
*C4475-90103*
C4475-90103


