background image

Deleting images

To delete a displayed image during 


Playback

:

1.

Press  .

2.

Use 

 to select an option, then press 

.

This Image

—Deletes the image or video clip.

All Except Favorites

—Deletes all images except those tagged as 

Favorites

.

This menu option only appears if you have images tagged as 

Favorites

 (see

“Tagging images as Favorites” on page 21

).

All Images (in Memory/on Card)

—Deletes all stored images and video clips.

Format (Memory/Card)

—Deletes all stored files, then formats the internal

memory or memory card.

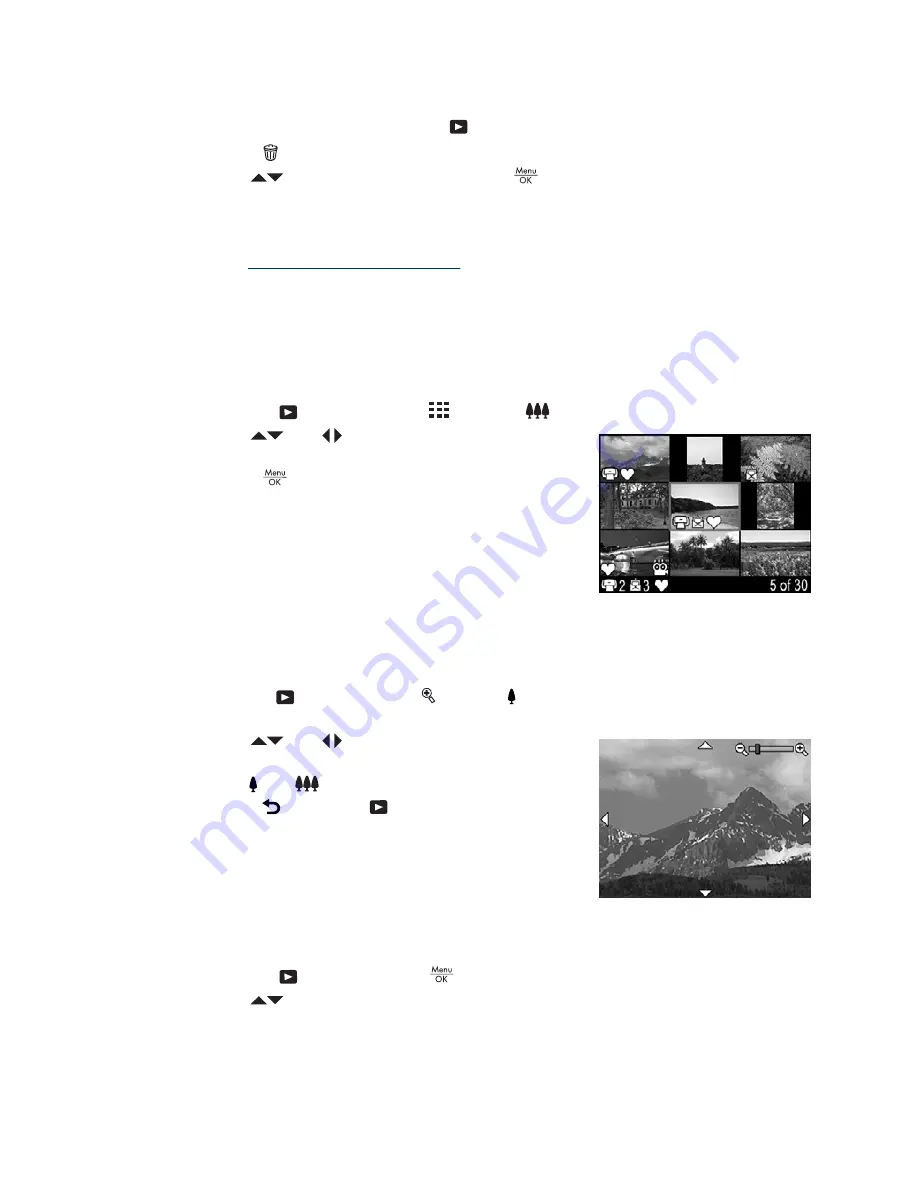
Viewing thumbnails

1.

While in 


Playback

, press 

 (same as 


Zoom Out

 on the 

Zoom

 lever).

2.

Use 

 and 

 to scroll through the

thumbnails.

3.

Press 

 to view the highlighted image on the

Image Display.

Magnifying images

This feature is for viewing purposes only; it does not permanently alter the image.

1.

While in 


Playback

, press   (same as   

Zoom In

 on the 

Zoom

 lever). The currently

displayed image is magnified 2x.

2.

Use 

 and 

 to pan around the magnified

image.

3.

Use   and 

 to change the magnification.

4.

Press   to return to 


Playback

.

Using the Playback Menu

1.

While in 


Playback

, press 

.

2.

Use 

 to highlight an option.

Deleting images

19

Summary of Contents for L2508A

Page 1: ...HP Photosmart R740 series Digital Camera User Guide ...

Page 2: ...HP products and services are set forth in the express warranty statements accompanying such products and services Nothing herein should be construed as constituting an additional warranty HP shall not be liable for technical or editorial errors or omissions contained herein Windows is a U S registered trademark of Microsoft Corporation SD Logo is a trademark of its proprietor ...

Page 3: ...d exposure 10 Focusing on the subject 11 Optimizing focus 11 Using Focus Lock 12 Optimizing exposure 12 Using zoom 12 Optical zoom 13 Digital zoom 13 3 Setting options for taking pictures and recording video clips Setting the flash 14 Flash Setting Red Eye 14 Using the Picture Capture and Video Record menus 15 Using the Self Timer setting 16 Using the Burst setting 16 4 Reviewing images and video ...

Page 4: ...ting up online destinations in the camera 30 Sending images to online destinations 31 8 Using the Camera Setup Menu 32 9 Troubleshooting Resetting the camera 33 Problems and solutions 33 Camera error messages 38 10 Product support Helpful websites 39 Getting assistance 39 A Managing batteries Top points about batteries 40 Extending battery life 40 Safety precautions for using batteries 40 Power in...

Page 5: ...ee Using zoom on page 12 Thumbnails see Viewing thumbnails on page 19 and Magnify see Magnifying images on page 19 functions 6 USB connector 7 Flash button Accesses the flash settings while in Picture Capture see Setting the flash on page 14 8 Delete button Accesses the Delete function while in Instant Review see Instant Review on page 10 and Playback see Deleting images on page 19 9 and buttons S...

Page 6: ...s a rechargeable HP Photosmart LI40 battery Do not charge any other battery in the charger 1 Plug the charger into an electrical outlet then insert the battery into the charger as shown The charger s Battery Charging light is orange when the battery is charging the battery is fully charged when the light turns green See Recharging the HP Photosmart LI40 battery on page 41 for information on chargi...

Page 7: ...f the camera before removing the battery Turn on the camera To turn on the camera press the button Choose the language Use to choose the language you want then press To change the language later use the Camera Setup Menu see Using the Camera Setup Menu on page 32 Set the region Along with the language setting the region setting determines the default date format Use to choose the region you want t...

Page 8: ...camera and open the Battery Memory Card door 2 Insert the memory card in the smaller slot as shown Make sure the memory card snaps into place 3 Close the Battery Memory Card door and turn on the camera NOTE When you turn on your camera with a memory card installed the camera indicates the number of images you can store on the memory card at the current Image Quality setting This camera supports st...

Page 9: ... www hp com go windowsvista English only Windows 1 Close all programs and temporarily disable any virus protection software 2 Insert the HP Photosmart Software CD into the CD drive and follow the on screen instructions If the installation screen does not appear click Start click Run type D Setup exe where D is the letter of your CD drive then click OK 3 When the software has finished installing re...

Page 10: ...n Gallery Menu on page 22 For information on transferring images from your camera to a computer See Transferring images with HP Photosmart Software on page 24 For information on printing images See Printing images directly to a printer on page 26 TIP To switch between Picture Capture Video Record and Playback slide to the desired option Chapter 1 continued 8 Getting started ...

Page 11: ... seconds if you have a large capacity memory card 3 Memory card indicator 4 Battery level indicator see Power indicators on page 41 5 Focus brackets see Auto focus and exposure on page 10 Taking pictures You can take a picture when the camera is set to Picture Capture 1 Slide to 2 Frame the subject for your picture in the Image Display 3 Press the Shutter button halfway down to measure and lock th...

Page 12: ...Image from the Delete menu then press NOTE To hear audio associated with video clips transfer them to your computer see Transferring and printing images on page 24 Auto focus and exposure When you press the Shutter button halfway down the camera automatically measures and locks the focus for pictures and video clips and exposure for pictures only When you auto focus Indicator Description Green foc...

Page 13: ...way down again If the focus brackets are still red try the following For pictures and video clips If the scene has low contrast use Focus Lock see Using Focus Lock on page 12 and aim at a point on the subject that has more colors or crisp edges For pictures only Select a shooting mode more appropriate for the scene you are capturing see Shooting Mode under Using the Picture Capture and Video Recor...

Page 14: ...still for the length of time required Try one of the following Set the flash to Auto Flash or Flash On see Setting the flash on page 14 Set the camera on a tripod or stable surface If the subject is out of the flash range or you do not have a tripod set the shooting mode to Steady Photo see Steady Photo under Using the Picture Capture and Video Record menus on page 15 Turn on more light NOTE When ...

Page 15: ...a will capture and the MP value decreases to indicate the resolution at which the scene will be captured When capturing images using digital zoom make sure that the MP value on the Image Display is appropriate for the size at which you want to print the captured image For MP values and their recommended print sizes see Image Quality under Using the Picture Capture and Video Record menus on page 15...

Page 16: ...ng Red Eye on page 14 Flash On The camera always uses flash If the light is behind your subject use this setting to increase the light on the front of your subject Flash Off The camera does not use flash Use this setting to capture poorly lit subjects beyond the flash range or to capture scenes with the existing light The flash setting remains in effect until it is changed again or you turn off th...

Page 17: ...nditions see Optimizing exposure on page 12 Theatre For capturing images at school programs concerts or indoor sporting events without using flash Landscape For scenes with deep perspective such as mountain scenes Portrait For pictures that have one or more people as their primary subject Action For capturing sporting events moving cars or any scene where you want to stop the action Night Portrait...

Page 18: ...5 If you are recording a video clip press the Shutter button to stop recording TIP If you want to include yourself in the picture place the camera on a tripod or stable surface then press the Shutter button all the way down The camera locks focus and exposure just before the end of the countdown allowing you time to place yourself in the scene The Self Timer setting resets to Off after the image i...

Page 19: ...The Burst setting remains in effect until it is changed again or until you turn off the camera Using the Picture Capture and Video Record menus 17 ...

Page 20: ...lay also indicates additional information about each image or video clip 1 Playback indicator 2 Memory card indicator 3 Battery indicator see Power indicators on page 41 4 1 of 30 Number of this image or video clip out of the total number of stored images and video clips 5 Image tagged as Favorite see Tagging images as Favorites on page 21 6 Image marked for printing via an online printing service...

Page 21: ...s then formats the internal memory or memory card Viewing thumbnails 1 While in Playback press same as Zoom Out on the Zoom lever 2 Use and to scroll through the thumbnails 3 Press to view the highlighted image on the Image Display Magnifying images This feature is for viewing purposes only it does not permanently alter the image 1 While in Playback press same as Zoom In on the Zoom lever The curr...

Page 22: ... Card Moves images from internal memory to memory card Available only if there are images in internal memory and a memory card is inserted To move images select this option and follow the on screen prompts Camera Setup Displays the Camera Setup Menu for setting camera behavior see Using the Camera Setup Menu on page 32 Camera Help Displays a list of help topics for commonly used features Removing ...

Page 23: ...mage then repeat Step 2 4 To exit the Playback Menu hold until the menu disappears If you have the HP Photosmart Software installed on your computer tagged images retain the tag when transferred to your computer see Transferring and printing images on page 24 Viewing slideshows Select View Slideshow to configure and run a slideshow of images and or video clips on the camera Image Display From the ...

Page 24: ...f the image the original image is retained Modifying colors TIP If you plan to modify colors do so before adding a border Modify Color allows you to apply color schemes to the displayed image To modify colors 1 While in the Design Gallery Menu use to select Modify Color then press 2 Use to select a color scheme and preview the effect it has on the image Black White Converts color images to black a...

Page 25: ...mage to the selected orientation then use the Zoom lever and to ensure that the image content you want gets saved TIP Make sure you crop images as needed before adding borders 1 While in the Design Gallery Menu use to select Crop then press 2 Use to select a crop orientation and preview the effect it has on the image Landscape Default Horizontally crops the displayed image to a 3 2 aspect ratio on...

Page 26: ...l the software on page 7 use this method to transfer images and video clips to your computer When you connect your camera to a computer with the HP Photosmart Software installed If you have tagged images as Favorites see Tagging images as Favorites on page 21 the tags are transferred with the images to your computer If you have marked images for printing see Marking images for printing on page 28 ...

Page 27: ... not transfer to the computer However you can still transfer images and video clips to your computer by Connecting your camera directly to the computer see Connecting to the computer on page 25 Using a memory card reader see Using a memory card reader on page 26 Connecting to the computer 1 Turn off the camera connect the camera and computer using the USB cable that came with your camera then turn...

Page 28: ... printing images from your computer see Transferring images with HP Photosmart Software on page 24 NOTE You cannot print video clips using the method described in this section You can however print a frame from a video clip using the HP Photosmart Software For more information see Help in the HP Photosmart Software 1 Check that the printer is turned on there is paper in the printer and there are n...

Page 29: ...t All Prints one copy of each image Press and follow the on camera instructions to begin printing Print Index Prints all images as thumbnails Press to begin printing Print Favorites Prints one copy of each image tagged as a Favorite Press to begin printing This option is available only if you have tagged at least one image as a Favorite see Tagging images as Favorites on page 21 Cancel Printing St...

Page 30: ...y the Photosmart Express Menu 1 Slide to and press 2 Use to highlight Photosmart Express then press 3 Use to highlight a menu option then press Print Allows you to select images and specify number of copies to print See Marking images for printing on page 28 Share Allows you to add custom online destinations and share images to one or more destinations See Sharing images on page 30 Buy Prints Onli...

Page 31: ...option is available only if you have more than one image in the camera 3 If you want to print more than one copy highlight Change Number of Copies then press In the Print menu for changing the number of copies use to specify the number of copies to print then press 4 From the main Print menu you can mark additional images for printing using to display an image highlighting This Image in the Print ...

Page 32: ...or which you want to buy prints hold down until the menu disappears 5 To buy prints of the images you selected see Transferring images with HP Photosmart Software on page 24 Sharing images You can customize the Share menu to include e mail addresses group distribution lists or other online services You can then select images to send to these destinations Setting up online destinations in the camer...

Page 33: ...s a list of destinations Highlight each destination to which you want to send all Favorites pressing to select each destination After selecting destinations press This option is available only if you have tagged more than one image as a Favorite see Tagging images as Favorites on page 21 All Images Displays a list of destinations Highlight each destination to which you want to send all images pres...

Page 34: ...Display Brightness Adjusts the brightness of the Image Display Low For extending battery life Medium Default For normal viewing conditions High For very bright lighting conditions Camera Sounds Turns the camera sounds such as button presses and shutter clicks off and on On Default Off Date Time Sets the date and time See Set the date and time on page 5 USB Configuration Specifies how a computer re...

Page 35: ...hotography experience periodically check the Hewlett Packard Technical Support website www hp com support for updates to your camera s firmware software and drivers How can I get professional quality prints if I don t have a photo printer Use the Buy Prints Online feature on the Photosmart Express Menu see Buying prints online on page 30 The camera does not turn on Install a new or recharged batte...

Page 36: ...ew them there The camera does not respond when I press a button Turn on the camera Most of the camera buttons do not respond when the camera is connected to a computer Replace or recharge the battery Reset the camera see Resetting the camera on page 33 The memory card may be defective Remove the memory card and test the camera if the camera works replace the memory card Format the internal memory ...

Page 37: ...ormation about flash working distance for this camera go to www hp com support select your language and region enter your camera model number in the Search Product field click Product Information then click Specifications My image is grainy Add indirect lighting use the flash see Setting the flash on page 14 or wait for natural lighting conditions to improve Using Steady Photo shooting mode can in...

Page 38: ...imum of 2000 images on a memory card It takes a long time to Delete All images from my memory card Having a large number of images stored on a memory card increases the time the camera takes to delete them Instead of deleting them format the memory card see Install and format an optional memory card on page 6 The Power light is on but the Image Display is off or the camera seems stuck and won t op...

Page 39: ...rences to make changes or to view the camera software help I cannot transfer images from the camera to my computer Either install the HP Photosmart Software see Install the software on page 7 or see Transferring images without HP Photosmart Software on page 25 Configure your camera preferences so the HP Photosmart software starts automatically when you connect your camera to your Macintosh Open th...

Page 40: ...ne help system Refer to the Hewlett Packard Technical Support website www hp com support Camera error messages Should you receive one of the following error messages when using your camera you can look up details about the message by visiting www hp com and searching on the specific code Lens Error general R740 021 Lens Error zoom cannot retract R740 022 Lens Error lens cannot extend R740 033 Lens...

Page 41: ... com support or contact the store where you purchased this camera The Hewlett Packard Technical Support website is available to all HP customers The Hewlett Packard Technical Support website is the fastest source of up to date product information and expert assistance including Fast e mail access to qualified online support specialists Firmware software and driver updates for your camera Valuable ...

Page 42: ...prevent short circuiting the batteries never carry small metal items such as keys or coins in the same pocket with your batteries Extending battery life To conserve battery power the Image Display turns off after 45 seconds by default Pressing any button wakes up the camera After five minutes of inactivity the camera turns off To further extend battery life Set Display Brightness to Low see Displa...

Page 43: ...0 to 30 percent energy remaining Battery level is low You cannot take pictures or record video clips but you can still review images in Playback and use the Playback Menu Blinking Battery is depleted Camera will power down NOTE If the camera is without a battery for a prolonged period the clock may be reset and you may be prompted to update it the next time you power on the camera Number of shots ...

Page 44: ...n Use the charger in a dry location only Do not charge the battery in a hot location such as in direct sunlight or near a fire When recharging the battery do not cover the charger Do not operate the charger if the battery appears damaged Do not disassemble the charger Unplug the charger from the electrical outlet before cleaning it After extensive use the battery may begin to swell If it becomes d...

Page 45: ...der None Zoom 3x optical zoom 7x digital zoom Focus Normal Wide 400 mm 15 76 in to infinity Telephoto 400 mm 15 76 in to infinity Close up Wide 50 mm to 800 mm 1 97 in to 31 52 in Shutter speed 1 2000 to 2 seconds Built in flash Yes 6 second typical recharge time 8 second maximum recharge time at power on Flash working range To locate the flash working range for this camera go to www hp com suppor...

Page 46: ...emperature range Operational 0 to 40 C 32 to 104 F at 15 to 85 relative humidity Storage 30 to 65 C 22 to 149 F at 15 to 90 relative humidity Memory capacity Not all 16MB of internal memory is available for storing images because some memory is used for internal camera operations The actual file sizes and number of still images that can be stored in internal memory or on a memory card will vary de...

Page 47: ...ng assistance 39 H HP Photosmart Express 28 HP Photosmart LI40 battery 40 42 HP Photosmart Software 7 I Image Display 3 Image Quality 15 44 images Date Time Imprint 16 Image Quality 15 magnifying 19 number remaining 9 per battery 41 sending 31 transfer to computer 24 install memory card 6 install software 7 Instant Review 10 16 interfaces 44 internal memory 9 44 L Landscape mode 15 Language 5 32 M...

Page 48: ...15 16 sending individual images 30 31 set date and time 5 setting up destinations 30 share pictures 28 Shutter button 3 10 shutter speed 43 slideshow 21 software install 7 solving problems 33 sounds of camera 32 space remaining in memory 9 specifications 43 State Selector 3 Steady Photo mode 15 storage 43 Sunset mode 15 support process 39 T Theatre mode 15 Thumbnails 19 Thumbnails control 3 Time D...

Page 49: ...r or an experienced radio TV technician for help For further information contact Manager of Corporate Product Regulations Hewlett Packard Company 3000 Hanover Street Palo Alto Ca 94304 650 857 1501 HP Photosmart R740 series Digital Camera Declaration of Conformity European Economic Area According to ISO IEC 17050 1 and EN 17050 1 declares that the product Conforms to the following Product Specific...

Reviews: