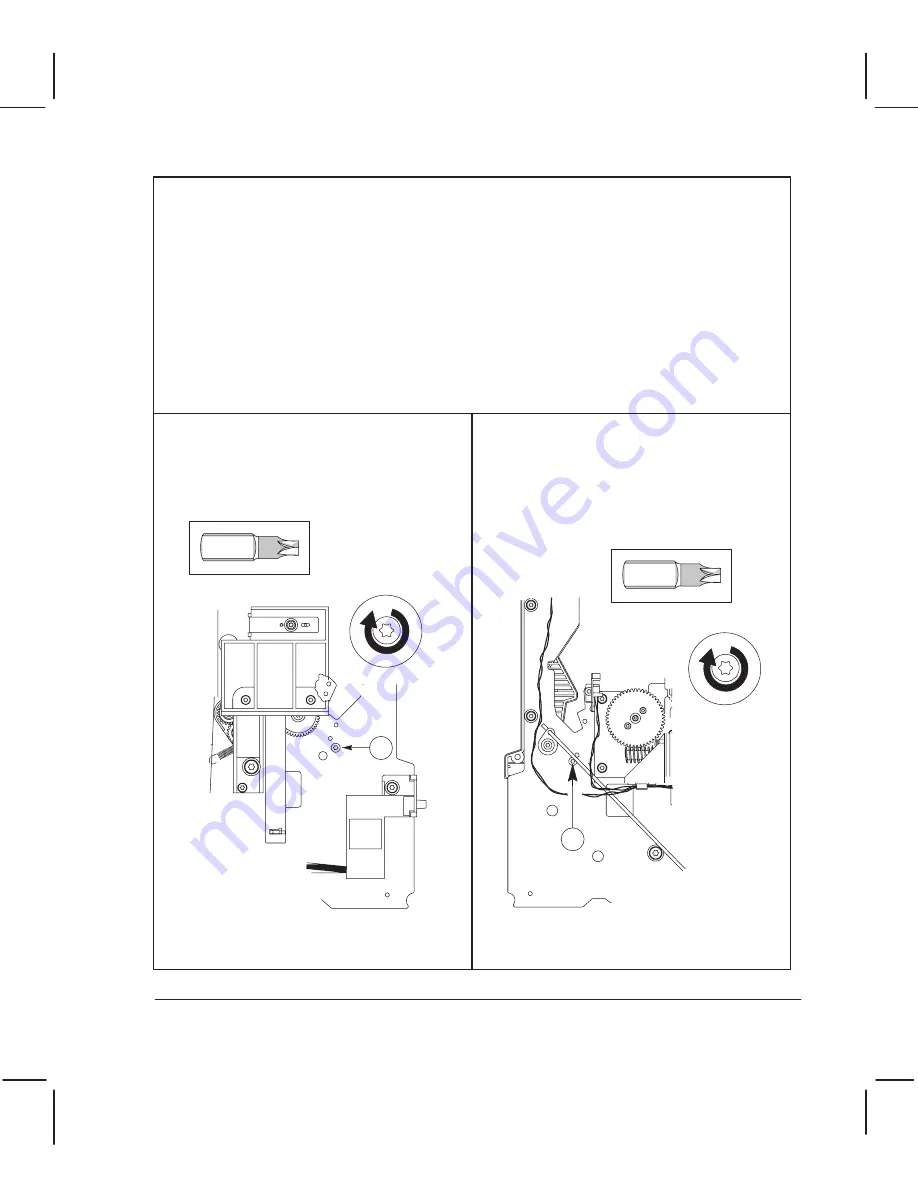
The order in which you replace the screws on the entry platen is important.
If the plotter is attached to a support, detach it.
Turn the plotter on its back.
Reconnect the media sensor to the entry platen (see also page 6Ć26).
Position the entry platen between the two sideplates.
Replace the indicated screw on the
leftĆhand side. (
dogĆpoint screw.)
Tighten this screw, making sure that the
entry platen is aligned tight against the
sideplate.
1
Torx-15
Replace the indicated screw on the
rightĆhand side. (
dogĆpoint screw.)
There must be no space between the entry
platen and the
sideplate. It doesn't
matter if there is a small space between
the entry platen and the
sideplate.
2
Torx-15
Position the top of the entry platen under all of the small pivots on the inside
of both sideplates, except the back pivot. Rest the entry platen against the back pivot.
Position the bottom of the entry platen above the bottom cover of the plotter.
6Ć67
Removal and Replacement
C3187Ć90000
Summary of Contents for DesignJet 200
Page 1: ... ...
Page 3: ... ...
Page 14: ... ...
Page 15: ... ...
Page 19: ... ...
Page 22: ...2Ć4 Site Planning and Requirements C3187Ć90000 ...
Page 23: ... ...
Page 27: ... 4 1 2 3 4 5 6 mm 0 25 in 5 1 2 3 4 5 B A B A A B A B X X X ...
Page 31: ... ...
Page 33: ... ...
Page 65: ... ...
Page 139: ... ...
Page 149: ...8Ć0 8 Troubleshooting ...
Page 178: ...8Ć30 Removal and Replacement C3187Ć90000 ...
Page 179: ...9Ć0 9 Product History and Service Notes ...
Page 193: ...10Ć1 10 Parts and Diagrams ...
Page 197: ...10Ć5 Parts and Diagrams C3187Ć90000 Legs and Media Bin 1 2 3 3 4 5 6 7 1 3 4 3 3 3 3 3 8 8 ...
Page 199: ...10Ć7 Parts and Diagrams C3187Ć90000 Window Center and Bottom Covers To Carriage ...
Page 203: ...10Ć11 Parts and Diagrams C3187Ć90000 Left Endcover and Trim ...
Page 205: ...10Ć13 Parts and Diagrams C3187Ć90000 Right Endcover and Trim ...
Page 207: ...10Ć15 Parts and Diagrams C3187Ć90000 Carriage Axis Drive Left End ...
Page 209: ...10Ć17 Parts and Diagrams C3187Ć90000 Service Station 1 2 3 3 4 5 7 6 6 ...
Page 215: ...10Ć23 Parts and Diagrams C3187Ć90000 Media Drive Assemblies ...
Page 219: ...10Ć25 Parts and Diagrams C3187Ć90000 Bail and Overdrive Assemblies ...
Page 221: ...10Ć27 Parts and Diagrams C3187Ć90000 Pinch Arm Assembly ...
Page 227: ... ...
Page 231: ... ...
Page 244: ...IndexĆ04 C3087Ć90000 ...
Page 245: ... ...


