NOTE:
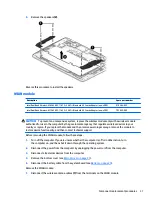
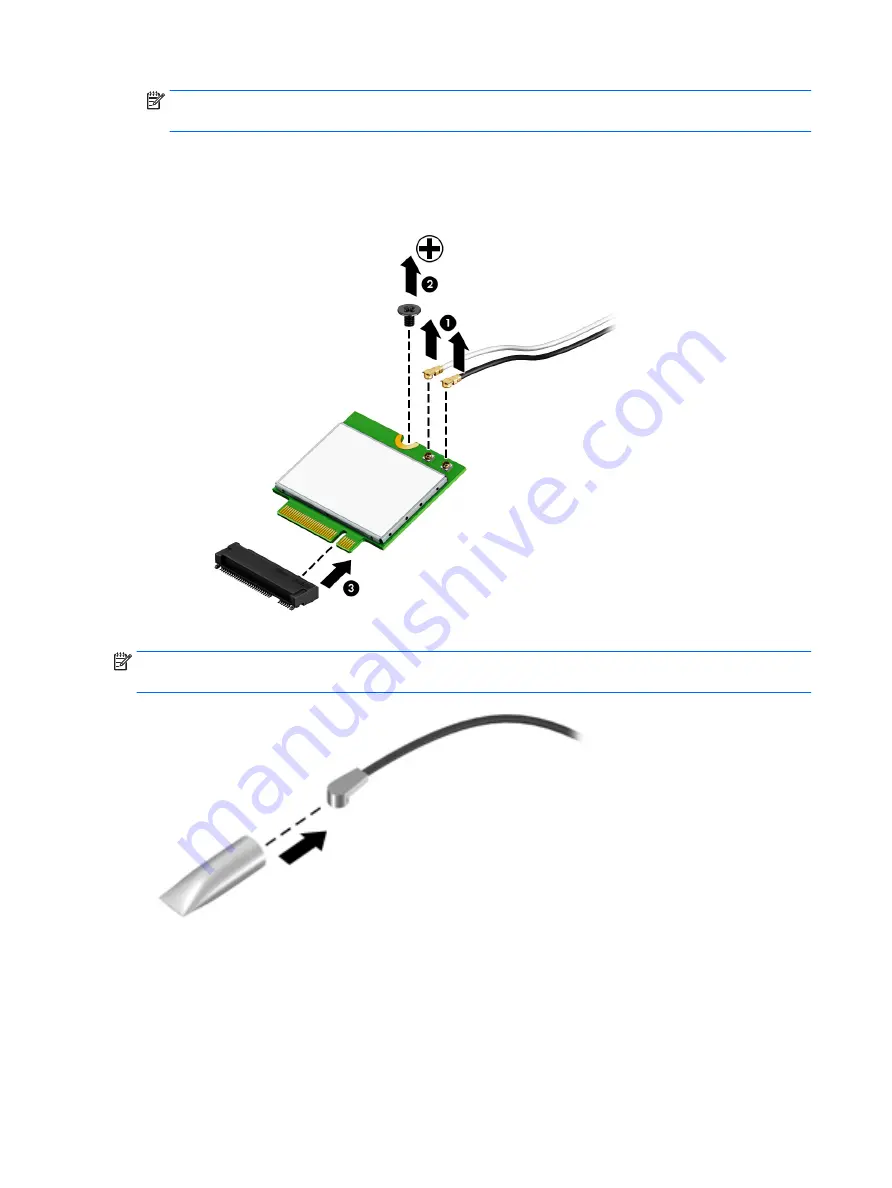
The wireless antenna cable labeled “1/MAIN” connects to the WLAN module “Main” terminal.
The wireless antenna cable labeled “2/AUX” connects to the WLAN module “Aux” terminal.
2.
Remove the Phillips PM2.0×3.2 screw (2) that secures the WLAN module to the computer. (The WLAN
module tilts up.)
3.
Remove the WLAN module (3) by pulling the module away from the slot at an angle.
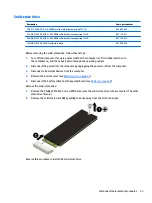
NOTE:
If the wireless antenna cables are not connected to the WLAN module terminal, the protective
sleeves should be installed on the antenna connectors, as shown in the following illustration.
Reverse this procedure to install the WLAN module.
32
Chapter 5 Removal and replacement procedures
Summary of Contents for CTO 13t-ab000
Page 4: ...iv Safety warning notice ...
Page 7: ...11 Recycling 66 Index 67 vii ...
Page 8: ...viii ...
Page 23: ...Computer major components Computer major components 15 ...


