38
Chapter 1
Remove/Replace System Components
Removing/Replacing System Components
Replacing the Hard Disk Drive(s)
To replace the hard disk drive(s), follow this procedure:
1. Remove the CD drive, DAT drive or flexible disk drive if you have not already done this.
Otherwise, skip this step. To remove the CD drive, DAT drive or flexible disk drive,
follow the procedure in the section “Removing the CD Drive” (steps 1 through 3; in
this chapter), “Removing the DAT Drive” (steps 1 through 5; in Appendix C),
or “Removing the Flexible Disk Drive” (steps 1 through 5; in Appendix D).
2. Remove the PCI cage if you have not already done this. Otherwise, skip this step. To
remove the PCI cage, follow the procedure in the section “Removing the PCI Cage,
I/O Card and PCI Backplane Board” (steps 1 and 2) found in this chapter.
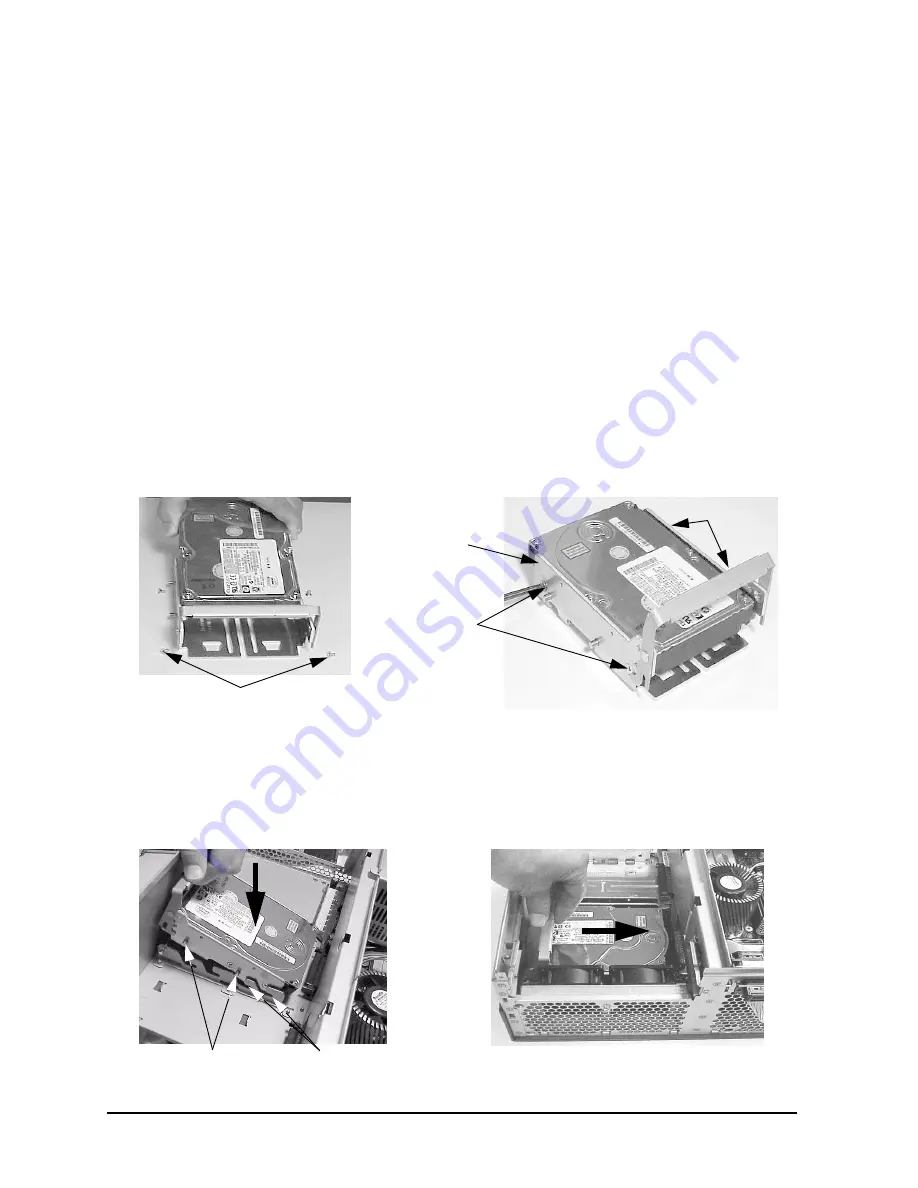
3. Insert the hard disk drive into the hard disk drive bracket and align the holes in the
disk drive bracket with the threaded holes in the hard disk drive. Next, screw in the
four mounting screws. See Figure 1-41. Note that for installation purposes, there are
four mounting screws located on the side of the unused hard disk drive bracket.
Figure 1-41. Installing the Hard Disk Drive into the Hard Disk Drive Bracket
4. Grasp the hard disk drive bracket handle and align the hard disk drive connector with
the connector on the system board. Push down and forward on the hard disk drive
handle to slide the bracket pins into the pin retainer slots. See Figure 1-42.
Figure 1-42. Replacing the Hard Disk Drive and Bracket in the Workstation
(replace the mounting screws)
(replace the hard disk drive into bracket)
Mounting Screws
Hard Disk Drive
(use a #2 Phillips
Bracket
Mounting
Screws
screwdriver)
Mounting
Screws
(Push forward in the direction of the arrow)
(Push down in the direction of the arrow)
Mounting Bracket Pins
Pin Retainer Slots


