


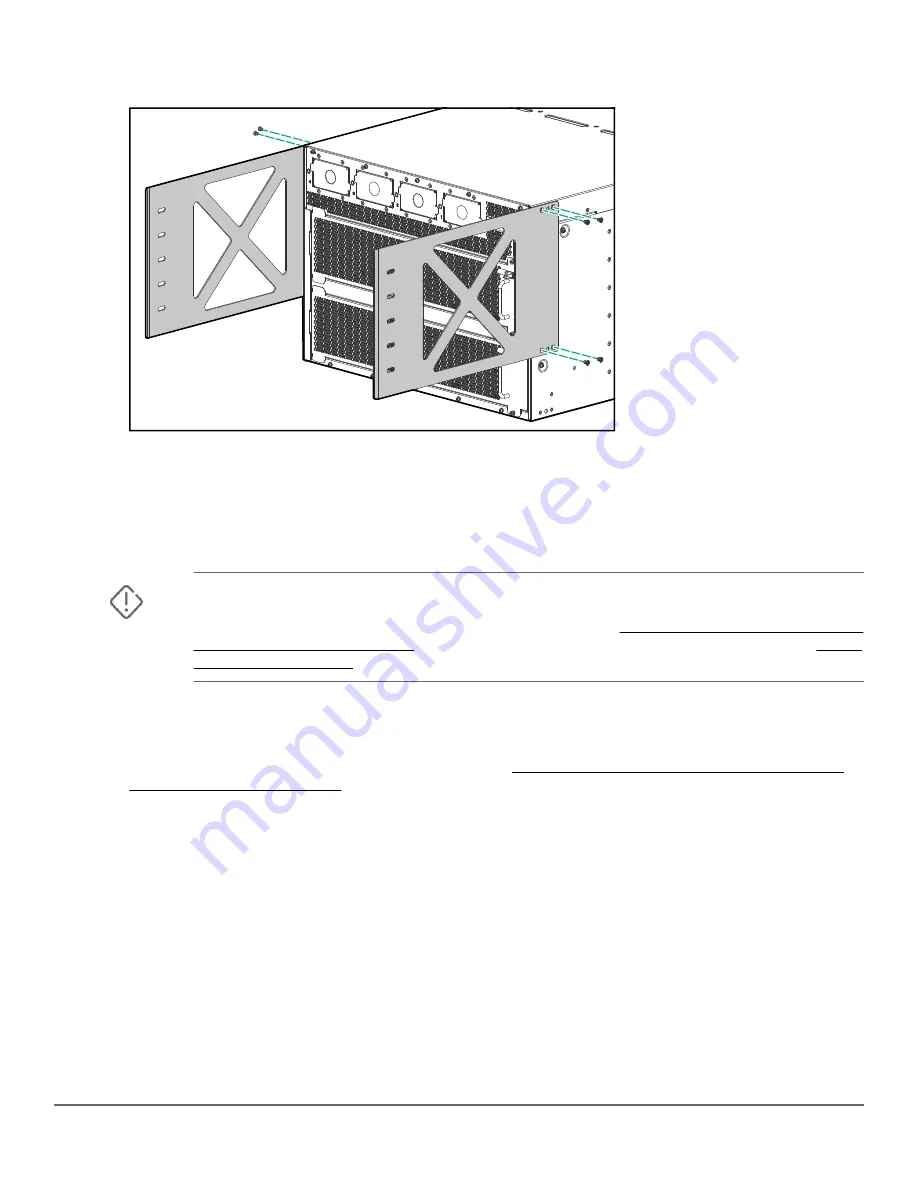
Procedure
1. Use the included flat-head screws to attach a rear adapter plate to each side of the switch.
2. Install four cage nuts on each rear post to use for securing a rear bracket to each rear post. Select the
cage nut positions to align with the level of the rear adapter plates installed in step 1.
3. Use the provided screws to attach a rear bracket to the rear post on each side of the rack.
Manually mounting the chassis in the four-post rack
WARNING: This procedure is for four persons manually mounting an Aruba 6410 ten-slot
chassis weighing less than 90 kg (200 lbs) in a two-post rack. For weights exceeding these limits,
reduce the weight of the chassis or use a mechanical lift. See Using a mechanical lift to mount
the chassis in a two-post rack for more information on using a mechanical lift. See also Aruba
Prerequisites
• The four-post rack mount hardware kit is installed on your four-post rack.
• Rack ears are mounted on the front of the switch. (See Installing rail spacers and front rack ears for
Procedure
1. With four people lifting, raise the switch to the level of the rack rails. (See the above Warning.)
2. Slide the switch onto the rails until the rails support the rear of the chassis.
3. Continue sliding the chassis onto the rack until the rails fully support the chassis weight.
4. Slide the chassis into the rack until the rack ears contact the front rack posts.
5. Use the screws provided in the accessory kit to secure the rack ears to the rack.
Chapter 6 Mounting the switch
63


