Removing and attaching the ergonomic and compact stands
The RP9 can be attached to a wall, swing arm, pole-mounted bracket, or other mounting fixture by removing
the stand (when ordered attached to the system unit). The RP9 supports the VESA industry standard 100 mm
spacing between mounting holes.
This apparatus is intended to be supported by UL or CSA Listed wall mount bracket. HP recommends that you
use an HP Quick Release mounting bracket for wall mounting (part number EM870AA).
CAUTION:
To attach a third-party mounting solution to the RP9, four 4 mm, 0.7 pitch, and 10 mm long
screws are required. Longer screws must not be used because they may damage the system. It is important to
verify that the manufacturer’s mounting solution is compliant with the VESA standard and is rated to support
the weight of the system.
Follow the steps below to remove the stand, mount the RP9 to a wall mount or swing arm, and to install the
stand.
1.
Shut down the computer properly through the operating system, then turn off any external devices.
2.
Disconnect the power cord from the power outlet.
CAUTION:
Regardless of the power-on state, voltage is always present on the system board as long as
the system is plugged into an active AC outlet. You must disconnect the power cord and wait
approximately 30 seconds for the power to drain to avoid damage to the internal components of the
computer.
3.
Disconnect all cables from the rear I/O connectors.
4.
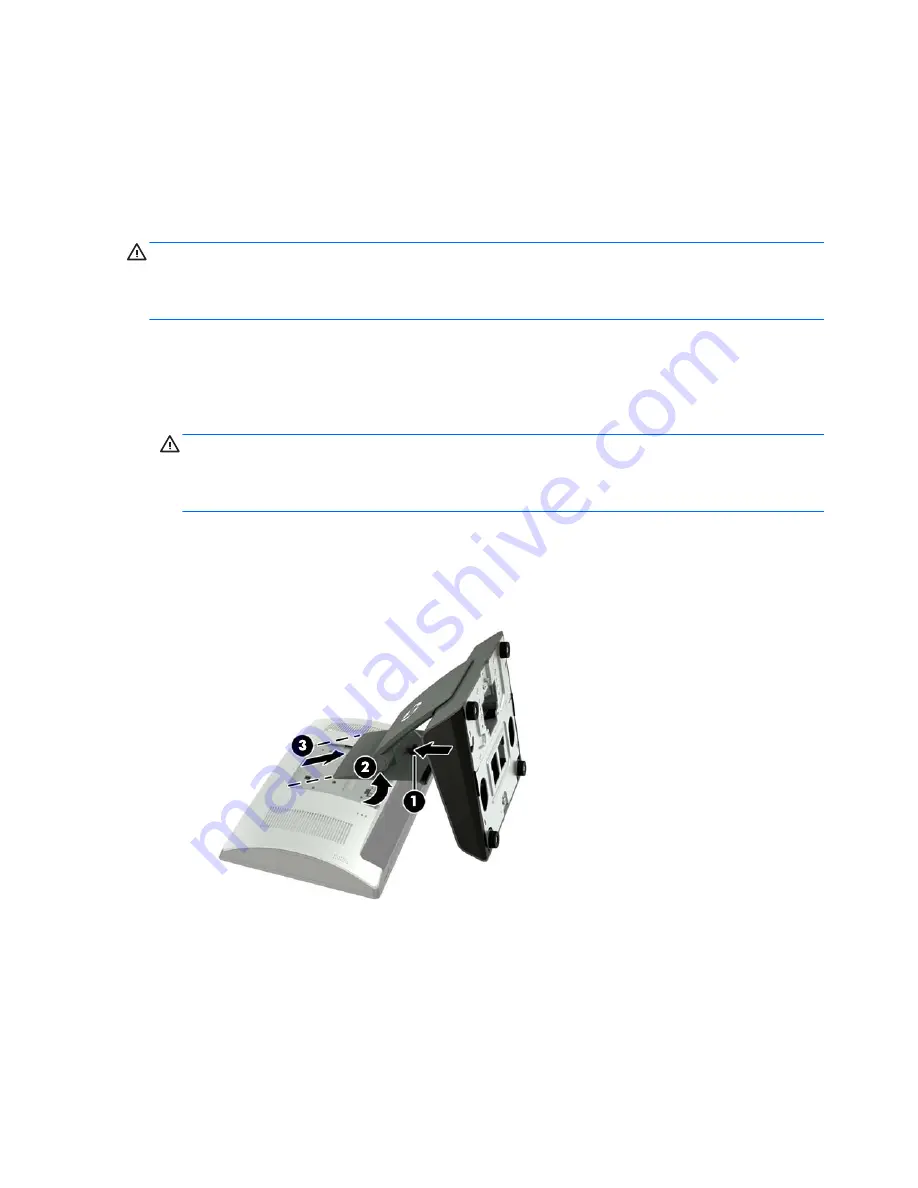
To remove the ergonomic stand, lay the RP9 face down on a flat surface covered by a soft clean cloth.
Push up the release latch on the rear of the display head (1), tilt the stand back (2), and then lift up from
the display (3).
6
Chapter 2 Hardware upgrades


