


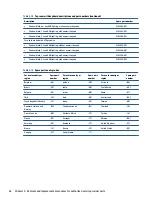
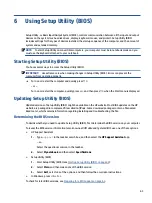


NOTE:
The display assembly is available as a spare part only at the subcomponent level. For display
assembly spare part information, see the individual removal subsections.
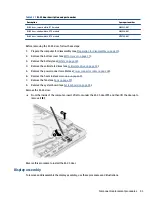
Before removing the display panel, follow these steps:
1.
Prepare the computer for disassembly (see
Preparation for disassembly on page 31
).
2.
Remove the bottom cover (see
3.
Remove the battery (see
).
4.
Remove the solid-state drives (see
).
5.
Remove the power connector cable (see
Power connector cable on page 38
).
6.
Remove the heat sink (see
7.
Remove the fans (see
).
8.
Remove the system board (see
).
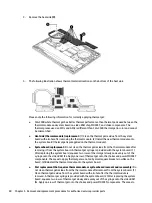
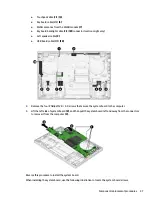
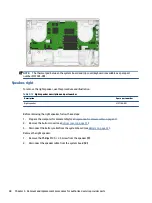
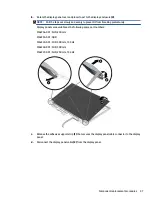
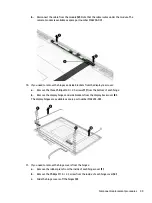
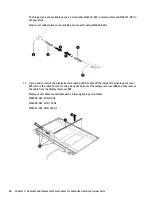
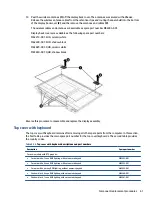
Remove the display assembly:
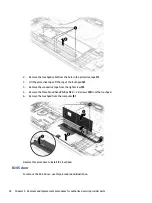
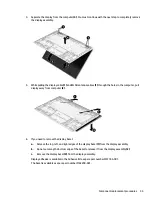
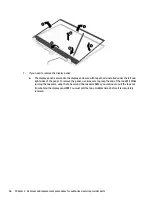
1.
Remove the antenna cable from the computer by releasing the tape (1), and then removing the
antennas cable from the computer (2).
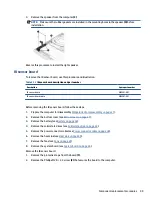
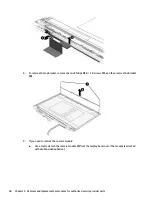
2.
Remove the six Phillips M2.5 × 3.5 screws (1) that secure the display assembly to the computer.
3.
Open the display to about 45° (2), and the close the display (3). This opens the hinges.
54
Chapter 5 Removal and replacement procedures for authorized service provider parts
Summary of Contents for 16-b0 Series
Page 4: ...iv Safety warning notice ...


