S8E V2.5 Hi-Carb Superchiller
230V / 50Hz
www.lancerbeverage.com
Page 11 of 31
Hoshizaki Lancer reserve the right to change specifications without notice.
Part No: 68000016
Images are for illustration purposes only as product may vary.
No 038 – 21 October 2014
6.6 Connecting to water supply
Using appropriate tubing and fittings connect a 10mm water supply line from Superchiller
carbonator pump inlet to a filtered, regulated water supply. (See Postmix circuit diagram page
13-15). Installation in accordance with AS/NZS 3500.1 and AS/NZS 3500.2.
Turn on water supply, check for leaks, adjust water regulator to 172-275kpa.
Open the bypass ball valve on the carbonator relief and bypass assembly until water flows from
CO
2
exhaust tube; then close the bypass ball valve. For dual carbonators, repeat this operation
for each carbonator.
Caution
Maximum water supply pressure to be 275 kpa.
Normal operating water temperature should be within 7°C to
32°C.
6.7
Connecting to CO
2
supply
Warning
As carbon dioxide (CO
2
) displaces oxygen; prevention of CO
2
leaks is paramount. If a leak is suspected, immediately ventilate
the contaminated area, before attempting repairs.
Connect CO
2
supply line from regulator to gas inlet on carbonator. (See Postmix circuit diagram
page 13 – 15 for details)
Adjust CO
2
Regulator supplying Carbonator to 550 kpa.
Turn on CO
2
supply.
6.8 Filling unit with water
Remove Superchiller lid and fill water bath until water flows out overflow tube.
NOTE:
Do not use water supplied from newly installed carbon filter as ice bank control operation will
be adversely affected.
6.9 Electrical
Connection
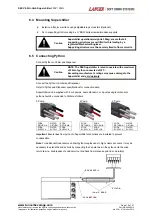
This unit requires a separate 10 amp (Postmix) and a 15amp (Refrigeration) power supplies.
Check the name plate on the machine for electrical supply requirements. Use only the power
supply specified on the name plate.
Warning
If the supply cord is damaged, it must be replaced by the
manufacturer, its service agent or similarly qualified persons in order
to avoid a hazard.


