background image


11.  Fresh Water System 

 
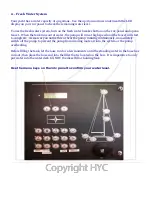
Your yacht has a water capacity of 40 gallons.  Use the up/down arrows underneath the LED 
display on your 12v panel to check the remaining water level.   

 
To use the fresh water system, turn on the fresh water breaker button on the 12v panel and open a 
faucet.  When the tank runs out of water, the pump will run at high speed and the faucet will start 

to cough air.  As soon as you notice this or hear the pump running continuously, immediately 
switch off the pump to prevent the pump from drawing more air into the system or the pump 

overheating. 
 
Before filling the tank, let the hose run for a few moments until the standing water in the hose has 

run out, then place the hose end into the filler that is located on the bow.  It is imperative to only 
put water into the water deck fill, NOT the diesel fill or holding tank. 


Use the menu keys on the 12v panel to confirm your water level.


Summary of Contents for Bavaria 32 2012

Page 1: ...Information operations manual for Bavaria 32 2012...

Page 2: ...is manual and don t hesitate to ask any of our professional friendly staff if you have any questions All the yachts in the Horizon fleet are maintained to the highest standards so that you may enjoy a...

Page 3: ...atteries Battery Switches 7 Instruments 8 VHF Radio 9 Anchoring the Windlass and Picking Up a Mooring 10 In Mast Furling Mainsail 11 Fresh Water System 12 Showers 13 Heads 14 Refrigeration 15 Propane...

Page 4: ......
Page 5: ...r 40 gallons Engine 29 hp Volvo Penta D1 30 Location of Fresh water refill bow Diesel refill starboard aft cockpit Manual bilge pump in cockpit Propane tank port aft cockpit locker Windlass breaker be...

Page 6: ...l Top row functions from left to right Compass light Navigation Instruments Autopilot Stereo System Windlass Primary bilge pump manual override Middle row functions from left to right Fresh Water Pump...

Page 7: ...Your yacht is equipped with a power inverter that enables you to have 110v power while away from the dock See section 3 Inverter for details main breaker always leave on 110v breakers ensure these are...

Page 8: ...nnected to shower power The inverter is located underneath the chart table and is turned on by a red switch on its face The two 110V sockets on the face of the inverter then become live To avoid addit...

Page 9: ...To the rear of the engine is the sea water strainer Do not open this To the front right of the engine is the engine coolant reservoir The coolant level should be between the maximum and minimum lines...

Page 10: ...ne has stopped An alarm will sound after you stop the engine alerting you that the ignition is still on and that you will drain your starter battery if you do not shut it off Press the ignition button...

Page 11: ...ing at 1400 rpms or more whether sitting at a mooring or motoring to a destination Check the battery levels and make note of them before turning on the engine Run the engine at 1400 rpms or more for a...

Page 12: ...hip s compass located at the helm Use the up and down arrows on the GMI 20 to go through pages of information such as wind speed and direction depth and heading sunrise sunset temperature and barometr...

Page 13: ...king channel after the contact is established Do no use Channel 16 for your conversations this channel is for hailing and distress only Channels to use 16 Hailing and Distress 74 Contact Horizon Yacht...

Page 14: ...mergency PAN PAN MEDICO PAN PAN MEDICO PAN PAN MEDICO Pronounced med ick oh This is an International Urgency Signal that should be used when medical advice is needed Safety SECURITE SECURITE SECURITE...

Page 15: ...the anchor to the sea floor The elements will push you back and away from the anchor Keep deploying chain until you have acquired the correct scope Attach the snubbing line Always attach the snubbing...

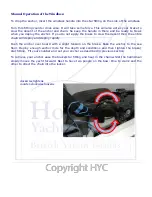
Page 16: ...the slack out of the 2nd rode and tie off Now engage reverse to 1500 RPMs as before There is a high amperage fuse that will blow if the windlass gets overloaded The fuse is located behind the 12V pan...

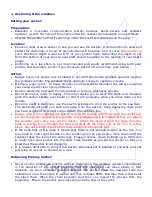
Page 17: ...ecent then the entire chain will deploy and deploy rapidly Push the anchor over board with a slight tension on the brake Ease the anchor to the sea floor Deploy enough anchor rode for the depth and co...

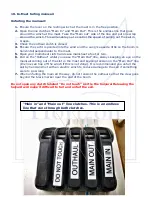
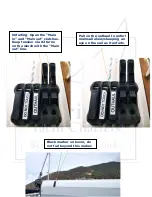
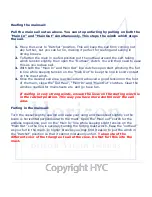
Page 18: ...et clutch and ease mainsheet a foot or two 6 Pull on the Outhaul whilst you ease the Main Out line always keeping an eye on the mainsail coming out of the slot in the mast and keeping tension on the M...

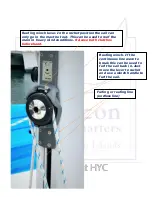
Page 19: ...this can be used to furl the sail back in Just move the lever to rachet and use a winch handle to furl the sail Reefing winch lever In the rachet position the sail can only go in the mast not out This...

Page 20: ...in and Main out clutches Keep tension via X2 turns on the winch with the Main out line Pull on the outhaul to unfurl mainsail always keeping an eye on the sail as it unfurls Black marker on boom do no...

Page 21: ...ired sail area is achieved and achieved a good tension on the foot of the main close the Out Haul Main In and Main Out clutches Clear the winches needed for mainsheets etc and go have fun If reefing i...

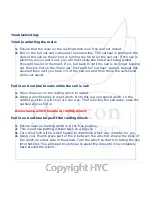
Page 22: ...l in and out line breaks while the sail is out 1 Move the lever on the reefing winch to rachet 2 Using a winch handle in mast winch Note this is a one speed winch In the ratchet position it will only...

Page 23: ...attached either on the port or starboard cleat and the yacht will be head to wind Remember to centralize the wheel and lock in place to avoid the yacht sailing around the buoy Next attach a second bac...

Page 24: ...e faucet will start to cough air As soon as you notice this or hear the pump running continuously immediately switch off the pump to prevent the pump from drawing more air into the system or the pump...

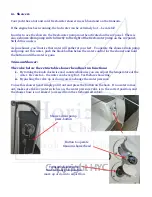
Page 25: ...er and hold the button until the water is gone Transom Shower The valve below the retractable shower head has two functions 1 By turning the knob clockwise and counterclockwise you can adjust the temp...

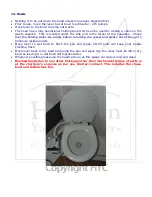
Page 26: ...before returning the vessel and please flush through to minimize residual odors Move lever to wet bowl to flush the pan and pipes 20 25 pulls will keep your heads smelling fresh Move lever back to dr...

Page 27: ...to the apex beside the dial 5 6 usually works the best without the risk of freezing anything However if 7 is not cold enough you may augment the system with a bag of ice Also the fuller you keep the...

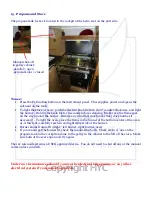
Page 28: ...flame in the funnel at the bottom center of the oven or if this fails carefully reach in and light either side of the burner Burner knobs from left to right left burner right burner oven If you canno...

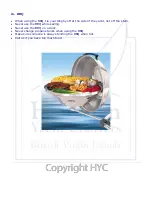
Page 29: ...off at the side of the yacht not off the stern Never use the BBQ while sailing Never use the BBQ on a dock Never change propane tanks when using the BBQ Make sure someone is always tending the BBQ wh...

Page 30: ...ly of oxygen air Open fire Pull out the yellow safety tab Point the extinguisher at the base of the fire and press down on the red button to discharge contents Generously cover the base of the fire an...

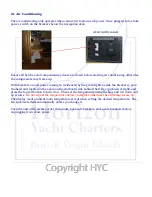
Page 31: ...rs go to the head unit located in the salon on the starboard side behind the fridge pictured at right and press the top left button to turn it on Then set the temperature using the blue and red down a...

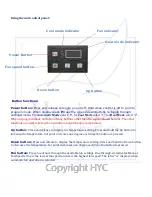
Page 32: ...release to display the temperature setting Press and hold the Up button to increase the temperature Set point increases one degree each time the button is pressed Down button Press and release to disp...

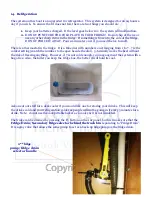
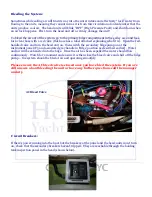
Page 33: ...switch the secondary bilge pump on at the instrument panel F5 and associated grey handle in Bilge position as described earlier Water and air will be exhausted into the bilge Once the air has been ex...

Page 34: ...3 or more hrs use the choke Pull the choke out and set a few revs with the throttle Do not twist the throttle trying to prime the engine You will only flood it Face the engine and pull the start cord...

Page 35: ...t lever Kill cord Throttle handle Pull cord Choke Lever to lower and raise the outboard Fuel vent make sure this is always slightly open when using the dinghy Fuel line connection make sure this is se...

Page 36: ...ain closed After you are securely anchored or moored feel free to deploy the transom for a swim platform or easy access to your dinghy though be careful not to let the dinghy hull ride up on the platf...

Reviews: