Aeroscout S 2 1.1m
EN
5
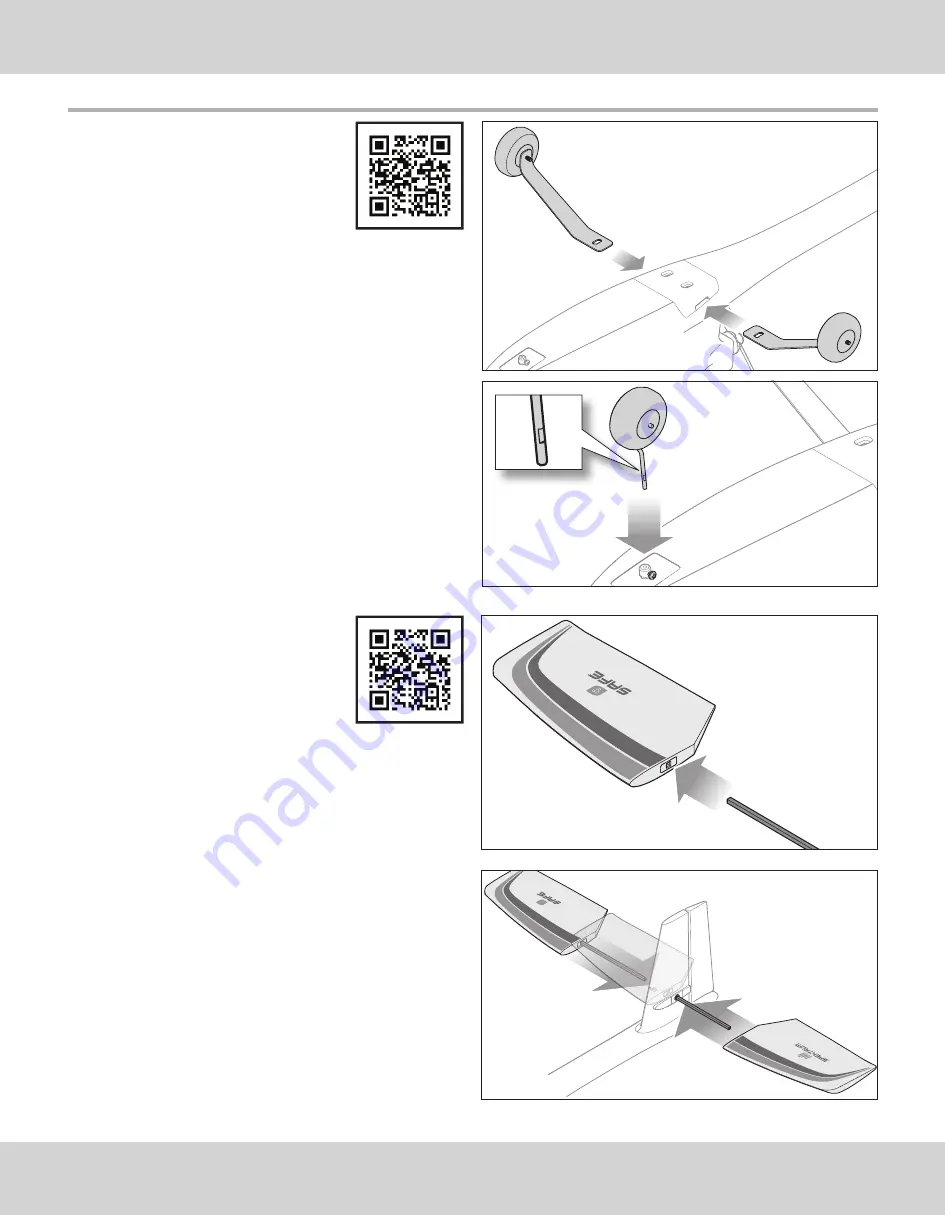
Landing Gear Installation
1. Slide the main gear into the slots in the fuselage until they lock into place.
Horizontal Tail Installation
We recommend watching the “Horizontal Tail
Installation” chapter/section of the assembly
video by scanning this QR code or using this URL:
www.horizonhobby.cc/AeroScoutS2assembly.
1. Slide the longer of the two included square carbon
fiber tubes fully into the hole of either of the
horizontal stabilizers. The tube is a friction fit and
does not require any adhesive.
IMPORTANT:
The fit will be tight.
TIP:
Use a drop of dishwashing soap on the rod to help it slide though the
opening in the vertical stabilizer.
2. Insert the tube through the hole in the vertical tail of the fuselage as shown,
until the previously attached horizontal stabilizer is against the fuselage.
IMPORTANT:
The decals on the horizontal stabilizers must face up when the
stabilizers are installed correctly.
3. Slide the opposite horizontal stabilizer over the other end of the tube. Press
the stabilizer halves together until they are both fully seated on the tube.
Use a credit card at the trailing edge to make sure there is a small (1mm)
gap between the stabilizers and the fuselage.
2. Insert the nose gear into the wheel collar as shown and tighten the screw
against the flat in the gear wire using a PH#2 screwdriver.
Assembly Video
Aircraft Assembly
We recommend reading each section of this
manual before proceeding with assembly
per the steps outlined. We also recommend
watching the entire assembly video by
scanning this QR code or using this URL:
www.horizonhobby.cc/AeroScoutS2assembly.
Assembly Video


