background image

BEFORE

YOU 
BEGIN

6

INTRODUCTION

IMPORT

ANT

PRECAUTIONS

ASSEMBL

Y

BEFORE

YOU 
BEGIN

TREADMILL

OPERA

TION

LIMITED

W

ARRANTY

TROUBLESHOOTING

MAINTENANCE

CONDITIONING

GUIDELINES

BEFORE YOU 

BEGIN

ASSEMBL

Y

7

INTRODUCTION

IMPORT

ANT

PRECAUTIONS

TREADMILL OPERA

TION

CONDITIONING GUIDELINES

TROUBLESHOOTING & 

MAINTENANCE

LIMITED WARRANTY

ASSEMBLY

IMPORTANT: READ THESE SAFETY INSTRUCTIONS BEFORE USE!

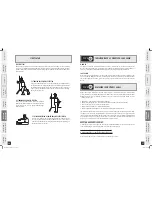
During the assembly process of the treadmill there are several areas that special attention must be paid. 

It  is  very  important  to  follow  the  assembly  instructions  correctly  and  to  make  sure  all  parts  are  firmly 

tightened. If the assembly instructions are not followed correctly, the treadmill could have frame parts that 

are not tightened and will seem loose and may cause irritating noises. There should be no side-to-side play 

in the console masts or any forward and back play in the console assembly or handlebars. If there is any 

play in these areas, the treadmill has not been properly assembled. To prevent damage to the treadmill, the 

assembly instructions must be reviewed and corrective actions should be taken.

UNPACKING

Place the treadmill carton on a level flat surface. It is recommended that you place a protective covering on 

your floor. Take CAUTION when handling and transporting this unit. Never open box when it is on its side. 

Once the banding straps have been removed, do not lift or transport this unit unless it is fully assembled 

and in the upright folded position, with the lock latch secure. Unpack the unit where it will be used. The 

enclosed treadmill is equipped with high-pressure shocks and may spring open if mishandled. Never grab 

hold of any portion of the incline frame and attempt to lift or move the treadmill. FAILURE TO FOLLOW THESE 

INSTRUCTIONS COULD RESULT IN INJURY! 

Before proceeding, find your treadmill’s serial number 

and  model  name  located  to  the  left  of  the  on/off 

power switch and power cord and enter it in the space 

provided below.

ENTER  YOUR  SERIAL  NUMBER  AND 

MODEL NAME IN THE BOXES BELOW:

 SERIAL NUMBER :

 MODEL NAME:

* Refer to the SERIAL NUMBER and MODEL NAME when calling for service.

* Also enter this serial number on your Warranty Card.

PST 8 SHOWN

READING RACK

WATER BOTTLE HOLDER

GRIP PULSE HANDRAILS

ON/OFF SWITCH

CIRCUIT BREAKER

WHEEL LOCKS

TRANSPORT WHEELS

FOOT LOCK LATCH

POWER CORD

CONSOLE

TOUCH PAD PANEL WITH BLUE BACK-LIT DISPLAY

SAFETY KEY PLACEMENT

MOTOR COVER

RUNNING BELT / RUNNING DECK

SIDE RAIL

ROLLER END CAP

CONSOLE MAST

REAR ROLLER ADJUSTMENT BOLTS

TOOLS INCLUDED

5 mm Allen Wrench/Phillips Screw Driver
8 mm Allen Wrench or 6 mm Allen Wrench
Open-end Wrench

PARTS INCLUDED

1 Safety Key
1 Console
1 Console Faceplate
2 Console Masts
2 Console Mast Boots
2 Handlebars
1 Power Cord
3 Hardware Packs

If you have questions or if there are any missing parts, we will guarantee complete satisfaction.

Customer Tech Support contact information is located on the back panel of this manual.

WARNING

PST6-PST8 Treadmill Rev 1.6.indd   6-7

7/25/05   1:49:39 PM

Summary of Contents for PARAGON 6

Page 1: ...PERFORMANCE SERIES TREADMILL USER S GUIDE FOR MODELS PST6 PST8 PST6 PST8 Treadmill Rev 1 6 indd 1 7 25 05 1 49 35 PM...

Page 2: ...get stronger and healthier faster Because we re committed to designing fitness equipment from the inside out we use only the highest quality components It s a commitment we back with one of the stron...

Page 3: ...UNDED TREADMILL POWER CORD GROUNDED TREADMILL POWER CORD At NO time should pets or children under the age of 12 be closer to the treadmill than 10 feet At NO time should children under the age of 12 u...

Page 4: ...his unit unless it is fully assembled and in the upright folded position with the lock latch secure Unpack the unit where it will be used The enclosed treadmill is equipped with high pressure shocks a...

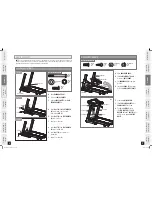
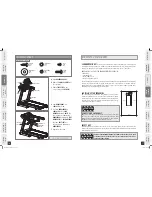
Page 5: ...nside hole I Repeat on other side NOTE It is recommended that you apply grease to the threads of each bolt as you assemble your treadmill to prevent loosening and noise Also during each assembly step...

Page 6: ...is to develop an exercise habit Your new treadmill will help you eliminate obstacles that prevent you from exercising Inclement weather and darkness won t interfere with your workout when you use your...

Page 7: ...lp if necessary when moving Do not attempt to move or transport treadmill unless it is in the upright folded position with the lock latch secured Failure to follow these instructions could result in i...

Page 8: ...ttings see page 16 J 1 2 KEYS One touch keys for increasing speed 0 5 mph increments and incline 0 5 increments K BACK LIT INCLINE INDICATORS Illuminate to indicate current incline L BACK LIT SPEED IN...

Page 9: ...r current accumulated workout s distance NOTE If you do not select a USER and just press START the Display window will default to program distance Neither USER TRIP or USER TOTAL will accumulate USER...

Page 10: ...Level 9 2 0 3 0 4 0 8 0 4 0 8 0 3 0 2 0 Level 10 2 0 3 0 4 0 8 5 4 0 8 5 3 0 2 0 WARM UP and COOL DOWN last 5 00 minutes each and are included in program times PROGRAM INTERVALS MANUAL INTERVALS ROLL...

Page 11: ...327 187 500 106 416 462 430 373 201 393 572 396 401 178 543 Distance Yards PROGRAM GOLF COURSE MANUAL INTERVALS ROLLING WEIGHT LOSS GOLF COURSE RACE CUSTOM 1 CUSTOM 2 THR ZONE 1 THR ZONE 2 VALLEY TOUR...

Page 12: ...ZONE plus or minus 5 beats per minute the INCLINE level will remain until you would rise above or drop below you TARGET HEART RATE ZONE at which time the incline would adjust accordingly The last 5 m...

Page 13: ...determined by your goals If you use your treadmill to prepare for a 5K run you will probably work out at a higher intensity than if your goal is general fitness Regardless of your long term goals alwa...

Page 14: ...up should gradually bring your heart rate into your Target Heart Rate Zone COOL DOWN Never stop exercising suddenly A cool down period of 3 5 minutes allows your heart to readjust to the decreased de...

Page 15: ...ES TIME COMMENTS WEEK WEEKLY GOAL WEEKLY TOTALS DAY SUNDAY MONDAY TUESDAY WEDNESDAY THURSDAY FRIDAY SATURDAY DATE DISTANCE CALORIES TIME COMMENTS WEEK WEEKLY GOAL WEEKLY TOTALS DAY SUNDAY MONDAY TUESD...

Page 16: ...WITCH LIGHT UP IF YES Double check that all connections are secure especially the console cable Unplug and reconnect the console cable to verify Make sure the console cable is not pinched or damaged i...

Page 17: ...d the service necessary to get you and your Horizon Fitness treadmill running again Cleanliness of your treadmill and its operation environment will keep maintenance problems and service calls to a mi...

Page 18: ...nsible or liable for indirect special or consequential damages economic loss loss of property or profits loss of enjoyment or use or other consequential damages of whatsoever nature in connection with...

Page 19: ...one of our trained customer technicians via phone email or our website Customer Tech Support Hotline 1 800 244 4192 Email comments horizonfitness com Website www horizonfitness com Customer Tech Suppo...

Reviews: