background image

6

7

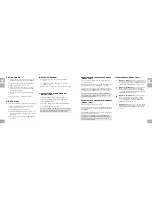
HARDWARE foR STEP 1

 :

ASSEMBLY 

STEP 1

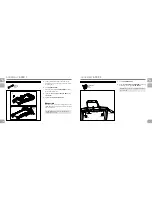
A  Cut the yellow banding straps and lift the running 

deck upward to remove all contents from underneath 
the running deck.

B  Open 

HARDWARE BAG

 1

C  Pull up the left and right 

CONSOLE MAST

 by lifting 

the handrails at both sides.

D  Tighten the 

LEFT & RIGHT CONSOLE MAST

 using 

BOLTS (A).

Tighten the 

PREINSTALLED BOLTS

.

ASSEMBLY 

STEP 2

BOLT (A)
M8 x 53L
Qty: 4

FIXING KNOB
M8
Qty: 2

HARDWARE foR STEP 2

 :

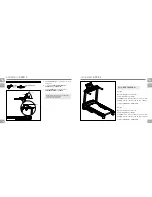
A  Open 

HARDWARE BAG 2.

B  Put down 

LEFT & RIGHT HANDLEBAR

 and fix it into 

horizontal position using 2 

FIXING KNOBS

.

NOTE: Make sure the knob is fully tightened before 
go to next step.

Omega 3

Shown

Omega 3

Shown

FIXING KNOB

LEFT HANDLEBAR

RIGHT HANDLEBAR

FIXING KNOB

1

2

BOLT (A)

LEFT CONSOLE MAST

RIGHT 
CONSOLE 
MAST

CAUTIoN

NOTE: Make sure the bolts are fully tightened 

before go to next step.

To avoid unexpected accidents, always assemble the 

treadmill with an assistant. Please follow the assembly 

steps to avoid injury.

Summary of Contents for OMEGA 2

Page 1: ...TREADMILL OWNER S MANUAL Read the treadmill guide before using this owner s manual OMEGA 2 OMEGA 3 ...

Page 2: ...e parts that are not tightened and will seem loose and may cause irritating noises To prevent damage to the treadmill the assembly instructions must be reviewed and corrective actions should be taken Before proceeding find your treadmill s serial number located on the front stabilizer tube and enter it in the space provided below Also locate the model name which is next to the serial number ENTER ...

Page 3: ... of any portion of the incline frame and attempt to lift or move the treadmill FAILURE TO FOLLOW THESE INSTRUCTIONS COULD RESULT IN INJURY WARNING NOTE During each assembly step ensure that ALL nuts and bolts are in place and partially threaded in before completely tightening any ONE bolt NOTE A light application of grease may aid in the installation of hardware Any grease such as lithium bike gre...

Page 4: ...LT A M8 x 53L Qty 4 FIXING KNOB M8 Qty 2 HARDWARE for step 2 A Open HARDWARE BAG 2 B Put down LEFT RIGHT HANDLEBAR and fix it into horizontal position using 2 FIXING KNOBS NOTE Make sure the knob is fully tightened before go to next step Omega 3 Shown Omega 3 Shown FIXING KNOB LEFT HANDLEBAR RIGHT HANDLEBAR FIXING KNOB 1 2 BOLT A LEFT CONSOLE MAST RIGHT CONSOLE MAST Caution Note Make sure the bolt...

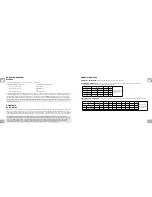
Page 5: ...NSOLE CONSOLE 55 DEGREES SCREW CONSOLE ADJUST KNOB ASSEMBLY STEP 4 YOU ARE FINISHED Omega 2 Max User Weight 125 kg 275 lbs Product Weight 80 kg 176 lbs Overall Dimension 178 x 85 x 134 cm 70 x 35 x 53 Folding Dimension 108 x 85 x 155 cm 43 x 35 x 61 Complies with EN957 1 EN957 6 HB Omega 3 Max User Weight 136 kg 300 lbs Product Weight 83 kg 183 lbs Overall Dimension 179 x 85 x 134 cm 71 x 35 x 53 ...

Page 6: ...gramming The BASIC OPERATION section in the treadmill guide has instructions for the following LOCATION OF THE TREADMILL Using the SAFETY KEY FOLDING the treadmill MOVING the treadmill LEVELING the treadmill TENSIONING THE RUNNING BELT CENTERING THE RUNNING BELT Using the HEART RATE function ...

Page 7: ...3 player Befestigen Sie den Sicherheitsclip an Ihrer Kleidung bevor Sie das Gerät starten Herzfrequenzüberwachungssysteme können ungenau sein Übermäßiges Training kann zu ernsthaften Verletzungen oder zum Tod führen Um das Risiko von Verletzungen einzudämmen stellen Sie sich auf die seitlichen Trittflächen bevor Sie das Gerät starten Lesen und befolgen Sie die Bedienungsanleitung vor der Erstbenut...

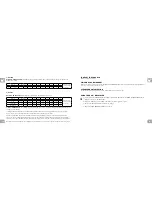
Page 8: ...LLSTELLUNG GEDRÜCKT HALTEN MANUAL MANUELL INTERVALS INTERVALL HRC HRC PROGRAMM WEIGHT LOSS GEWICHTSREDUZIERUNG EnergySaver ENERGIESPARMODUS CALORIES KALORIEN HEART RATE HERZFREQUENZ OMEGA 3 CONSOLE OPERATION Note There is a thin protective sheet of clear plastic on the overlay of the console that should be removed before use A Target LED indicators Indicate what target if any is set for the curren...

Page 9: ...our workout TIME Shown as minutes seconds View the time remaining or the time elapsed in your workout DISTANCE Shown as miles Indicates distance traveled or distance remaining during your workout SPEED Shown as MPH or KM H Indicates how fast your walking or running surface is moving INCLINE Shown as percent Indicates the incline of your walking or running surface CALORIES Total calories burned or ...

Page 10: ...UT key until you have selected the new WORKOUT you would like Press ENTER New workout will begin at the first segment after warm up and all workout statistics will roll over NOTE If you accidentally press the SELECT TARGET key during a workout if no buttons are pressed after 5 seconds the current target will resume NOTE HRC is not available for workout changing If you accidentally press the SELECT...

Page 11: ...nnot be set higher than Fast High The console will beep to alert if the values are incorrect IMPORTANT The heart rate function on this product is not a medical device While heart rate grips can provide a relative estimation of your actual heart rate they should not be relied on when accurate readings are necessary Some people including those in a cardiac rehab program may benefit from using an alt...

Page 12: ...begin your workout After the 4 minute warm up period the elevation level will increase gradually to get the user to the entered target heart rate zone Once the user is at the target heartrate zone plus or minus 5 beats the elevation level will remain at the currentresistance level If the user is more than 25 beats per minute above the target heart rate zone the console will shut down for safety re...

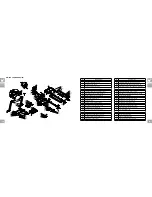
Page 13: ...R PAD RUNNING DECK TM676 B31 SCREW FH Φ5X15L SM PH BAN POT B33 DIRECTION LABEL CARB 2 B34 NUT NLK M10x1 5P BAN NO DESCRIPTION B35 Side Rail Fixing Washer TM08 141F B39 SCREW BH M8X1 25PX30L HS G12 9 BZN B40 Ornament Running Deck PVC BL TM37B B41 Elastomer Fixed lastomeric R TM290 1US B42 RVN ALS7 8125 3 8 0 5 3 8 YZN B43 SCREW BH Φ4x12L TC PH BAN POT B45 AIR STICK DAMPING 35KG 359 581L B47 Buffer ...

Page 14: ...NLK M10x1 5P BAN M33 WASHER FLT Φ10 2XΦ20 0X2 0T BZN M36 SCREW BH Φ4X10L TC PH FLT M38 WASHER FLT Φ8 2xΦ19 0x2 0T M40 NUT NLK M8x1 25P BZN M80 NUT NLK M8X1 25P G12 BZN N15 LOCKING HANDBAR CONSOLE MAST TM676 N43 Safety Key assembly TM622 P01 POWER SWITCH KCD3 P02 WIRE POWER SOCKET SET 250LOCK80 750 1 P04 Breaker Through Electric Current 7A 250V P09 WIRE BS CON BLACK 250LOCK2 60L NO DESCRIPTION P10 ...

Page 15: ...RH Φ4X12L TC PH BAN POT B35 Side Rail Fixing Washer TM08 141F B39 RVN ALS7 8125 3 8 0 5 3 8 YZN B40 NUT NLK M10x1 5P BAN B41 AIR STICK DAMPING 45KG 223L B42 SCREW BH M8X1 25PX30L HS G12 9 BZN B45 SCREW HH M10X1 5PX45L 15L B46 ELASTOMER ORANGE B47 ELASTOMER BLUE B48 FIXING BUMPERC B50 DIRECTION LABEL CARB 2 B58 FIXING BUMPERC BLACK TM616 1US H05 NUT NLK M8x1 25P BZN H06 SCREW M8X1 25Px9L D10x11 2L ...

Page 16: ...FLT Φ10 2XΦ20 0X2 0T BZN M38 WASHER FLT Φ8 2xΦ19 0x2 0T M40 NUT NLK M8x1 25P BZN M80 NUT NLK M8X1 25P G12 BZN N15 LOCKING HANDBAR CONSOLE MAST TM676 N43 Safety Key assembly TM622 P01 POWER SWITCH KCD3 P02 WIRE POWER SOCKET SET 250LOCK80 750 1 P04 Breaker Through Electric Current 7A 250V P09 WIRE BS CON BLACK 250LOCK2 60L P10 Inductance 6mH 200 300 Add Label TM80 P11 WIRE CTRL BOARD PWR WHITE 250LO...

Page 17: ...ijn recycleerbaar Breng het apparaat aan het einde van de gebruiksduur naar een op recycling gespecialiseerd bedrijf plaatselijk verzamelpunt E Informaciones para la evacuaciòn Los productos de Horizon Fitness son riciclables Cuando se termina la vida ùtil de un aparato o una màquina entrèguelos an una impresa local de eleiminaciòn de residuos para su reciclaje I Indicazione sullo smaltimento I pr...

Page 18: ...34 35 ...

Page 19: ...TREADMILL OWNER S MANUAL Omega 2 3 Owner s Manual 061912 Rev 1 2012 Horizon Fitness ...

Reviews: