background image

10

INTRODUCTION

IMPORT

ANT

PRECAUTIONS

ABOUT 

YOUR

TREADMILL

BEFORE

YOU 
BEGIN

TREADMILL

OPERA

TION

LIMITED

W

ARRANTY

TROUBLESHOOTING

MAINTENANCE

CONDITIONING

GUIDELINES

11

INTRODUCTION

IMPORT

ANT

PRECAUTIONS

ABOUT 

YOUR

TREADMILL

BEFORE YOU 

BEGIN

TREADMILL OPERA

TION

CONDITIONING GUIDELINES

TROUBLESHOOTING & 

MAINTENANCE

LIMITED WARRANTY

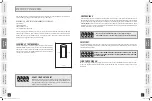
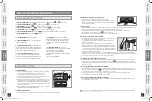
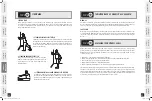
DO NOT STAND ON THE BELT

While you are preparing to use the treadmill, do not stand on the belt. Place 

your feet on the side rails before starting the treadmill. Start walking on the 

belt only after the belt has begun to move. Never start the treadmill at a fast 

running speed and attempt to jump on!

NEVER USE THE TREADMILL WITHOUT SECURING THE SAFETY KEY CLIP TO YOUR 

CLOTHING. PULL ON THE SAFETY KEY CLIP FIRST TO MAKE SURE IT WILL NOT COME 

OFF YOUR CLOTHING.

BEFORE YOU BEGIN

Your treadmill can be a tremendously effective tool for achieving your personal fitness goals. Regular use 

of your treadmill can improve the quality of your life in so many ways. 

HERE ARE JUST A FEW OF THE HEALTH BENEFITS OF ExERCISE:

• Weight Loss 

• A Healthier Heart

• Improved Muscle Tone

• Increased Daily Energy Levels

The key to reaping these benefits is to develop an exercise habit. Your new treadmill will help you eliminate 

obstacles  that  prevent  you  from  exercising.  Inclement  weather  and  darkness  won't  interfere  with  your 

workout  when  you  use  your  treadmill  in  the  comfort  of  your  home.  This  guide  provides  you  with  basic 

information for using and enjoying your new machine.

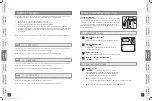
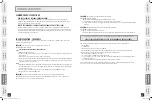
LOCATION OF THE TREADMILL

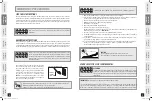
Place the treadmill on a level surface. There should be 6 feet of clearance 

behind the treadmill, 3 feet on each side and one foot in front for folding 

and the power cord. Do not place the treadmill in any area that will block 

any vent or air openings. The treadmill should not be located in a garage, 

covered patio, near water or outdoors.

WARNING

3 feet

6 feet

3 feet

1 foot

WARNING

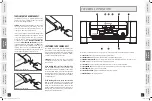
SAFETY KEY

Your treadmill will not start unless the safety key is placed in position. Attach the clip end securely to your 

clothing. This safety key is designed to cut the power to the treadmill if you should fall. Check the operation of 

the safety key every 2 weeks.

Do not operate the treadmill if the power cord or plug is damaged.

If the treadmill appears to not be working properly, do not use the treadmill.

PROPER USAGE

Your treadmill is capable of reaching high speeds. Always start off using a slower speed and adjust the speed in 

small increments to reach a higher speed level. Never leave the treadmill unattended while it is running. When 

not in use, remove the safety key, turn the on/off switch to off and unplug the power cord. Make sure to follow 

the MAINTENANCE schedule located on page 22 in this manual. Keep your body and head facing forward. Do not 

attempt to turn around or look backwards while the treadmill is running. Stop your workout immediately if you 

feel pain, faint, dizzy or are short of breath.

WARNING

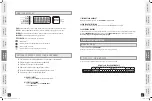
TURN THE POWER ON

Make sure that your treadmill is properly connected to a power outlet. The ON/OFF switch is located next to the 

power cord. Flip this switch to the ON position, so that the switch is lit. You will hear a beep and the console 

will turn on.

Evolve_SS_Treadmill_Rev.1.5.indd10-11   10-11

6/23/08   2:43:16 PM

Summary of Contents for Evolve Simple Steps

Page 1: ...TREADMILL USER S GUIDE HORIZON SERIES FOR MODEL EVOLVE SIMPLE STEPS Evolve_SS_Treadmill_Rev 1 5 indd1 1 6 23 08 2 43 04 PM...

Page 2: ...lifestyle a Horizon Fitness treadmill can help you attain it adding quality performance to your at home workouts with the ergonomics and innovative features you need to get stronger and healthier fas...

Page 3: ...ure before first time use Failure to do so may cause premature electronic failure WARNING WARNING SAVE THESE INSTRUCTIONS Read all instructions before using this treadmill When using an electrical pro...

Page 4: ...SE INSTRUCTIONS COULD RESULT IN INJURY Before proceeding find your treadmill s serial number and model name located on the stabilizer leg and enter it in the space provided below Enter your serial num...

Page 5: ...rea has enough space to store the treadmill This treadmill is equipped with two STABILIZER LEGS on the front side To store the treadmill vertically follow these steps To stand the treadmill up pull th...

Page 6: ...e the treadmill on a level surface There should be 6 feet of clearance behind the treadmill 3 feet on each side and one foot in front for folding and the power cord Do not place the treadmill in any a...

Page 7: ...slipping sensation when running on the treadmill the running belt must be tightened In most cases the belt has stretched from use causing the belt to slip This is a normal and common adjustment To eli...

Page 8: ...in working out OR SELECT A Program Select a Program using the PROGRAM KEYS Press start to begin 1 2 A B GETTING STARTED SELECTING A PROGRAM PROGRAM INFORMATION MANUAL MODE Is only selected by pressing...

Page 9: ...changes Time will count up from 0 00 NOTE 5 000 steps 2 5 miles based on the average stride length Actual distance may vary P3 5 000 STEPS Step based program Transmits steps taken from your pedometer...

Page 10: ...ceived including interference that may cause undesired operation TROUBLESHOOTING Pedometer case is difficult to or will not open The pedometer case is designed to open as if worn on the hip Hold the p...

Page 11: ...hey set aside a specific time of day to exercise It doesn t matter whether it s in the morning before breakfast during lunch hour or while watching the evening news What s more important is that it s...

Page 12: ...r personal goals in precise measurable terms and then put your goals in writing The more specific you can be the easier it will be to track your progress If your goals are long term divide them up int...

Page 13: ...e a certain type of thumping noise due to the belt riding over the rollers especially new treadmills This noise will diminish over time although may not totally go away Over time the belt will stretch...

Page 14: ...t be pre authorized by Horizon Fitness Horizon Fitness obligation under this warranty is limited to replacing or repairing at Horizon Fitness option the same or comparable model at one of its authoriz...

Page 15: ...nfitness com CUSTOMER TECH SUPPORT 1 6 2 0 L a n d m a r k D r i v e C o t t a g e G r o v e W I 5 3 5 2 7 T e l 1 8 0 0 2 4 4 4 1 9 2 DO NOT RETURN TO THE RETAILER if you have any problems during ass...

Reviews: