HYDROSTIK PRO SAFETY INFORMATION:
2. General Information
HYDROSTIK PRO SAFETY INFORMATION:
• Remove
the
HYDROSTIK
PRO
from
the
pressure
regulator
immediately
after
use.
• DO
NOT
try
to
disassemble,
open
or
repair
the
cartridges
when
broken
or
worn
out!
• DO NOT store cartridges under direct sunlight
• DO
NOT
store
cartridges
under
direct
sunlight.
• Keep
it
away
from
fire.
Fire
Hazard!
• Keep
it
in
a
safe,
dry
and
cool
place.
• Keep
it
away
from
temperatures
above
50
˚
C
while
filling,
storage
and
using.
• Provide adequate ventilation and refrain from placing items on or around the appliance
• Provide
adequate
ventilation
and
refrain
from
placing
items
on
or
around
the
appliance
during
operation.
Refrain
from
placing
the
appliance
in
enclosures
or
causing
the
appliance
to
not
vent
freely.
• Keep
away
from
alkaline
and
acidic
environment.
• This
is
not
toy
– keep
away
from
children.
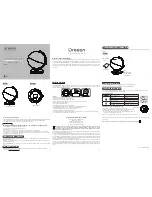
• The HYDROSTIK PRO cartridge must be placed horizontally when it is being charged otherwise the cartridge
• The
HYDROSTIK
PRO
cartridge
must
be
placed
horizontally
when
it
is
being
charged
otherwise
the
cartridge
can
crack!
• HYDROSTIK
PRO
contents
are
flammable.
Do
not
disassemble.
• Avoid
contact
with
HYDROSTIK
PRO
contents.
• Remove the HYDROSTIK PRO from the pressure regulator immediately after use
• Remove
the
HYDROSTIK
PRO
from
the
pressure
regulator
immediately
after
use.
• When
using
the
appliance,
basic
safety
precautions
should
always
be
followed
to
reduce
risk
of
fire,
or
personal
injury.
• Hydrogen
shall
be
stored,
handled
and
used
with
caution
so
life
and
health
are
not
jeopardized
and
the
risk
of property damage is minimized
of
property
damage
is
minimized.
EDUSTAK
JUNIOR
User
Manual
rev.1.1
©2013
Horizon
Ltd.
All
rights
reserved.
4