2 - 3
Step 2. Charge the Batteries
We recommend use of Honeywell peripherals, power cables, and power adapters. Use of any non-
Honeywell peripherals, cables, or power adapters may cause damage not covered by the warranty.
Ensure all components are dry prior to mating terminals/batteries with peripheral devices. Mating
wet components may cause damage not covered by the warranty.
Step 3. Boot the Terminal
The terminal begins booting as soon as power is applied and runs by itself. Do NOT press any keys or
interrupt the boot process.
When the boot process is complete, the Desktop appears, and the terminal is ready for use.
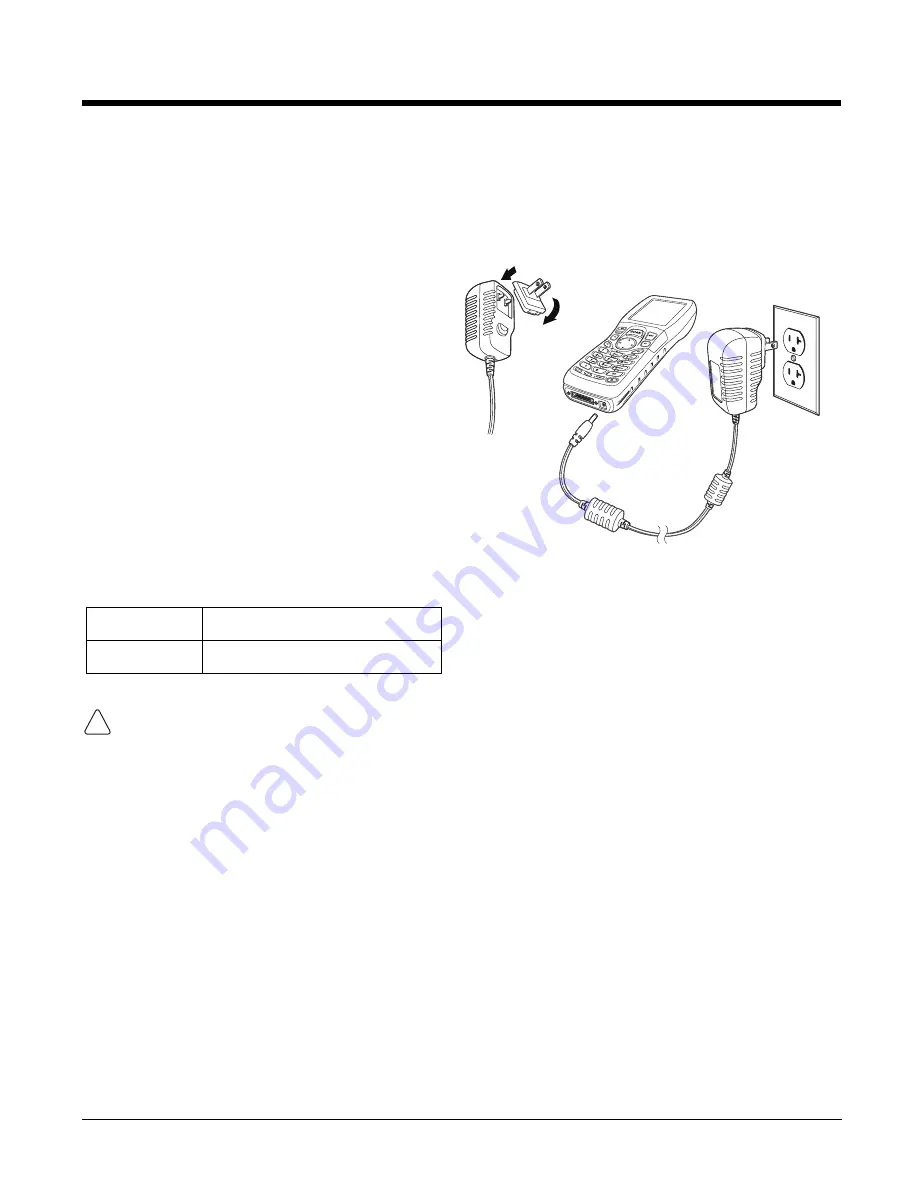
ScanPal 5100s ship with both the main battery
pack and internal backup battery significantly
discharged of power. Charge the main battery
pack with the ScanPal 5100 charging cable for
a
minimum of 4 or 6 hours depending on your
battery before initial use
.
1.
Attach the appropriate plug adapter to the
plug of the power cable.
2.
Insert the plug into the appropriate power
source.
3.
Plug the ScanPal 5100 power cable into the
end of the unit.
Note: If you remove the battery pack or it completely
discharges, there is a 30 minute window in which
to insert a charged battery pack before the
backup battery completely discharges. If your
backup battery completely discharges, the
contents of the RAM memory will be lost. If your
backup battery is less than fully charged, there is
a proportionally smaller window of time available.
LED Indicators
Red LED On
Charging
Green LED On
Battery is full or fully charged
2
3
1
!
Summary of Contents for ScanPal 5100
Page 1: ...ScanPal 5100 with Windows CE 5 0 Core User s Guide ...
Page 30: ...3 16 ...
Page 42: ...6 6 ...
Page 63: ......


