background image

•  Place the heater on a firm, level, open surface free from obstructions and at least 3 ft. (0.9m) away

from any combustible materials. DO NOT use on an unstable surface such as bedding or deep
carpeting. Be sure the heater is not in a position where it may be tripped over by small children 
or pets. The heater’s rubber feet will hold it firmly in position.

•  With the Power knob in the OFF position, plug the heater into a grounded 120V outlet suitable for a 

3-prong plug (Fig.1).

•  Turn the Thermostat fully clockwise 

to its highest position.

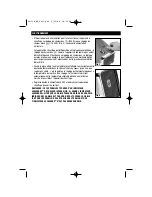
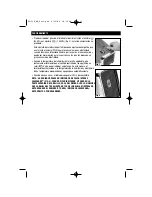
This heater is equipped with adjustable front legs that allow you to adjust
the heat output angle up and down.

Adjust the angle up or down by turning the lever located on the side of the
heater counter-clockwise 

to tilt up. Turn the lever clockwise 

to

lower the output angle. (Fig. 2).

IMPORTANT SAFETY INSTRUCTIONS REGARDING THE PLUG ON YOUR PRODUCT

Fig. 1

Fig. 2

SET-UP

OUTPUT DIRECTION

HZ-510_OM_Rev1.qxd  6/22/06  10:59 AM  Page 2

Summary of Contents for HZ-510 - Professional Series Ceramic Heater

Page 1: ...en grounding lug extending from the adapter must be connected to a permanent ground such as a properly grounded outlet box The adapter should not be used if a three slot grounded receptacle is available 10 This heater draws 12 5 amps during operation To prevent overloading a circuit do not plug the heater into a circuit that already has other appliances working 11 It is normal for the plug to feel...

Page 2: ...e OFF position plug the heater into a grounded 120V outlet suitable for a 3 prong plug Fig 1 Turn the Thermostat fully clockwise to its highest position This heater is equipped with adjustable front legs that allow you to adjust the heat output angle up and down Adjust the angle up or down by turning the lever located on the side of the heater counter clockwise to tilt up Turn the lever clockwise ...

Page 3: ...ockwise until the heater goes off This is the point at which the Thermostat setting equals the room temperature At this setting the Thermostat will automatically turn the heater on and off to maintain this selected temperature Turn the Power knob to OFF and unplug the heater when you are finished using it NOTE THIS PRODUCT IS EQUIPPED WITH A SAFEGUARD ALERT HEAT INDICATOR BADGE FIG 4 WHEN THE SAFE...

Page 4: ...e you have reached your Desired Temperature setting Check for any obstructions If you find one turn the heater OFF and unplug it Wait at least 10 minutes to allow the heater to cool completely before removing any obstruction When done plug in the heater and follow the OPERATION instructions CONSUMER RELATIONS Mail questions or comments to Kaz Incorporated Consumer Relations Dept 250 Turnpike Road ...

Page 5: ...lean the external surfaces of the heater DO NOT USE WATER WAX POLISH OR ANY CHEMICAL SOLUTION Clean your heater using the above mentioned steps then pack the heater in its original container and store in a cool dry place This heater does not disassemble CLEANING AND STORAGE ELECTRICAL RATING This product is rated at 1500 watts 120V 60Hz HZ 510_OM_Rev1 qxd 6 22 06 10 59 AM Page 5 ...

Page 6: ...risdiction This warranty applies only to the original purchaser of this product from the original date of purchase B At its option Kaz will repair or replace this product if it is found to be defective in material or workmanship Defective product should be returned to the place of purchase in accordance with store policy Thereafter while within the warranty period defective product may be returned...

Page 7: ...ans des prises de courant à deux fentes La patte verte de mise à la terre de l adaptateur doit être raccordée à une mise à la terre permanente telle une prise de courant adéquatement mise à la terre L adaptateur ne devrait pas être utilisé si une prise de courant mise à la terre à trois fentes est disponible 10 Durant son fonctionnement cet appareil de chauffage tire 12 5 ampères Afin de ne pas su...

Page 8: ...dans une prise de courant mise à la terre de 120 V pouvant recevoir une fiche à trois broches Fig 1 Tourner complètement le bouton du thermostat dans le sens horaire à son réglage le plus élevé Cet appareil de chauffage est muni de pieds antérieurs réglables permettant de diriger la chaleur vers le haut ou vers le bas Régler l angle vers le haut ou vers le bas à l aide du levier situé sur le côté ...

Page 9: ...ntement le bouton du thermostat dans le sens anti horaire jusqu à ce que l appareil s arrête c est le point où le réglage du thermostat équivaut à la température de la pièce À ce réglage le thermostat maintient automatiquement la température ambiante désirée en mettant en marche et en arrêtant l appareil de chauffage Régler le bouton d alimentation à OFF et débrancher l appareil de chauffage quand...

Page 10: ...ut que l appareil ait cessé de fonctionner simplement parce que la température désirée a été atteinte Vérifier qu il n y a pas d objet qui obstrue l appareil Si c est le cas mettre l appareil hors tension et le débrancher Laisser l appareil de chauffage refroidir complètement pendant au moins 10 minutes puis enlever l objet qui l obstrue Brancher ensuite l appareil de chauffage et suivre les instr...

Page 11: ...e NE PAS UTILISER D EAU DE CIRE DE PRODUITS À POLIR NI UNE SOLUTION CHIMIQUE QUELLE QU ELLE SOIT Nettoyer l appareil de chauffage en suivant les étapes mentionnées précédemment puis emballer l appareil de chauffage dans sa boîte d origine et le remiser dans un endroit frais et sec Cet appareil de chauffage ne se désassemble pas NETTOYAGE ET ENTREPOSAGE CARACTÉRISTIQUES ÉLECTRIQUES ASSIGNÉES Cet ap...

Page 12: ... Cette garantie s applique uniquement à l acheteur initial de ce produit à compter de la date de l achat initial B À sa discrétion Kaz réparera ou remplacera ce produit si l on constate qu il comporte un vice de matière ou de main d uvre Tout produit défectueux devrait être retourné à l endroit où il a été acheté conformément à la politique du magasin Par la suite tout produit défectueux dont la g...

Page 13: ... toma de tierra a una base de dos entradas La patilla verde del adaptador debe conectarse a una toma de tierra permanente tal como una base de enchufe con puesta a tierra Si dispone de una base enchufe con toma de tierra con 3 ranuras no use el adaptador 10 El aparato de calefacción necesita 12 5 amperios para funcionar Para evitar sobrecargas no enchufe el aparato en un circuito que esté alimenta...

Page 14: ...de corriente de 120 V con puesta a tierra para enchufes de 3 patillas Fig 1 Gire completamente el termostato en el sentido de las agujas de un reloj hasta el máximo Gracias a las patas anteriores ajustables del radiador el calor puede dirigirse hacia arriba o hacia abajo Sírvase de la palanca situada en el lateral del radiador para ajustar el ángulo hacia arriba o hacia abajo Gírela en el sentido ...

Page 15: ...amente el termostato en el sentido contrario de las agujas de un reloj hasta que el radiador se detenga De esta manera el termostato está ajustado a la temperatura de la habitación y mantendrá dicha temperatura prendiéndose y apagándose automáticamente Cuando no vaya a usar el radiador apáguelo OFF y desenchúfelo NOTA SU RADIADOR POSEE UN INDICADOR DE CALOR INTENSO SAFEGUARDMC FIG 4 CUANDO DICHO I...

Page 16: ...eratura Puede que el radiador se haya parado porque haya alcanzado la temperatura preseleccionada Compruebe que no hay ningún objeto que obstruya el aparato En caso afirmativo apague el radiador y desenchúfelo Déjelo enfriar completamente al menos 10 minutos y quite dicho objeto Seguidamente vuelva a enchufar el radiador siguiendo las instrucciones de la sección FUNCIONAMIENTO ATENCIÓN AL CLIENTE ...

Page 17: ...e las superficies exteriores del aparato NO USE AGUA CERA NINGÚN PRODUCTO DE ABRILLANTADO NI NINGUNA OTRA SOLUCIÓN QUÍMICA Limpie el radiador siguiendo las etapas anteriores y guárdelo en un lugar fresco y seco Este radiador no se desmonta LIMPIEZA Y ALMACENAMIENTO CARACTERÍSTICAS ELÉCTRICAS Las características eléctricas de este aparato son 1 500 W 120 V 60 Hz HZ 510_OM_Rev1 qxd 6 22 06 10 59 AM ...

Page 18: ... la compra inicial del producto a partir de la fecha de compra inicial B Kaz se reserva todo derecho de reparación o sustitución del presente producto si se constata que presenta un defecto de fábrica o mano de obra Todo producto defectuoso debe devolverse al lugar donde lo compró y de acuerdo con la política de dicho comercio Seguidamente todo producto defectuoso cuya garantía esté en vigor podrá...

Page 19: ...HZ 510_OM_Rev1 qxd 6 22 06 10 59 AM Page 19 ...

Page 20: ...HZ 510_OM_Rev1 qxd 6 22 06 10 59 AM Page 20 ...

Reviews: