background image

3

NOTE: NEVER LEAVE AN OPERATING UNIT UNATTENDED

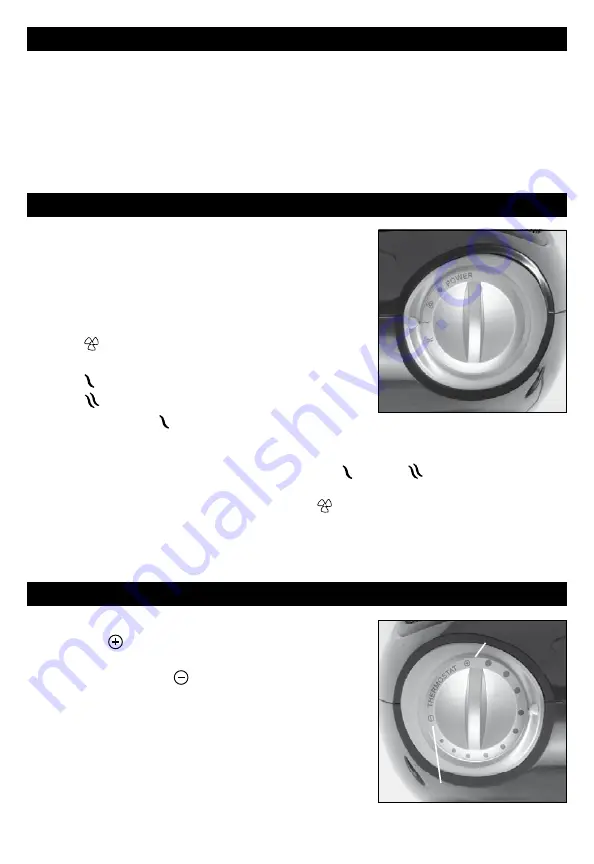
•  With the POWER KNOB in the Off (•) position, plug the heater 

into a polarized 120V outlet. 

DO NOT FORCE THE POLARIZED 

PLUG INTO THE OUTLET;

 it will only fit one way.

•  The POWER KNOB is equipped with two (2) settings  

plus a fan setting:

    1) Fan  (

) - this setting uses the unit as an air circulator  


         without heat

    2) Low (

) - this setting uses 900 watts of power

  3) High (

) - this setting uses 1500 watts of power

NOTE: Because the LOW ( ) setting does not require as much 

electricity to operate, it is more energy efficient and may be a better option if you are concerned about 

saving energy.

•  Turn heater on by turning the POWER KNOB to either LOW ( ) or HIGH ( ), the power light will come 

on.

•  For FAN only operation, turn the selector knob to FAN ( ) and turn the thermostat to its highest setting. 

The unit will work as an air circulator without heat.

•  To disconnect heater, turn POWER KNOB to the OFF (•) position and unplug the heater when you are 

finished using it.

OPERATION

SET UP

THERMOSTAT

Place the heater on a firm, level, open surface free from obstructions and at least 3 feet (0.9m) away from 

any wall or combustible material

DO NOT 

use on an unstable surface such as bedding or deep carpeting.

BE SURE THE HEATER IS NOT IN A POSITION WHERE IT MAY BE TRIPPED OVER BY CHILDREN OR PETS.

To set the Thermostat, turn the Thermostat Control fully to the 

highest setting (

)

When the room reaches a comfortable temperature, slowly turn the 

Thermostat Control towards ( ) until both the heating element 

and fan go off (the Power Light will remain on). This is the point at 

which the Thermostat setting equals the room temperature. At this 

setting, the Thermostat will automatically turn the heater back on 

and then off as needed to maintain the selected temperature.
Turn the POWER KNOB to OFF (•) and unplug the heater when you 

are finished using it.

Decrease Temperature

Increase Temperature

Summary of Contents for HZ-1350 Series

Page 1: ...s hot when in use To avoid burns Do not let bare skin touch hot surfaces If provided use handles when moving this heater Keep combustible materials such as furniture pillows bedding papers clothes and curtains at least 3 feet 0 9 m from the front of the heater and keep them away from the sides and rear 3 Warning Extreme caution is necessary when any heater is used by or near children or invalids a...

Page 2: ...uids are used or stored 17 Warning Use this heater only as described in this manual Any other use not recommended by the manufacturer may cause fire electric shock or injury to persons 18 Warning Always plug heater directly into a wall outlet receptacle NEVER use with an extension cord or relocatable power tap outlet power strip 19 Warning NEVER tamper with this product or attempt to fix it Any ta...

Page 3: ...tor without heat To disconnect heater turn POWER KNOB to the OFF position and unplug the heater when you are finished using it OPERATION SET UP THERMOSTAT Place the heater on a firm level open surface free from obstructions and at least 3 feet 0 9m away from any wall or combustible material DO NOT use on an unstable surface such as bedding or deep carpeting BE SURE THE HEATER IS NOT IN A POSITION ...

Page 4: ...fails to operate one of the above mentioned safety features may have been activated to prevent overheating Be sure the power cord is plugged into a working electrical outlet Check your Thermostat setting The unit may simply be off because you have reached your desired heat setting Check for any obstructions If you find an obstruction turn the heater OFF and unplug it Allow the heater to cool compl...

Page 5: ...ary from jurisdiction to jurisdiction This warranty applies only to the original purchaser of this product from the original date of purchase B At its option Kaz will repair or replace this product if it is found to be defective in material or workmanship C This warranty does not cover damage resulting from any unauthorized attempts to repair or from any use not in accordance with the instruction ...

Page 6: ...6 ...

Page 7: ... que votre peau nue ne touche pas les surfaces chaudes Utilisez les poignées du radiateur pour le déplacer s il en possède Gardez les corps combustibles meubles oreillers literie papiers vêtements et rideaux par exemple à au moins 0 9 m 3 pi de l avant du radiateur et éloignez les des côtés et de l arrière 3 Avertissement Redoublez de vigilance lorsque le radiateur est utilisé par des enfants ou e...

Page 8: ...erme des pièces chaudes et produisant des étincelles Ne l employez pas dans les lieux où sont utilisés ou entreposés essence peinture ou liquides inflammables 17 Avertissement N utilisez le radiateur que tel que décrit dans ce guide Tout autre emploi que ne conseille pas le fabricant peut être source d incendie de choc électrique ou de blessures corporelles 18 Avertissement Branchez toujours le ra...

Page 9: ...sque vous cessez de l employer réglez le BOUTON D ALIMENTATION en position d ARRÊT puis tirez la fiche hors de la prise de courant FONCTIONNEMENT MISE EN PLACE THERMOSTAT Placez le radiateur sur une surface rigide plane et d aplomb exempte d obstructions et située à au moins 3 pieds 0 9 mètre des murs et des matières combustibles NE le faites PAS fonctionner sur une surface instable literie ou moq...

Page 10: ...atteint la température préréglée au thermostat Vérifiez s il y a une obstruction quelconque Si vous découvrez une obstruction réglez le radiateur en position d ARRÊT et débranchez le Laissez l appareil refroidir complètement et retirez l obstruction Attendez au moins dix minutes avant de rebrancher l appareil et de suivre les instructions de la section FONCTIONNEMENT SERVICE À LA CLIENTÈLE Questio...

Page 11: ...Cette garantie ne s applique qu à l acheteur initial de ce produit à partir de la date d achat B Kaz peut à son gré réparer ou remplacer ce produit s il s avère défectueux en raison d un vice de matériau ou de main d œuvre C Cette garantie ne couvre pas les dommages résultant d une tentative non autorisée de réparer cet appareil ni d une utilisation non conforme à ce manuel d instructions Appelez ...

Page 12: ...ion CANADA Flat Size IN W11 x H8 5 Folded Size IN W5 5 x H8 5 Scale 1 1 Material 50 gloss or matte text inside pages Minimum 80 gloss or matte text cover Page Count 12 Revision 4 Date 25OCT16 Release Date 7NOV16 Re release Date Special Instructions Colors Dielines Do not print Spot Colors Quality Requirement of Artwork and Quality Clarification Process of Artwork Printing Meet Eng QS 06 02 Kaz USA...

Reviews: