Document 800-04559
Rev D
111
11/09
Operation
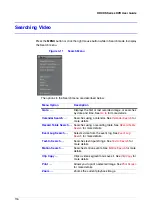
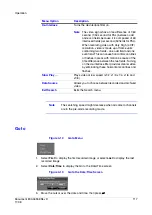
Click the right mouse button during live monitoring to display the Mouse menu (see
Figure 4-7
Mouse Menu
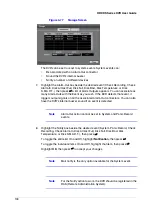
Select Display to show the Mouse Display menu (see
Figure 4-8
Mouse Display Menu
1.
Clicking Camera and selecting the camera number is the same as pressing the
individual camera buttons on the front panel which displays the selected camera
full screen. When in the PIP display mode, click the right mouse button and select
PIP to change the location and the size of the PIP.
2.
Select PIP, 2x2, 3x3 and 4x4 to display the cameras in the selected multi-view
screen mode.
3.
Click Previous Group or Next Group is the same as pressing the Left or Right
buttons on the front panel which moves to the previous or next page.
4.
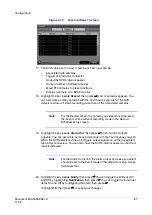
Select Edit Group for the active cameo function.
a.
Select Edit Group and choose a camera that you want to change display
position (for example, Camera A).
Mouse Menu Options
Description
Freeze, PTZ …, Spot
Monitor …
Is the same as pressing the FREEZE, PTZ and
SPOT buttons as described in
.
Zoom …
Zooms in on the live image. While in the zoom
mode, there are two ways to move around the
enlarged portion of the video.
•
There is a PIP located in right-bottom corner.
The PIP has a rectangle showing what area of
the image has been enlarged. Click inside the
PIP to move to another area of the image you
want enlarged.
•
Click and hold the mouse button on the
enlarged video and drag the video.
Summary of Contents for HRXDS16
Page 8: ...8 ...
Page 12: ...Contents 12 ...
Page 18: ...Tables 18 ...
Page 24: ...24 HRXDS Series DVR User Guide ...
Page 102: ...102 HRXDS Series DVR User Guide ...
Page 138: ...138 HRXDS Series DVR User Guide ...
Page 152: ...152 HRXDS Series DVR User Guide ...
Page 154: ...154 HRXDS Series DVR User Guide ...
Page 156: ...156 HRXDS Series DVR User Guide ...
Page 160: ...160 HRXDS Series DVR User Guide ...
Page 162: ...162 HRXDS Series DVR User Guide ...
Page 164: ...164 HRXDS Series DVR User Guide ...
Page 171: ......

