background image

35

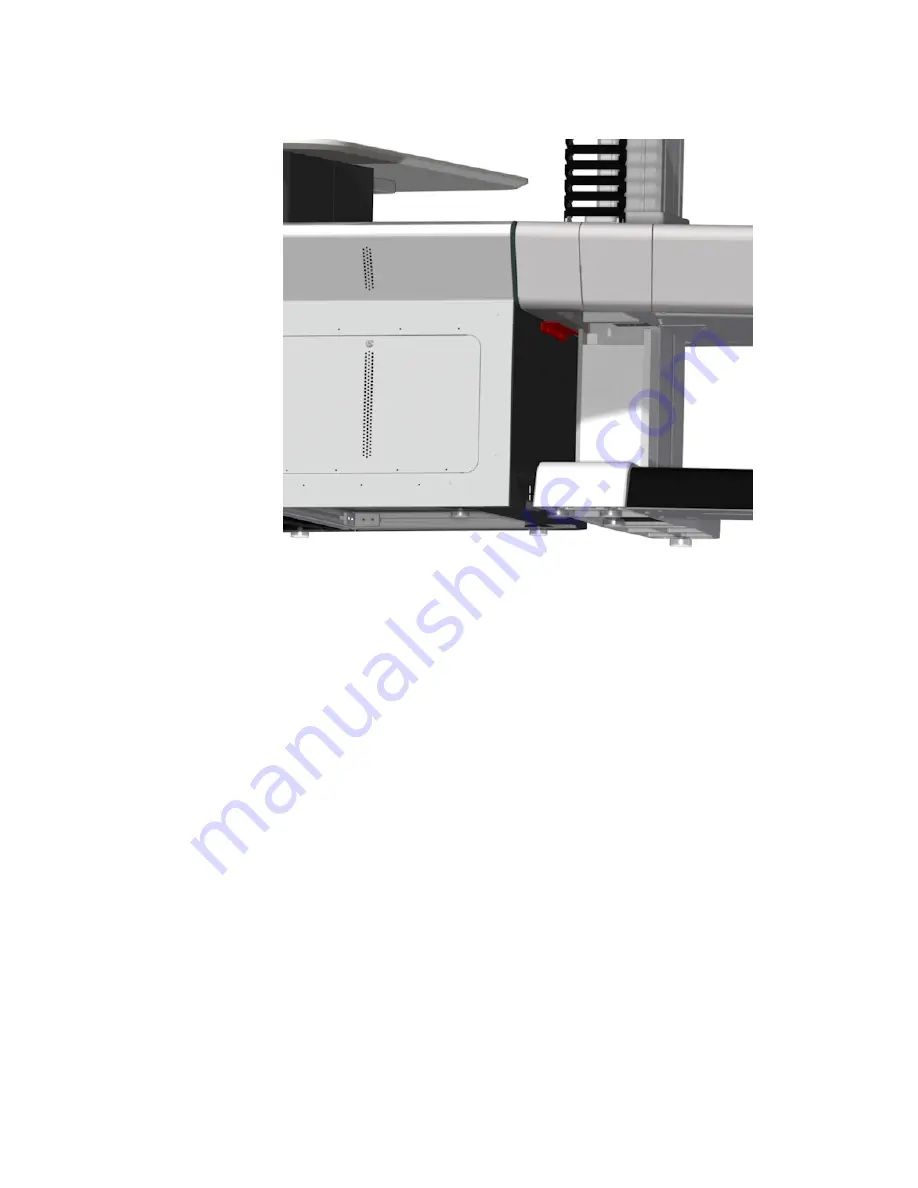
6. Tighten the bolts to fix the bracket to the side panel and screw a

tech screw into each of the three holes in the top of the bracket to
secure it to the console.

7. Open the console lower raceway and you will find a power cable

labeled

RAUX

or

LAUX

meaning left or right side of the console.

8. Remove the front panes of the auxiliary unit. Feed the cable

through the console foot and into the auxiliary. Pull the cable up
and behind the frame and fan, and then plug into the power bar,
as shown below in green.

Chapter 3 - Installing an Experion Orion Console

Summary of Contents for Experion Orion Console

Page 1: ...Experion PKS Release 516 Orion Console Installation Guide EPDOC X313 en B June 2015 ...

Page 2: ...al Sàrl While this information is presented in good faith and believed to be accurate Honeywell disclaims the implied warranties of merchantability and fitness for a purpose and makes no express warranties except as may be stated in its written agreement with and for its customer In no event is Honeywell liable to anyone for any direct special or consequential damages The information and specifica...

Page 3: ...ion Console 23 Installing the alarm light panel 26 Raising and lowering the work surface 27 Setting preset heights for the work surface 29 Confirming the installation of an Experion Orion Console 30 Installing an auxiliary unit 32 Chapter 4 Installing equipment in an Experion Orion Console 37 Installing hardware within the equipment tray 38 Chapter 5 Servicing an Experion Orion Console 39 Cleaning...

Page 4: ...4 Contents ...

Page 5: ...IDE This guide describes how to plan assemble and service Experion Orion Console Revision history Revision Date Description A June 2014 Initial release of the document B June 2015 Added information about the Auxiliary Units 5 ...

Page 6: ...6 Chapter 1 About this guide ...

Page 7: ...ace is being lowered The top of the equipment tray should never be used as an additional work surface and nothing should be placed on top of it or over the ventilation holes CAUTION ELECTRICAL AND FIRE SAFETY To avoid injury or damage from electrical hazards l Do not perform electrical work on the console without proper training and qualifications l Do not perform electrical work without first dis...

Page 8: ...tor l Do not place objects or position body parts between the work surface and the top of the equipment tray DAMAGE OR INJURY COULD RESULT WHEN THE WORK SURFACE IS LOWERED l Do not disable safety features such as height adjustment limit switches and so on BYPASSING SUCH FEATURES OR GUARDS COULD RESULT IN INJURY OR DAMAGE TO EQUIPMENT l The top panels or rear door of the equipment tray may be opene...

Page 9: ... the monitor arms may damage the monitor arms and could break the monitor arm and or fall off causing personal injury and damage to the equipment and consoles The weight limits of each monitor arm should be observed and monitor arms should not be loaded with a heavier weight The weight limits of each monitor arm is 18 1 kg 40 lbs For monitors weighing more than 18 kg the monitor weight can be dist...

Page 10: ...single cable or plugged into a single socket using multi adaptors is dangerous and can result in power overloads short circuits and electrical shocks l For data cables and connectors only manufacturers recommended cables should be used in single cables to avoid poor connections ground loops and signal degradation This could detrimentally affect the operation of the data connections l The console i...

Page 11: ...on Console into position 18 Attaching the work surface to the Experion Orion Console base 19 Attaching monitors to the Experion Orion Console 21 Running cables through the Experion Orion Console 23 Installing the alarm light panel 26 Raising and lowering the work surface 27 Setting preset heights for the work surface 29 Confirming the installation of an Experion Orion Console 30 Installing an auxi...

Page 12: ...osition consoles joined together and sharing a middle foot the crating and packing is identical for both consoles The two position console is designed to be installed on site using this guide but it is not recommended that the three position console be installed by the customer without assistance from a trained and certified installer Therefore the instructions in this guide are limited to those f...

Page 13: ...units are shipped in a separate crates These crates may not be standard and are customized depending on the number of auxiliary units being shipped The contents of each crate will be clearly identified and itemized on the shipping documents Each auxiliary unit will be shipped as two pieces 1 Auxiliary unit base 2 Work surface Unpacking the Experion Orion Console Details about the Experion Orion Co...

Page 14: ...be removed The console base is sitting on top of a fixed internal platform in the crate 2 Remove the console base canvas straps Both the console base and the work surface are strapped down in the shipping crate using canvas straps that are attached to four anchoring points one in each corner of the floor of the crate Remove the canvas straps securing the console base 14 Chapter 3 Installing an Exp...

Page 15: ...nsole using any part of the equipment tray or lift columns The semi assembled console base must always be lifted from UNDERNEATH THE CONSOLE FEET using the lifting straps With one person using each of the lifting straps located on each console foot and a third person to steady the console by supporting not lifting the middle of the equipment tray lift and remove the console base from the platform ...

Page 16: ...olly or trolley to transport it to the final location 4 Remove platform The platform supports the console base during transportation of the shipping crate To remove the alarm light panel and work surface from the crate you need to remove this platform by removing the screws holding it in place 16 Chapter 3 Installing an Experion Orion Console ...

Page 17: ...n in the shipping crate using canvas straps that are attached to four anchoring points one in each corner of the floor of the crate Remove the canvas straps securing the alarm light panel and the work surface 6 Alarm light panel ATTENTION The alarm light panel must be handled carefully as the surface can scratch easily Do not Chapter 3 Installing an Experion Orion Console ...

Page 18: ...ch have standard crate and packing the crate and packing for any accessories and auxiliary units may vary according to what is being shipped Auxiliary units always consist of two pieces a work surface and the base units which require assembly for installation Those items should be unpacked following the same instructions provided above for the main base unit and work surface Placing the Experion O...

Page 19: ...ll and maintain equipment contained in the equipment tray Therefore you need to allow for adequate space between any wall or barrier that is located behind the console and the rear of the console Figure 3 2 Space considerations at the rear of the Experion Orion Console Electrical and data connections For more information about electrical and data connections see the Experion Orion Console Specific...

Page 20: ...th the mounting holes on the top of the lift columns insert and loosely tighten the bolts While you are attaching the work surface make sure someone else is holding the work surface steady 4 Repeat for the other lift column but you may find that you need to gently move the console feet so that the mounting points in the work surface align with the mounting holes on the top of the lift column Inser...

Page 21: ...one else is holding the work surface steady 3 When you have all bolts attached you can tighten them The work surface is now attached to the auxiliary unit base Attaching monitors to the Experion Orion Console Attach the high definition monitors to the slat rails on the Experion Orion Console The instructions for attaching monitors to the Experion Orion Console are available as a video on YouTube h...

Page 22: ...de mount away from the slat rail and then remove the slide mount from the slat rail 3 Attach the slide mounts to the monitor arms 4 Attach the monitor plate a Align the monitor plate with the mount points on the back of the monitor b Ensure that the monitor plate has the correct orientation c Insert all screws Once all the screws are in place tighten them using the hex key 5 Slide the monitor arms...

Page 23: ...ion Orion Console Run cables through the Experion Orion Console such as power cables HDMI cables and USB cables The instructions for running wires in an Experion Orion Console are available as a video on YouTube http youtu be ufz3UfFpHRM An outline of the steps required to run the cables is also provided below Prerequisites n You will need the following items from the toolkit l Cable ties l Scisso...

Page 24: ...p 5 Push the power cable plug into the power strip 6 Repeat these steps for the slat wall power strip on the other side of the console a Pull the cable up from the flexible cable track and into the slat rail posts b Pull the cable across from the slat rail posts and into the slat wall cavity c Push the power cable plug into the power strip d Repeat these steps for the slat wall power cable on the ...

Page 25: ...trol dongle push in the work surface control cable and push in the safety pressure tape cable To run the alarm light panel cables 1 Pull the alarm light cable up from the flexible cable track into the slat rail posts and then pull it across the back of the slat wall cavity 2 Connect the two parts of the alarm light cable together and secure it within the slat wall cavity using cable ties 3 Repeat ...

Page 26: ... to the related equipment 4 Unfasten the power cable for the work surface 5 Pull the cable down into the flexible cable track 6 Thread the cable through the opening in the equipment tray and then push the power cable plug into the power strip 7 Connect any work surface devices requiring power to the work surface power sockets located under the work surface power socket lid and thread any excess ca...

Page 27: ...e to rest on top of two pre installed set screws inside the groove to prevent it from resting on the LEDs located at the bottom on the groove 3 Insert and loosely tighten each of the five screws 4 Once the five screws are in place tighten all screws Raising and lowering the work surface Raise and lower the work surface using the work surface lift control Figure 3 3 Work surface lift control Chapte...

Page 28: ... When the height of the work surface appears in the work surface lift control display the lift columns are unlocked Release the S button 2 Do one of the following To Do this Raise the work surface Press and hold the up button The work surface will rise and the work surface lift control display will display the height of the work surface Release the up button when the work surface reaches the desir...

Page 29: ...nd will blink for three seconds 3 While the work surface lift control display is blinking press the 1 2 or 3 button to store the work surface height S1 S2 or S3 will appear for one second on the work surface lift control display depending on the memory button you pressed 4 If you do not want to store a work surface height to a memory location press the up or down button To move the work surface to...

Page 30: ...ble from the work surface is connected to the lift control cable located in the flexible cable track Check that the work surface will stop lowering when pressure is applied to the tape switch on the underside of the work surface Place a chair at its highest setting where it can still slide underneath the work surface Do not sit in the chair Standing next to the console use the work surface lift co...

Page 31: ...check that the interior light illuminates When the equipment tray door is opened or the removable covers on the top of the equipment tray are removed LED lighting within the equipment tray illuminates If these lights do not illuminate check the following l The power light located on the power strip within the equipment tray is illuminated l The switch located on the equipment tray door surround is...

Page 32: ...uipment in your console This section explains how to install an auxiliary unit on your console Prerequisites To complete this installation you will need n The 1 1 2 inch button head bolts that came with the unit n 5 32 hex driver n 3 tech screws To install an auxiliary unit 1 Remove the base of the auxiliary unit and the work surface from the shipping crate and use a dolly or trolley to move them ...

Page 33: ... slide the auxiliary unit next to the console and align the back of the auxiliary unit with the console equipment storage Leave a 1 8 0 125 cm gap between the console and the auxiliary unit Chapter 3 Installing an Experion Orion Console ...

Page 34: ...ith the console equipment storage 5 When the two surfaces are level use the hex driver to loosen the bolts on the side panel bracket shown below in red and slide the bracket up to be in contact with the underside of the console 34 Chapter 3 Installing an Experion Orion Console ...

Page 35: ... console lower raceway and you will find a power cable labeled RAUX or LAUX meaning left or right side of the console 8 Remove the front panes of the auxiliary unit Feed the cable through the console foot and into the auxiliary Pull the cable up and behind the frame and fan and then plug into the power bar as shown below in green Chapter 3 Installing an Experion Orion Console ...

Page 36: ...36 Chapter 3 Installing an Experion Orion Console ...

Page 37: ...CHAPTER 4 INSTALLING EQUIPMENT IN AN EXPERION ORION CONSOLE Install and configure equipment in an Experion Orion Console In this section Installing hardware within the equipment tray 38 37 ...

Page 38: ...d be positioned towards the front of the console and the front of the workstation should be positioned towards the rear of the console This ensures that most cable connections at the rear of the workstation are as close as possible to the power strip and cable tray located in the equipment tray When installing thin clients it is strongly recommended that you use the mounting kit supplied This will...

Page 39: ... Experion Orion Console In this section Cleaning the Experion Orion Console 40 Maintaining Experion Orion Console components 43 Turning off and turning on power to the lift columns 43 Recalibrating the lift columns 44 Troubleshooting lift column errors 45 39 ...

Page 40: ... the acrylic alarms panels as they will leave unsightly marks and scratches that may not be able to be removed Spray and aerosol may damage nearby electronic monitors or other sensitive equipment on the consoles Chemical cleaners may damage and discolor the acrylic and its special abrasion resistant coating Only lint free water dampened microfiber cloths should be used for cleaning the acrylic ala...

Page 41: ... remove Item Cleaning technique Spills and stains Most everyday spills can be removed with the cleaning techniques listed Some stains however such as food dye tea and fruit drinks may require a bit more aggressive cleaning These common stains can be removed with a cloth dampened with a small amount of full strength bleach bleach should only come in contact with the surface for 2 to 5 minutes follo...

Page 42: ...y and longevity Painted surfaces Use a soft damp cloth not wet for general cleaning purposes If stains are present use a mild soap The paint used on the console is an HP scratch resistant powder coat however the scratch resistance is only designed to maintain the paint and delay the signs of normal wear and tear Avoid using any other cleaning fluid or abrasive materials which may scratch the powde...

Page 43: ...r arms Supporting brackets Once a month you should check the tightness of the screws on the supporting brackets located within the equipment tray If required tighten these screws Turning off and turning on power to the lift columns Turn off and then turn on power to the lift columns to reset them To reset the lift columns 1 In the lower raceway locate and remove the power cable from the lift colum...

Page 44: ...k surface There is a safety cut out mechanism to prevent this but that should be seen as a LAST RESORT safety device Prerequisites n Electrical connections to the console are in place and power has been restored To reset the lift columns 1 Press and hold the S button on the work surface lift control for one second 2 Press and hold the down button on the work surface lift control Keep holding the d...

Page 45: ...te the following steps to reset the lift columns 1 In the lower raceway locate and remove the power cable from the lift column control 2 Wait 5 seconds 3 Insert the power cable back into the lift column control CAUTION If you need to reset the lift columns the operator should never stay seated with their legs underneath the work surface as the columns may return to their lowest position and could ...

Page 46: ... has occurred There may be an object on top of the equipment tray or located in front of the equipment tray that is stopping the work surface from lowering Solution Remove any obstructions between the equipment tray and the work surface or the floor and the work surface and try lowering the work surface again Diagnostic check Error code E16 Cause An invalid key sequence has occurred such as holdin...

Page 47: ...r other countries Trademarks that appear in this document are used only to the benefit of the trademark owner with no intention of trademark infringement Third party licenses This product may contain or be derived from materials including software of third parties The third party materials may be subject to licenses notices restrictions and obligations imposed by the licensor The licenses notices ...

Page 48: ...he operational or security capabilities of the software Honeywell investigates all reports of security vulnerabilities affecting Honeywell products and services To report a potential security vulnerability against any Honeywell product please follow the instructions at https www honeywell com en us product security Support For support contact your local Honeywell Process Solutions Customer Contact...

Reviews: