


User Information Guide – Protective Helmets for Structural Firefighting
• Wear protective gloves and eye/face
splash protection when cleaning soiled
items.
• Do not wash protective helmets or other
protective clothing alongside personal
items.
• Do not dry clean your protective helmet
or helmet components.
Routine Cleaning
– Clean your protec-
tive helmet after each use or whenever
your helmet has become soiled. You
may clean your helmet with or without
the ear covers, headband/ratchet
covers, and chinstrap. Use the following
procedures for routine cleaning by hand
of your protective helmet in a utility sink:
1. Choose a utility sink that is specifi-
cally used for cleaning protective
gear; do not use a kitchen sink or
other sink that is employed for
personal products.
2. Remove the ear covers and chin-
straps and wash them separately
using the instructions provided below.
3. Brush off any loose debris.
4. Fill the utility sink with warm water
no hotter than 105°F (40°C).
5. Use a mild detergent in an amount
according to the detergent supplier’s
instructions.
6. Scrub the exterior of the helmet
gently using a soft-bristle brush.
7. Use only a soft cloth or sponge to
clean the EZ-Touch eye protectors.
8. Drain the sink and thoroughly rinse
the exterior of the helmet. Conduct a
second rinse if necessary.
9. Inspect the helmet and, where
necessary, rewash any portions of the
protective helmet that do not appear
clean, or submit it for advanced
cleaning.
10. Dry the helmet by air drying it in a
well ventilated area, but not in
direct sunlight. Do not force-dry
the helmet with a hair dryer, or
place it over a heating duct or
radiator. Forced drying may cause
damage to the helmet
suspension.
11. Only when all components are dry,
reinstall the ear covers and head-
band/ratchet pads according to the
instructions provided below.
12. Rinse the utility sink, following
routine cleaning procedures.
Optional Machine Cleaning of
Selected Components
– Washing
machines and dryers may be used only
for the ear covers and chinstraps. If
washing with protective garments,
wash your ear covers and chin straps
only with the liners of your protective
garment. Do not wash these
components with garment outer
shells, as the hardware and hook and
loop closure tape will damage your
helmet components. Use the
following procedures if machine
washing and drying:
1. Choose a washing machine that is
used for cleaning of protective
clothing. While top-loading
machines may be used, front-
loading washers/extractors are
preferred as these machines are
less likely to physically damage
clothing and can be programmed
for specific water levels,
temperatures, and times.
2. Brush off any loose debris.
3. Pre-treat heavily soiled or
spotted areas.
4. Unless otherwise instructed, load
machine to 80% of its rated
capacity. Overloading will result in
inefficient cleaning.
5. Use mild wash settings, a mild
detergent, and warm water
temperatures.
6. Following washing, remove helmet
ear covers and chin straps from
washing machine and air dry as
specified above, or put in a dryer on
a no-heat setting.
7. Inspect the ear covers and
chinstraps. If necessary, rewash
these components or submit them
for advanced cleaning.
Advanced Cleaning
– Your protective
helmet must be subjected to an ad-
vanced cleaning at least every 12 months
at the time of advanced inspection or
whenever soiling requires additional
cleaning. Advanced cleaning must be
performed by persons qualified by your
department or organization, or by an in-
dependent service provider (ISP) that
has been accepted by Honeywell.
Decontamination
– Proper
decontamination of your protective
helmet will depend on the type and
extent of contamination. If your
protective helmet has become
contaminated with blood or body fluids,
immediately isolate the helmet and
inform your supervisor, department, or
organization. Before reuse of your
protective helmet, it must be subjected
to specialized cleaning procedures that
have been proven to remove
contaminated fluids.
If your protective helmet has become
contaminated with chemicals or other
hazardous substances, immediately
isolate your helmet and remove it from
service, taking care not to cross-
contaminate other clothing items.
Immediately inform your supervisor,
department, or organization. Do not
wear a protective helmet that was
contaminated until verification has been
provided that your protective helmet is
free from contamination.
Removal and Installation of Compo-
nents –
In most cases, your protective
helmet will be provided fully assembled.
However, there are some cases where
you will need to install certain compo-
nents, or you may need to replace some
components that have become dam-
aged. You will also need to remove the
ear covers for complete cleaning of your
helmet. Use the following instructions for
these actions:
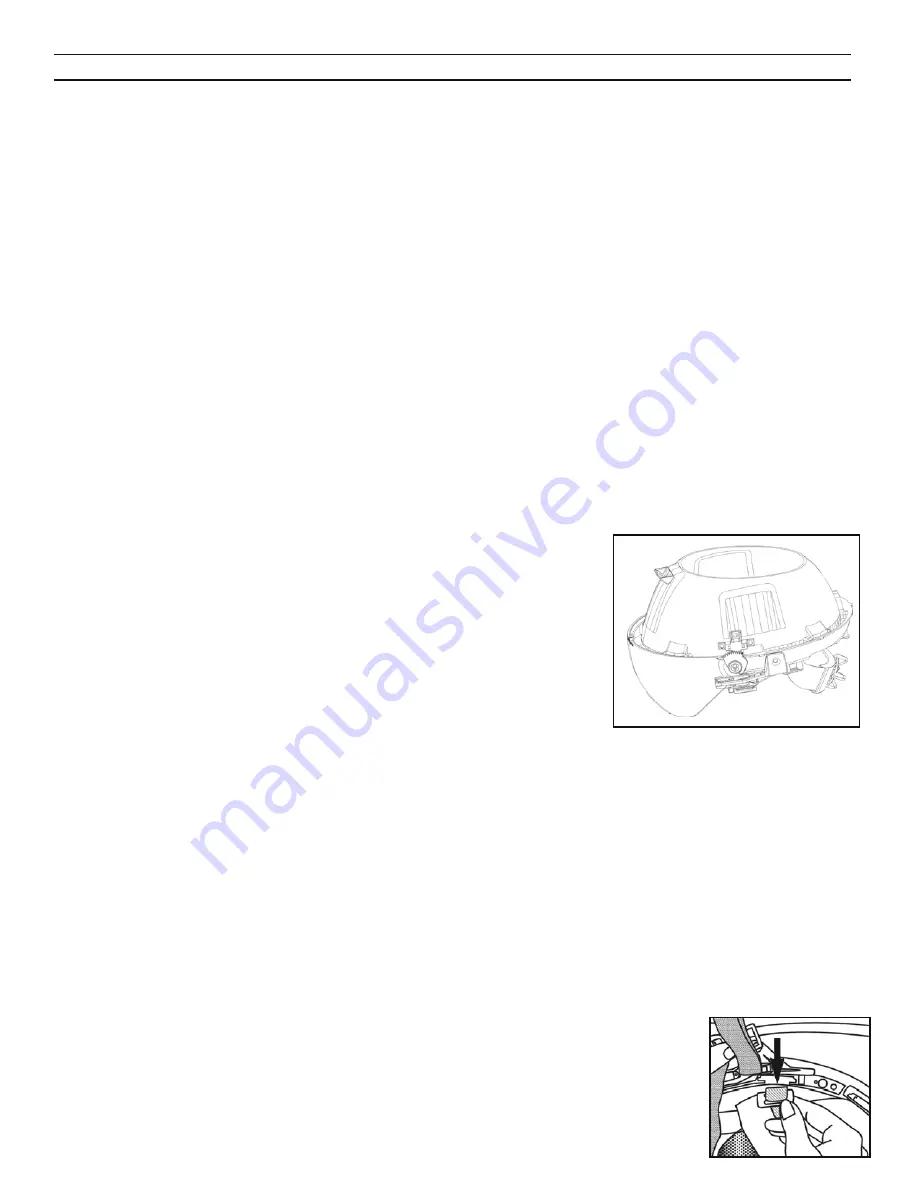
Removing Impact Liner and
Suspension
The one-piece impact liner and suspen-
sion is secured in the shell by four
screws (two on either side of the
helmet). Liners should not be removed
more often than is essential for special
repairs, such as replacing the EZ Touch
eye protector. When necessary, use a
Phillips screwdriver to fully remove each
screw. If the screw turns without
loosening, then use an adjustable or
other type of wrench to hold the nut (top
of side brim) while turning the screw.
Ensure that the screws and nuts are
fully tightened before using your helmet.
Removing Ear Covers
Step 1
–
Remove both
side ribbon
tabs from the
suspension
ring by pulling
them up
firmly.


