6
MOUNTING (
Model 5215)
1.
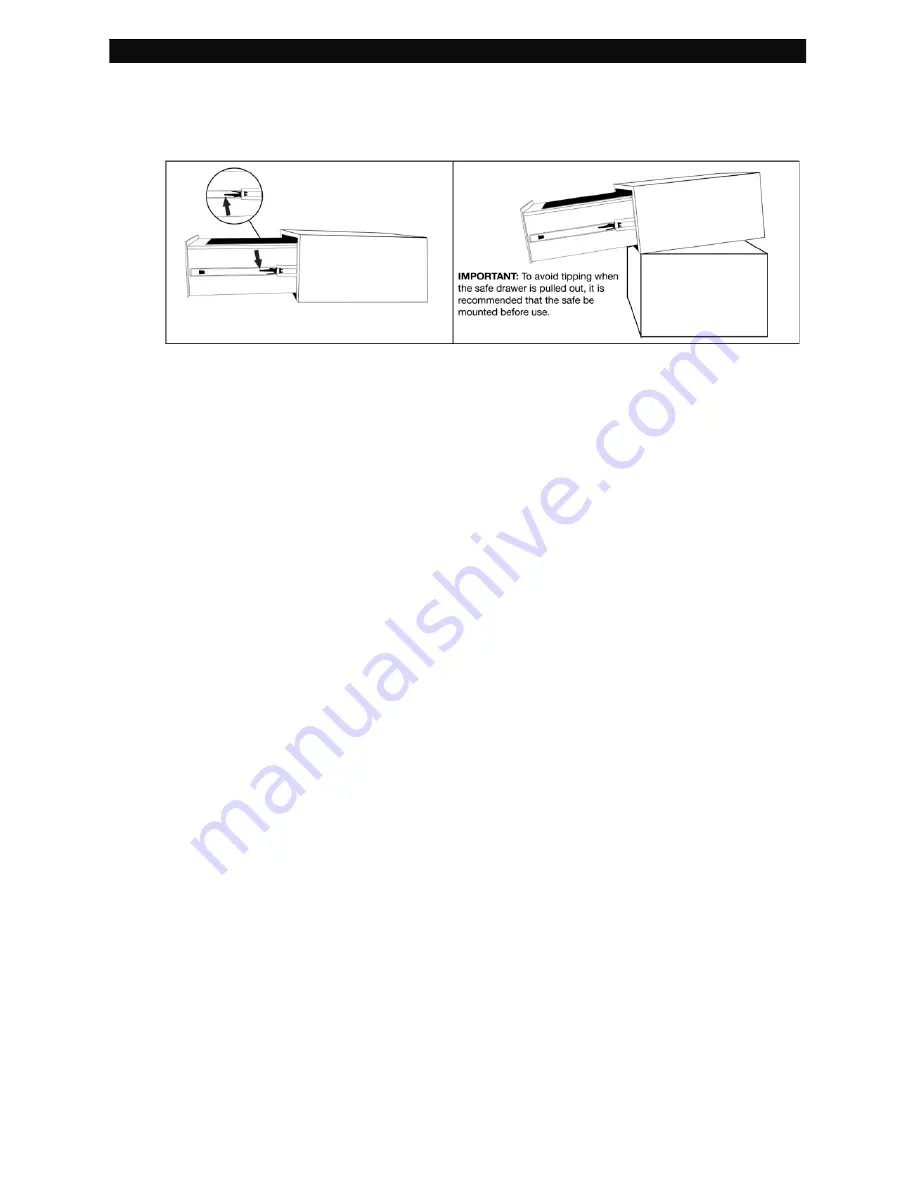
Unlock the safe and Pull the drawer out until it stops. On each of the drawer glides there
is a small plastic latch. To remove the drawer you need to simultaneously push down on
the right side latch while pulling up on the left side latch putting forward pressure on the
drawer as you do. This will release the drawer from the drawer glides and allow the
drawer to be removed.
2.
Determine if you want to secure the safe to the wall on onto the floor and then select
a suitable and convenient location.
3. Locate the predrilled holes on the inside of safe.
4. Place your safe in the desired location.
5. Line up the predrilled holes and mark the floor or wall through the holes. NOTE: It is not
recommended to attempt to bolt to both floor and wall.
6. Move the safe aside to clear marked spots for drilling.
7. Drill holes appropriate for hardware being used and the mounting surface.
INCLUDED: (2 each – bolts, washers and masonry anchors).
8. Place the safe back over the holes and install the fasteners as required.
It is important to note that if prior to installation you have any questions and/or concerns regarding
the proper securing of the safe to a wall or floor you should check with your local home center /
hardware retailer or independent contractor. The securing of the safe to a wall or floor is at the
consumer’s expense and discretion. LHLP, Inc. is not responsible for any costs incurred if the unit
is damaged and needs to be replaced.


