Page 8
i)
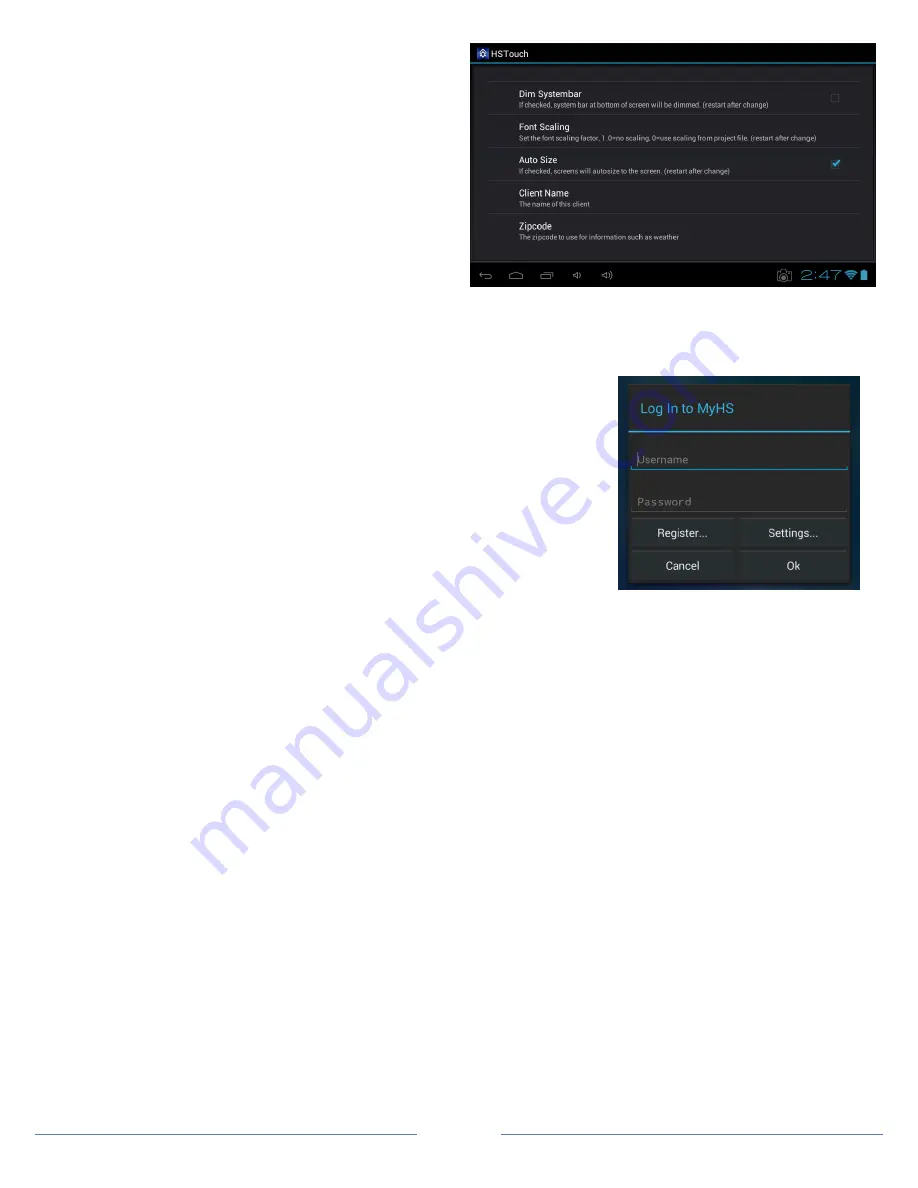
Dim
Systembar
allows for the bottom systembar to
be dimmed.
Font Scaling
allows for changing the
scaling factor.
j)
Auto Size
allows for auto-sizing of the project being
used for your device.
Client Name
will allow you to
change the name of your device’s HSTouch Client.
(For use with HSTouch Designer).
Zipcode
is used
for weather.
k)
Now that your Client has been set up, go back to
the Main Screen and go to the settings menu on
the bottom right. Click Exit. Now go to your app
drawer and click HSTouch. This will allow for any
changes to take place.
l)
You are now ready to control your home via your device!
Setting Up MyHS
The next step involves going into the HSTouch application and entering in your
Account Username and Account Password.
a)
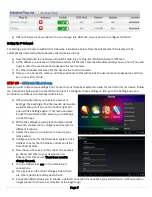
Open up the HSTouch application. It will give you the same prompt as
earlier to Log In to MyHS.
b)
The email you used to register is your Username and the password you
used will be used as the Password.
c)
Click Ok and HSTouch will now connect.
d)
HSTouch will now always connect through MyHS when launching. This
will work from any location and any network.
STEP #10
– System Restore
Doing a system restore will reset your HomeTroller S6 back to factory default and wipe all user data. Please make sure
to make a backup of your HomeSeer HS3 folder (located C:\Program Files(x86)\HomeSeerHS3) if you want to save
anything from your previous HS3 install. Follow below to proceed with a System Restore
a)
Attach a monitor and keyboard to your HT-S6.
b)
Restart your HomeTroller.
c)
Upon restart wait for the HomeSeer Start / Restore Menu to show.
d)
Select the System Restore option.
e)
Press Enter when it prompts to you select the restore option (
ie S6_SYSTEMRESTORE_XXXXXX
)
f)
Your HomeTroler will restart once finished.


