6
5
INSERTING AND REPLACING BATTERIES
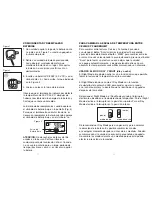
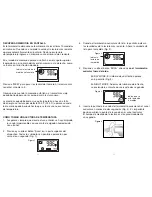
1. Carefully remove the battery cover as
shown in Figure 1 using a small flat
instrument.
2. Carefully remove the battery by pressing
down on the metal clip holding the battery
in place. Do not use metal tweezers or a
screwdriver to remove the battery.
3. Insert one CR-2032 (3.0 V dc) battery with
the plus symbol (+) up as shown in
Figure 2.
4. Replace the battery cover.
Note that the thermometer will display a
default temperature of 00.0˚F/00.0˚C after
battery power is restored and until a
measurement is taken.
When the low battery symbol appears on the
display (Figure 3), the battery should be
replaced. When the low battery symbol
appears with the “Lo” symbol, the battery
must be replaced in order for the ear
thermometer to function.
NOTE: Do not discard used lithium batteries
in trash. Please turn in at an official collection
point. If the monitor will not be used for an
extended period of time (three months or
more), please remove battery.
CHANGING TEMPERATURE SCALE BETWEEN
CELSIUS AND FAHRENHEIT
To switch between Celsius and Fahrenheit readings, press and hold
the “Scan” button while the unit is on and immediately press the
“MEM” button to toggle between scales. Once the desired scale is
selected, press the “Scan” button to take a new reading or allow the
unit to turn off automatically and then turn it back on to view the
converted temperatures stored in memory.
USING NIGHT MODE & DAY MODE
Night Mode is a unique feature that allows a temperature reading to
be taken in a dark setting.
Night Mode functions like Day Mode with the addition of an LED
flashlight feature to aid in guiding the probe into the ear canal and
a display that will illuminate for 5 seconds after measurement.
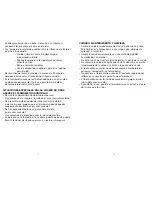
Select Night Mode or Day Mode by using the slide switch on the
right side of the device. For Night Mode, slide the switch into the
up position. For Day Mode, slide it into the down position.
Day Mode is recommended for general use in order to preserve
battery life. Modes can be changed at any time before or after
measurement. They can also be changed regardless of whether
the unit is turned on/off. Do not change modes during measure-
ment as the accuracy of the reading may be affected.
°
°
Figure 3
Figure 1
Figure 2
(UP)
(DOWN)
Day Mode
Night Mode
Low battery
warning

