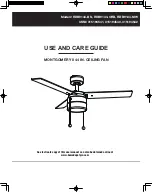
HOMEDEPOT MONTGOMERY II Use And Care Manual Download Page 5


5


1


WARNING

personal injury, mount to outlet box marked acceptable for

screws provided with the outlet box.


Secure the outlet box directly to the building structure. Use


appropriate fasteners and building materials. The outlet
box and its support must be able to fully support the moving
weight of the fan (at least 35 lbs.). Do not use plastic outlet
boxes. Figures 1 and 2 are examples of different ways to
mount the outlet box

Figure 

1

Figure 2

Figure 3

Outlet Box

Outlet Box

Outlet Box

Place the downrod assembly (H) through the ceiling canopy (B) 
and insert the motor wires through the downrod assembly (H) 
(Figure 4). 

Determining mounting method

Installing the fan body

2

Remove the split pin (1), washer (2) and pivot pin (3) from the 
downrod assembly (H) and set them aside for later.

Figure 4 

H

B

C

3

2

1

Secure the motor shaft and downrod by tightening the 
screw on the downrod (H) (Figure 5).

Figure 5 

H

B

C

You may need an installation hanger bar as shown in 
Figure 3 (available at your Retailer) to hang your fan 
where there is an existing fixture but no ceiling joist.

present, read the following instructions. 

Disconnect the power by removing fuses or turning off 
circuit breakers.

Push the pivot pin (3) through the motor shaft and downrod 
holes (Figure 5). Secure the pivot pin (3) by installing the 
washer (2) and then inserting the split pin (1) into the 
pivot pin (3) and bending the ends to prevent it from falling 
out. (Figure 5).

If there is not an existing UL-Listed metal mounting box 

To reduce the risk of fire, electrical shock, or

fan support of 15.9 kg (35 lbs.) or less and use mounting

Installation 

Summary of Contents for MONTGOMERY II

Page 1: ...ERY II 44 IN CEILING FAN USE AND CARE GUIDE Model RDB9144 BN RDB9144 ORB RDB9144 MW USN 315194541 315194540 315194542 An electronic copy of this user manual can also be obtained online at www homedepotpro com ...

Page 2: ...g or cleaning unit switch power off at service panel and lock service disconnecting means to prevent power from being switched on accidentally When the service disconnecting means cannot be locked securely fasten a prominent warning WARNING personal injury mount to an outlet box acceptable for fan provided with the outlet box Most outlet boxes commonly used for the support of lighting fixtures are...

Page 3: ...hes of this type give their longest useful life when protected from varying weather conditions A certain amount of wobble is normal and should not be considered a defect Servicing performed by unauthorized persons shall render the warranty invalid There is no other express warranty The retailer hereby disclaims any and all warranties including but not limited to those of merchantability and fitness...

Page 4: ...escription Quantity A Mounting bracket 1 B Ceiling canopy 1 C Fan motor with switch housing 1 D Set of blade holders with blade holder screws pre installed E Set of blades 3 1 G Pull chain pendant 2 3 H H in downrod assembly 1 2 Shatter resistant shade F I 4 1 2 I RDB9144 MW BN ORB Pre installation continued 9 watt E 26 LED A19 bulb ...

Page 5: ...washer 2 and pivot pin 3 from the downrod assembly H and set them aside for later Figure 4 H B C 3 2 1 Secure the motor shaft and downrod by tightening the screw on the downrod H Figure 5 Figure 5 H B C You may need an installation hanger bar as shown in Figure 3 available at your Retailer to hang your fan where there is an existing fixture but no ceiling joist present read the following instructio...

Page 6: ...acket A Attach the mounting bracket A on the electrical box by sliding the mounting bracket A over the screws provided with the outlet box Make sure the mounting bracket A is level You may need to insert additional washers not provided between the outlet box and the mounting bracket A to make it level Note the flat side of the mounting bracket A should be toward the electrical box REMEMBER to turn ...

Page 7: ... are no loose strands or connections Use the plastic wire nuts BB supplied with your fan and secure the connectors with electrical tape Follow the steps below to connect the fan to your household wiring Connect the fan supply black wire and light supply blue wire to the black household wire as shown in Figure 8 Do not connect the blue wire if the light kit is not used Connect the neutral fan white...

Page 8: ...screws 1 on the blade holder fit into the holes on the motor Figure 11 Tighten the pre installed blade holder screws 1 When the electrical connections are established take the fan off the hook Slide the ceiling canopy B up the downrod H making sure the ball joint groove engages with the ceiling canopy entry hole tab Slide the bayonet slots on the ceiling canopy B into the screws at either end of th...

Page 9: ...nce from the tip of one blade to the ceiling as shown in Figure 12 Rotate the fan until the next blade is positioned in the same place as the previous blade and measure again Repeat for each blade Measurements should be within 1 8 in If blade wobble is still noticeable interchanging two adjacent side by side blades can redistribute the weight and possibly result in smoother operation Install light...

Page 10: ...r air conditioner on a higher setting without affecting your comfort Cool weather Reverse An upward air flow moves warm air off the ceiling area as shown in Figure 16 This allows you to set your heating unit on a lower setting without affecting your comfort Figure 16 The pull chain controls the fan speed as follows 1 pull High 2 The slide switch controls the direction the fan rotates forward switc...

Page 11: ...iable speed controls If you have installed this type of control choose and install another type of control Make sure the motor housing is a short distance from the ceiling It should not touch the ceiling Some connections may become loose because of the fan s natural movement Check the support connections brackets and blade attachments twice a year Make sure they are secure It is not necessary to r...

Page 12: ...An electronic copy of this user manual can also be obtained online at www homedepotpro com Retain this manual for future use ...

Reviews: