ASSEMBLY
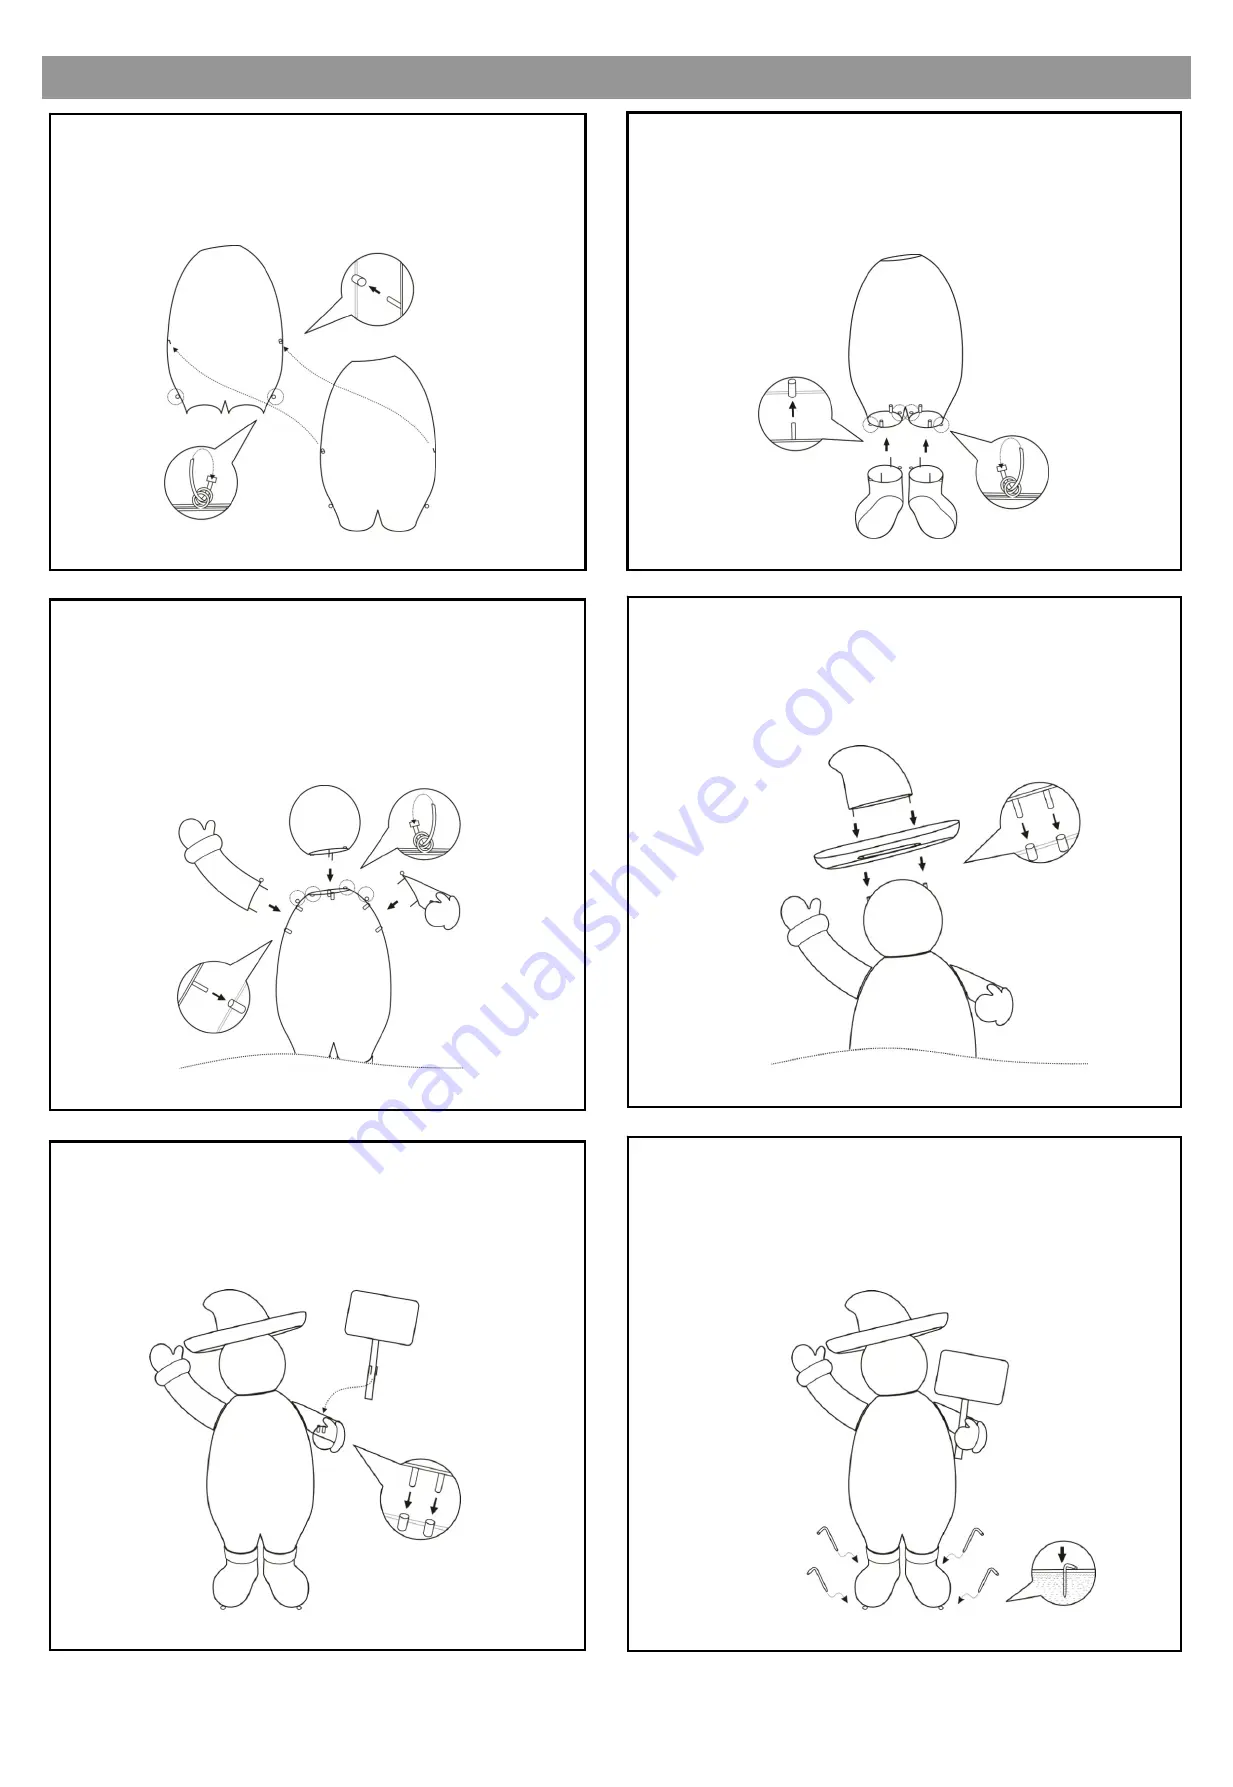
1 Assembling the Body
Insert the metal connecting rods on one Half of Body (D) into the
connecting holes on the other Half of Body. Fasten together at the
metal connecting loops with the Plastic Ties (I).
2 Assembling the Boots to the Body
Insert the two metal connecting rods on the top of each Boot (F) into
the connecting holes at the bottom of the Body. Fasten together at the
metal connecting loops with the Plastic Ties (I).
3 Assembling the Arms & Head to Body
Insert the two metal connecting rods on each Arm (E) into the
connecting holes on the sides of the Body. Fasten together at the
connecting loops with Plastic Ties (I). Insert the two metal connecting
rods of the bottom of the Head (C) into the connecting holes on the
top of the Body. Fasten together at the connecting loops with the
Plastic Ties (I). Note: The Left Arm holds the Sign.
4 Assembling the Hat & Hat Brim to Head
Place the Hat Brim (B) on top of the Head then insert the two metal
connecting rods of the bottom of the Hat (A) through the holes on the
brim and into the corresponding connecting tubes on the Head.
5 Assembling the Sign to the Left Hand
Insert the two metal connecting rods on the pole of the Sign (G) into
the corresponding holes on the Santa's left hand. Note: Make sure
the front of the sign is facing outward.
6 Securing the Santa to the Ground
Secure the figure to the ground using the metal Ground Stakes (H)
provided. Place the Ground Stake through the metal loops on the Boots
making sure the "L" shaped end is over the metal frame then into the
ground.


