OPERATION
HOLZMANN MASCHINEN GmbH www.holzmann-maschinen.at
25
BT150-914
Check before starting work:
All cables and plugs
Table and safety fence on tight fit
The free and centered run of sanding belt and disc
The sanding:
Always use the proper, located in perfect condition abrasives. (Change
wear of abrasives immediately!) With abrasive in good condition you
obtain a good grinding result.
Do not exert too much pressure to the sanding abrasive
Maximum distance table-sanding disc: 1.6mm!
The machine has no clamp opportunity, so it is important, as the whole
area hang up the work piece on the worktable and maintain a firm grip!
14.2
Adjustment
14.2.1
Sanding belt
1.
Plug in the sander.
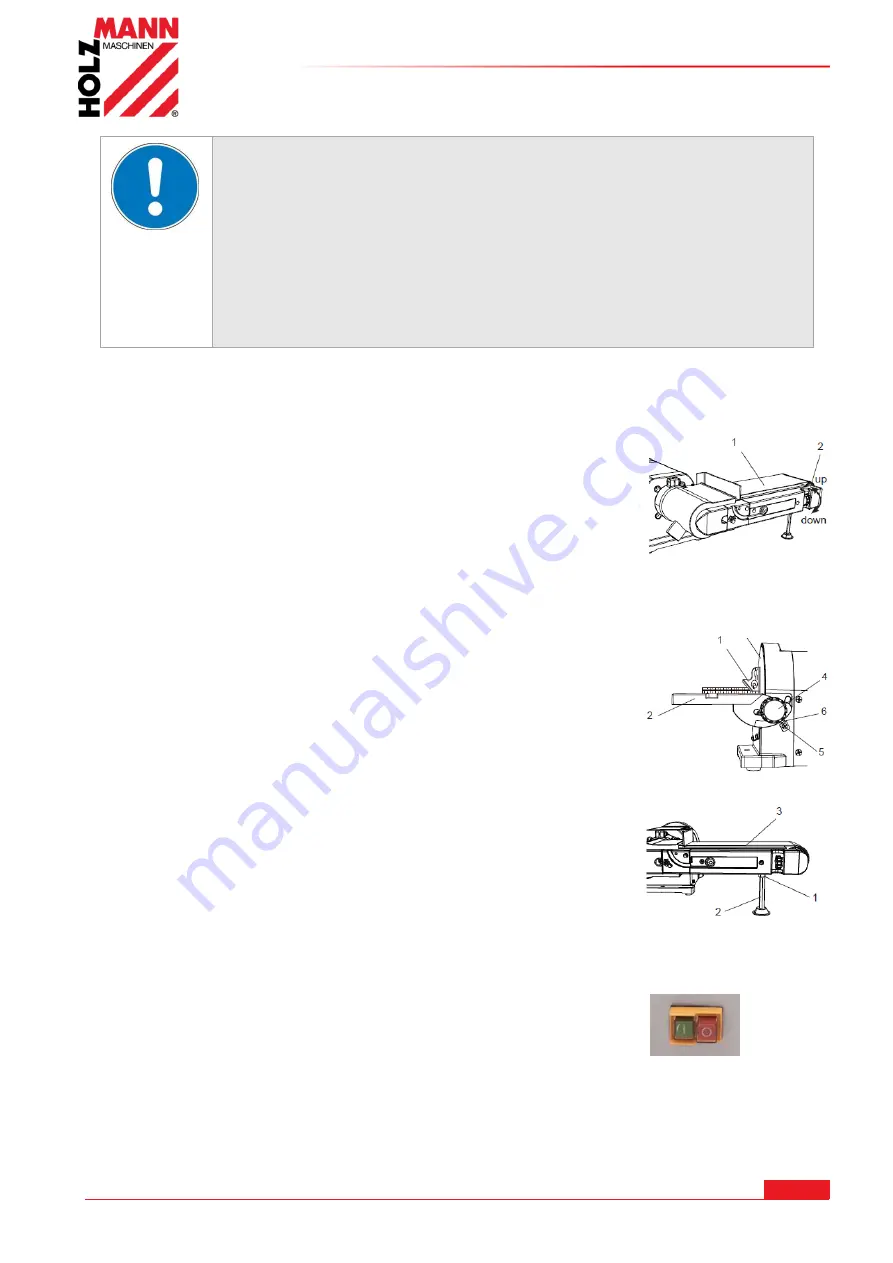
2. Turn power switch ON, then immediately OFF, noting whether the belt (1)
tends to slide off its track, and to which side (front or back) of the sander.
3. If the sanding belt does not slide to either side, it is tracking properly.
4. Viewed from the switch end, if the sanding belt runs toward the disc side,
slightly turn the tracking knob (2) clockwise (down).
5. Viewed from the switch end, if the sanding belt runs away from the disc side,
slightly turn the tracking knob (2) counterclockwise (up).
6. Turn power switch ON, then immediately OFF again, again taking note of any
belt movement.
7. Readjust tracking knob (2) another ¼ turn, necessary.
14.2.2
Sanding table (Disc sander)
1
. Using a combination square (1), place one side of the square on the disc
table (2) with the other side against the sanding disc (3), and check to see if
the disc table is 90° to the disc.
2. If the disc table surface is not 90° to the disc, loosen the table lock knob (4),
adjust table square with disc and tighten the table lock knob (4).
3. Loosen the screw (5) and secure the scale pointer (6) at 0°.
NOTE: The disc table (2) can be tilted from 0° to 45° by loosen ing the table
lock knob (4). Tilt the disc table (2) to the desir ed angle. Tighten table lock
knob (4).
14.2.1
Leveling the sanding Support sanding belt by horizontal operation
The support rod is designed for adjusting the level of sanding belt. To adjust,
please do the following.
1. Loosen the lock nut (1) on the upper end of the support rod (2) with the
adjustable wrench.
2. Adjust support rod(2) upward or downward to leveling the sanding belt(3).
3. When the level of the sanding belt (3) is achieved, tighten the lock nut (1).
14.3
Operating
14.3.1
ON/OFF
To turn the machine on, press “I” (green).
To turn the machine off, press “O” (red).
3
Summary of Contents for BT 150 914
Page 61: ......


