background image

15.0 CONTACT US

Please do not hesitate to contact us if you need further support.

-39-

[email protected] (America)
[email protected] (Canada)
[email protected] (Europe)

+1(855) 888-6699

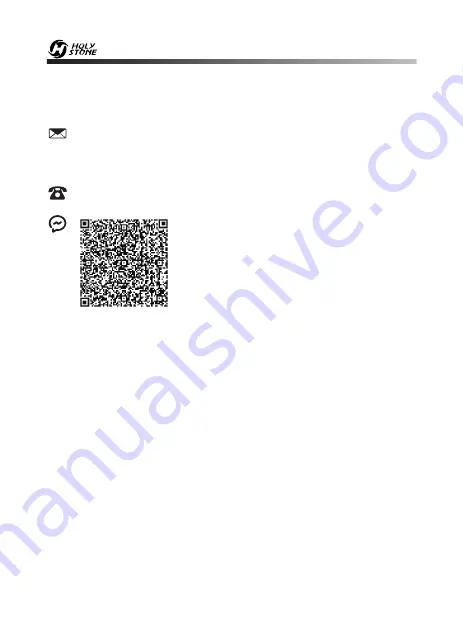
For online support, please scan 

this code with Live Chat

Summary of Contents for HS710

Page 1: ...HS710 Instructions For Use V 4 0 Gebrauchsanweisung www holystone com 1 855 888 6699 usa holystone com USA ca holystone com CA eu holystone com EU ...

Page 2: ......

Page 3: ...46 86 Deutsch 01 45 English ...

Page 4: ...ing 6 4 Mode Switch 7 0 Installation 7 1 Drone Battery 7 2 Propellers 7 3 TF Card 7 4 Preparing the Drone 7 5 Phone Holder 7 6 Transmitter Battery 7 7 Antenna 8 0 Charging 9 0 Operation Guide 9 1 Download APP 9 2 Connect to Wi Fi 9 3 Pairing 9 4 Calibrating the Compass 9 5 Unlocking Locking 9 6 One Key Takeoff Landing 01 01 05 06 07 08 10 10 11 12 13 14 14 15 16 16 17 18 18 19 20 22 23 Contents ...

Page 5: ...1 0 APP Operation Instruction 11 1 Operation Interface 11 2 Follow Me 11 3 Point of Interest 11 4 Headless Mode 11 5 TapFly 11 6 Take Photo Record Video 12 0 Drone Status Indicator 13 0 Specifications 14 0 Trouble Shooting 15 0 Contact Us 16 0 General Information 23 24 27 29 30 31 32 33 34 35 36 38 39 40 ...

Page 6: ...Stone may provide 2 When using this product please be sure to strictly abide by the specifica tion requirements and safety guidelines stated in this document Any personal injury property damage legal disputes and all other adverse events caused by the violation of any of the safety instructions or due to any other factor WILL NOT be HolyStone s responsibility This product is a high precision drone...

Page 7: ...f the indicator etc If there is any problem found after checking the drone please refrain from using it until the problem is resolved Keep in Sight Avoid flying over or near obstacles crowds high voltage power lines trees airports or bodies of water DO NOT fly near strong electromagnetic sources such as power lines and base stations as it may affect the onboard compass DO NOT use this drone in adv...

Page 8: ...u feel tired take medicine or feel unwell and drink alcohol Be aware of the volume of noise that the drone produces Please ensure to keep your distance to avoid ear damage Please ensure batteries are fitted in the correct orientation as shown in the instruction manual Avoid short circuits by fitting the batteries correctly and do not crush or squeeze the batteries as this could cause the risk of a...

Page 9: ...ery in any way DO NOT use the battery if it gives off an odor generates heat becomes discolored deformed or appears abnormal in any way If any of these situations occur while the battery is in use or being charged remove it from the device or charger immediately and discontinue use DO NOT pierce the battery casing with a nail or any other sharp object break it open with a hammer or step on it Disp...

Page 10: ...under any circumstance Failure to keep the device completely dry will result in failure and permanent damage to the unit Be aware that although it might be dry where you are droplets of rain or mist from a river or waterfall could damage your drone where it is flying Frequently check the charging plug and other accessories for signs of damage If any part of the device or cables are damaged avoid u...

Page 11: ...se V 4 0 Gebrauchsanweisung www holystone com 1 855 888 6699 usa holystone com USA ca holystone com CA eu holystone com EU Drone Transmitter Drone Battery Spare Propellers Screwdriver USB Charging Cable Instructions For Use 4 0 PACKAGE CONTENTS ...

Page 12: ... 07 5 0 DRONE DETAILS Vision Positioning Lens Drone Battery Propeller B Propeller B Propeller A Propeller A HD Camera Battery Indicator Power Switch ...

Page 13: ...ons Left Joystick Unlocking Locking LCD Screen Return to Home Power Switch Right Joystick One Key Takeoff Landing GPS Mode Switch Folded Handle Phone Holder Camera Angle Adjustment Short press Take Photos Long press Record Video Long press Speed Switch ...

Page 14: ... Stop Short press the button and the camera icon on the LCD screen flashes once and the camera takes one photo Long press the same button the video icon on the LCD screen flashes slowly and the camera is taking video Long press the button again the camera will stop video recording After turning on the transmitter the GPS Mode is default on GPS mode can be turn off by sliding GPS switch Check the i...

Page 15: ...peed Mode 6 2 LCD Screen Functions 6 3 Low Battery Warning 1 When the battery icon is shown on the LCD screen Pic 1 and the red indicator lights keep flashing slowly it means that the battery is nearly low voltage 2 When the battery icon is shown on the LCD screen Pic 2 and the red indicator lights keep flashing rapidly it means that the battery is in low voltage Pic 1 Pic 2 Satellite Count ...

Page 16: ...wn Left Joystick Right Joystick Left Right Left Right Fly to Left Fly to Right Fly to Left Fly to Right Rotate Left Rotate Right 6 4 1 MODE 2 Default mode from factory MODE switching is only possible before pairing Hold the button and then turn on the power switch button at the same time then press the button for 3 seconds to switch the MODE Check the icon or on the LCD screen to confirms MODE sta...

Page 17: ...led Removal As shown above press the battery lock on both sides of the battery and pull it back to remove the battery 7 1 Drone Battery Attention Before installing the battery please remove the insulation gasket from the battery The battery should be installed firmly failure to do so may affect the flight safety of your drone The drone may crash due to a power cut during the flight ...

Page 18: ... on the correct motor shaft See illustration above An A or B printed on the back of each propeller Lock the propeller to the motor shaft with screws Please rotate each screw clockwise HEAD Removal For propeller removal use the screwdriver included to rotate the screws counterclockwise and remove propeller ...

Page 19: ...not included into the slot as shown above before turning on the drone The drone supports TF card up to 32 GB All arms of the drone are folded before the drone is packaged at the factory First unfold the front arms then unfold the rear arms 7 4 Preparing the Drone HEAD ...

Page 20: ...tely Pic 3 2 Tilt the holder 30 degrees towards you and then you will hear a click sound Pic 4 Pic 5 Pic 6 3 Rotate and fix the support board in place Pic 5 4 Adjust the phone holder upward or downward according to the size of your phone Pic 6 7 5 Phone Holder ...

Page 21: ...g to the given polarity Step 3 Close the battery compartment Insert batteries with correct polarity Do not mix old and new batteries Exhausted batteries are to be removed from the transmitter 7 6 Transmitter Battery 7 7 Antenna There is a buckle on the antenna please follow the steps shown above to open the antenna Not included ...

Page 22: ...wer Bank Connect the Battery to the USB Charging Cable Connect the USB Charging Cable with Power Bank or a USB Adapter 5V 2 0A for charging When the battery is charging the indicator lights on the battery will flash green When the battery is fully charged all four green indicators on the battery will turn solid The charging time is about 2 5 hours ...

Page 23: ...phone to the drone To check the drone s status in the Ophelia GO app Open you phone s Wi Fi settings and click Wi Fi to search for the Wi Fi of the drone Select the Wi Fi network HolyStoneFPV Wait for a couple of seconds for your phone to connect to the drone s Wi Fi This connection is generally represented by the Wi Fi logo appearing on your phone s screen Open the Ophelia GO application The conn...

Page 24: ...e head forward Once the transmitter sends out a long beep sound and the signal icon is shown on the LCD screen which means that the drone has been successfully paired with the transmitter 1 Make sure the transmitter mobile device and the drone battery are fully charged 2 Make sure the drone battery and the propellers are mounted securely 3 Make sure the drone arms are unfolded 4 Make sure the came...

Page 25: ... the indicator lights flash yellow slowly it indicates that the drone can start compass calibration Step 2 Hold the drone horizontally and rotate the drone in 3 complete circles When completed the green lights will flash Step 3 Hold the drone vertically and rotate the drone in 3 complete circles When completed the indicator lights will turn solid green and on the LCD screen changes from slow flash...

Page 26: ...y occur such as close to magnetite deposits or large metallic structures such as parking structures steel reinforced basements bridges cars or scaffolding DO NOT carry objects such as mobile phones that contain ferromag netic materials near the drone during calibration Attention ...

Page 27: ... stop rotating immediately and the drone locks Pic 7 Method 2 After drone lands pull the throttle joystick to the bottom position and hold it for 3 seconds The motor will stop rotating and the drone will be locked Pic 8 Pic 7 Pic 8 Please unlock the motor before take off Short press the red button The motors rotate and the drone is unlocked ...

Page 28: ...the drone is flying short press the button the drone will automatically land on the ground Landing Take off Tip Before flying make sure the GPS Mode is turned on in case the drone gets lost 10 1 Camera Angle Adjustment 10 0 FUNCTION DETAILS During the flight you can dial the wheel left right to tilt the camera up down The gimbal has an 90 tilt range 90 ...

Page 29: ...re and it will fly back to the last recorded Home Point You can exit Failsafe RTH mode by pressing the button or pushing the Throttle Joystick if the transmitter signal is recovered During the Failsafe Return procedure the drone can not avoid obstacles The drone cannot Return to Home if the GPS signal is weak satellites number is less than 7 If there is no GPS signal or the transmitter signal has ...

Page 30: ...f the height no more than 98 feet and the distance no more than 328 feet b When the flight altitude is lower than 98 feet the drone will elevate automatically to 98 feet high then fly back above the Home Point and exit the First Low Voltage RTH a When the flight altitude is higher than 98 feet the drone will fly back above the Home Point then descend automatically to 98 feet high and exit the Firs...

Page 31: ...int then descend vertically b When the flight altitude is lower than 49 feet depending on the flight distance there are two cases b 1 Flight Distance 49 ft The drone will elevate automatically to 49 feet high then fly back above the Home Point and descend vertically b 2 Flight Distance 49 ft The drone will descend vertically and directly on the spot Home Point H 49 ft H 49 ft a Flight Altitude 49 ...

Page 32: ...ptical Flow Positioning System is easily affected by the light strength and features of the surface textures Once the image sensor is not available your drone will switch to Gesture Mode automatically Be cautious to operate the drone in the following situation The Optical Flow Positioning System is typically used in an indoor environ ment when GPS is weak or unavailable It works best when the dron...

Page 33: ...10 Fly over surfaces that are tilting over 30 degrees could not receive the echo of the ultrasonic wave 11 Flying speed should be controlled not to be too fast When drone is 1 meter from the ground the flying speed should not be over 5m s When the drone is 2 meters against the ground the flying speed should not be over 10m s Keep sensors clean at all times The vision system is only effective when ...

Page 34: ...GPS Signal General Settings Drone Battery Level Transmitter Battery Level Wi Fi Signal Strength Transmitter Signal Strength Take Photo Record Video RTH Switch TapFly Delete Submit Homepage One Key Takeoff Landing Camera Parameters Point of Interest Follow Me Headless Mode Distance m Height m Zoom in and out ...

Page 35: ...n the area Use in an open area and be mindful of your surroundings The drone is NOT equipped with obstacle avoidance When the Follow Me function is enabled the drone will follow the GPS in your phone to follow you wherever you go 1 Ensure the drone s flight range is within 16 98 feet 2 Click the icon first then select the icon and follow the prompt box to enter the Follow Me function the drone wil...

Page 36: ... of Interest function 2 The drone will record it s flight position the moment you enter this function as the point of interest The drone will now continuously circle clockwise around the preset point The default radius is 16 feet 3 To exit Point of Interest mode simply click the icon on the application interface again ...

Page 37: ...n during the flight we recommend that the pilot stays facing the same direction that the drone head faces at take off By doing so it is ensured that when the pilot pushes the direction joystick forward backward the drone will fly forward backward toward him her If the pilot moves the direction joystick left right the drone will move left right relative to him her Click the icon first then select t...

Page 38: ...oint on the screen click icon to submit the route The drone will now fly along the path according to the points connected on the map 2 Exit the TapFly mode by clicking the icon again 3 If the flight path submission fails you can choose to re submit or exit again DO NOT fly the drone towards people animals or small fine objects e g tree branches and power lines or transparent objects e g glass or w...

Page 39: ...ng Click the icon to enter the gallery for viewing Without the TF card installed the photos and videos will be saved in app albums After installing the TF card the photos and videos will be saved in both the app album and the TF card If you want to view the photos and videos stored in the TF card in the application please make sure that the phone is connected to the Wi Fi of the drone ...

Page 40: ...al The indicator lights turn solid green Good GPS signal The indicator lights flash green slowly The indicator lights flash red slowly Entering the First Low Voltage RTH The indicator lights flash red rapidly Entering the Second Low Voltage RTH Compass Horizontal Calibration has completed The drone is not connected to the transmitter Indicator Status Meanings ...

Page 41: ...olded TRANSMITTER Operating Frequency 2 452 2 474 GHz Transmitter Power EIRP 16 dBm Max Flight Distance 1968 feet 600 m outdoor and unobstructed Battery Type 2 1 5V AA batteries Not included Operating Temperature Range 32 to 104 F DRONE BATTERY Capacity 1820 mAh Voltage 7 7 V Battery Type Li Po Energy 14 014 Wh Charging Temperature Range 41 to 104 F 5 to 40 C Charging Time about 2 5 hours ...

Page 42: ...P Max Video Resolution 3840 2160P 15fps Lens FOV 120 Max Transmission Distance 984 feet 300 m outdoor and unobstructed Photo Formats JPEG Video Formats AVI MP4 Supported TF Cards Supports a TF Card with a capacity of up to 32 GB Not included Controllable Range Pitch 90 to 0 Operating Temperature Range 32 to 104 F 37 ...

Page 43: ...w propeller 1 2 3 The drone could not be unlocked and the rear light flashed The drone battery voltage is too low Please fully charge the battery No Problem Solution The propellers spin but the drone cannot take off 1 Recharge the battery 2 Install the propellers in right orientation 3 Replace the propellers ...

Page 44: ...US Please do not hesitate to contact us if you need further support 39 usa holystone com America ca holystone com Canada eu holystone com Europe 1 855 888 6699 For online support please scan this code with Live Chat ...

Page 45: ...ainst harmful interference in a residential installation This equipment generates uses and can radiate radio frequency energy and if not installed and used in accordance with the instructions may cause harmful interference to radio communications However there is no guarantee that interference will not occur in a particu lar installation If this equipment does cause harmful interference to radio o...

Page 46: ...sure requirement The device can be used in portable exposure condition without restriction This part belongs to the transmitter IC Notice This device complies with Canada Industry licence exempt RSS standard s Operation is subject to the following two conditions 1 this device may not cause interference and 2 this device must accept any interference Including interference that may cause undesired o...

Page 47: ...ion aux radiations Cet équipement est conforme aux limites d exposition aux rayonnements IC établies pour un environnement non contrôlé Cet équipement doit être installé et utilisé avec un minimum de 20 cm de distance entre lasource de rayonnement et votre corps HOW TO RECYCLE THIS PRODUCT This symbol on the product or its documentation indicates that it must not be disposed of with household wast...

Page 48: ...he battery temperature must never exceed 60 C 140 F otherwise the battery could be damaged or ignite 6 Never charge battery on a flammable surface near flammable products or inside a vehicle preferably place the battery in a non flammable and nonconductive container 7 Never leave the battery unattended during the charging process Never disassemble or modify the housing s wiring or puncture the cel...

Page 49: ...d 15 The packaging has to be kept since it contains important information 16 This toy should only be connected to the equipment with symbol Class II Caution 1 The max operating of the EUT is 45 C and shouldn t be lower than 10 C 2 The device complies with RF specifications when the device used at 0mm from your body 3 Declaration of Conformity We Xiamen Huoshiquan Import Export CO LTD hereby declar...

Page 50: ...ttp www holystone com Download CE HS710_EU_DOC pdf This product can be used across EU member states MANUFACTURER INFORMATION Manufactured by Xiamen Huoshiquan Import Export CO LTD Address Unit 33 Room 806 NO 2 Huming Road Siming District Xiamen China 1 855 888 6699 45 ...

Page 51: ......

Reviews: