


4K
QUICK SET-UP GUIDE
SETTING UP THE CONSOLE
MISC-07085-001 Rev 001 ©2021 Hologic, Inc. All rights reserved. Specifications are subject
to change without prior notice. Hologic, Omni, The Science of Sure and associated logos
are trademarks or registered trademarks of Hologic, Inc. and/or its subsidiaries in the United
States and/or other countries.
3
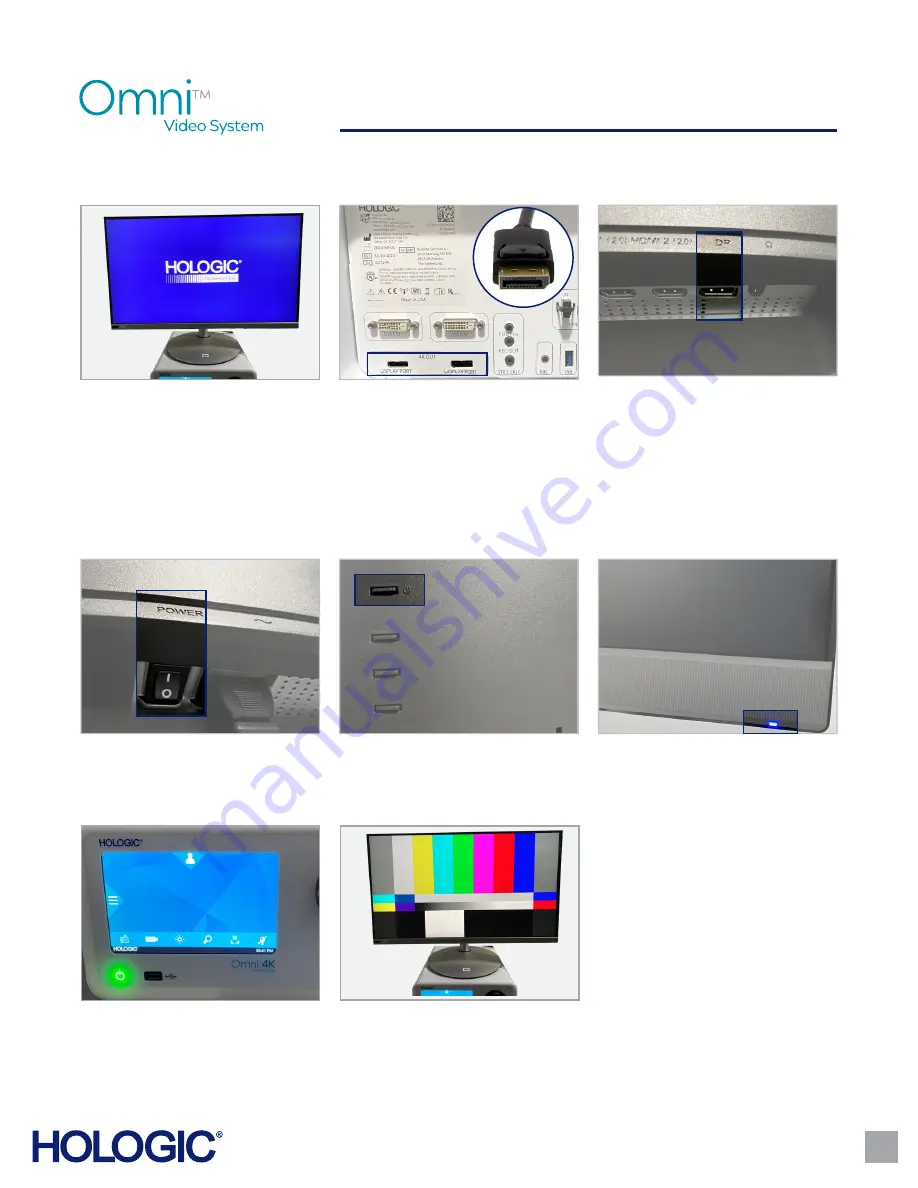
Place the monitor
next to or on top of
the Hologic Omni4K Console (CCU) in
a sturdy and accessible location with
access to 2 grounded outlets�
Power on the monitor.
Toggle the black
power switch located next to the AC
power inlet on the back of the monitor
to the “ON” position�
Press the top left horizontal button on
the rear of the monitor�
When the monitor is powered on, a blue
light is illuminated in the lower right-
hand corner of the monitor�
Connecting the video output.
Connect
the DisplayPort cable to either of the
DisplayPort outputs on the rear panel of
the Omni4K Console�
Note: Either DisplayPort receptacle will
work.
Connect the opposite end of the
DisplayPort cable to the DisplayPort
input on the monitor�
Note: a DVI cable may be used instead
of DisplayPort*.
*Using a DVI cable will result in a High Definition
1080p image instead of 4K Ultra High Definition�
REVIEW CAMERA SETTINGS
AND PROFILES, AND MAKE
ANY CHANGES AS NEEDED
PRIOR TO STARTING A CASE.
Power on the Omni4K Console
(CCU)
by pressing and holding the amber
power button with one finger until
the amber light changes to green� An
illuminated green light indicates that the
CCU is ON�
Connect monitor and CCU power cords.
Connect gray AC Power cord to the back of the Omni4K Console (CCU) and plug into
a grounded wall outlet� Connect the black AC power cord to back of the 4K monitor and plug into grounded wall outlet�
Ensure that a color bar pattern appears
on the monitor� A live image will only
be displayed once a camera head is
connected to the CCU�


