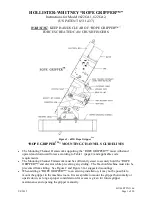


BULLETIN 1166
9/4/2015
Page 7 of 20
Rope Size
#
o
f
3
m
m
#
o
f
1
.5
m
m
#
o
f
0
.8
m
m
#
o
f
3
m
m
#
o
f
1
.5
m
m
#
o
f
0
.8
m
m
mm
Inches
mm
Shims on Rope Side
Between Block &
Shoe
Shims on Outside (back)
of Block
6
6.00
2
2
1
0
1
0
1/4
6.35
2
2
0
0
1
1
7
7.00
2
1
1
0
2
0
5/16
7.94
2
1
0
0
2
1
8
8.00
2
1
0
0
2
1
9
9.00
2
0
1
0
3
0
3/8
9.53
2
0
0
0
3
1
10
10.00
1
1
1
1
2
0
11
11.00
1
1
0
1
2
1
7/16
11.11
1
1
0
1
2
1
12
12.00
1
0
1
1
3
0
1/2
12.70
1
0
0
1
3
1
13
13.00
0
1
1
2
2
0
14
14.00
0
1
0
2
2
1
9/16
14.29
0
1
0
2
2
1
15
15.00
0
0
1
2
3
0
5/8
15.88
0
0
0
2
3
1
16
16.00
0
0
0
2
3
1
Table 2 - Recommended Shim Arrangement for Different Rope Sizes
LINING REPLACEMENT or SHIM ADJUSTMENT
The linings will wear, especially after multiple high-speed stops. When clamping, the
rotating shaft will move towards the upper end of the cam as the linings wear. Near the end
of the cam, the excessive wear switch (see Figure 6 on page 5) will open and the “ROPE
GRIPPER™” will not automatically reopen (reload).
In this case you must inspect the linings, and decide whether the spacer shims should be
adjusted, or the linings should be replaced. This will depend on whether the grooves in the
linings are more or less than 3/16” (4.75mm) deep. To inspect linings for wear, first reopen
the “ROPE GRIPPER™” using Method 1 or 2 described below.
1.
Turn OMS lever to
Reset Release
. On PC Board, move jumper J5 to J3. Turn OMS lever
to
Auto Reset
; gripper will reload electrically. Once in the open position, install the
security set screws so they touch the rotating shaft. Return jumper on J3 to J5. Or;
2.
o
Turn OMS lever to
Reset Release
.
o
Now turn the lever to
Manual Reset
while simultaneously pushing down the spring
plunger. (
Note
: If you feel interference while trying to push the lever to the manual reset
position, it may be because the pawl is interfering with the hub gear teeth (see Figure 10
on page 9). Slightly turn the hub gear hex from outside to the right or left and try again).


