HOBO Pendant MX Temp (MX2201) and Temp/Light (MX2202) Logger Manual
1-800-LOGGERS 3
If the logger does not appear in the list or if it is having
trouble connecting, follow these tips.
•
Make sure the logger is “awake” by pressing the circle on
the case. The alarm and status LEDs will blink once when
the logger wakes up. This will also bring the logger to the
top of the list if you are working with multiple loggers.
•
If the logger is currently logging at a fast interval (5
seconds or faster) and the temperature is -10°C (14°F) or
below, you may need to press the button twice before it
appears in the list.
•
Make sure the logger is within range of your mobile
device. The range for successful wireless communication
in air is approximately 30.5 m (100 ft) with full line-of-
sight.
•
Change the orientation of your phone or tablet to ensure
the antenna in your device is pointed toward the logger.
Obstacles between the antenna in the device and the
logger may result in intermittent connections.
•
If your device can connect to the logger intermittently or
loses its connection, move closer to the logger, within
sight if possible. If the logger is in water, the connection
can be unreliable. Remove it from water for a consistent
connection.
•
If the logger appears in the list, but you cannot connect
to it, close HOBOmobile and power cycle the mobile
device. This forces the previous Bluetooth connection to
close.
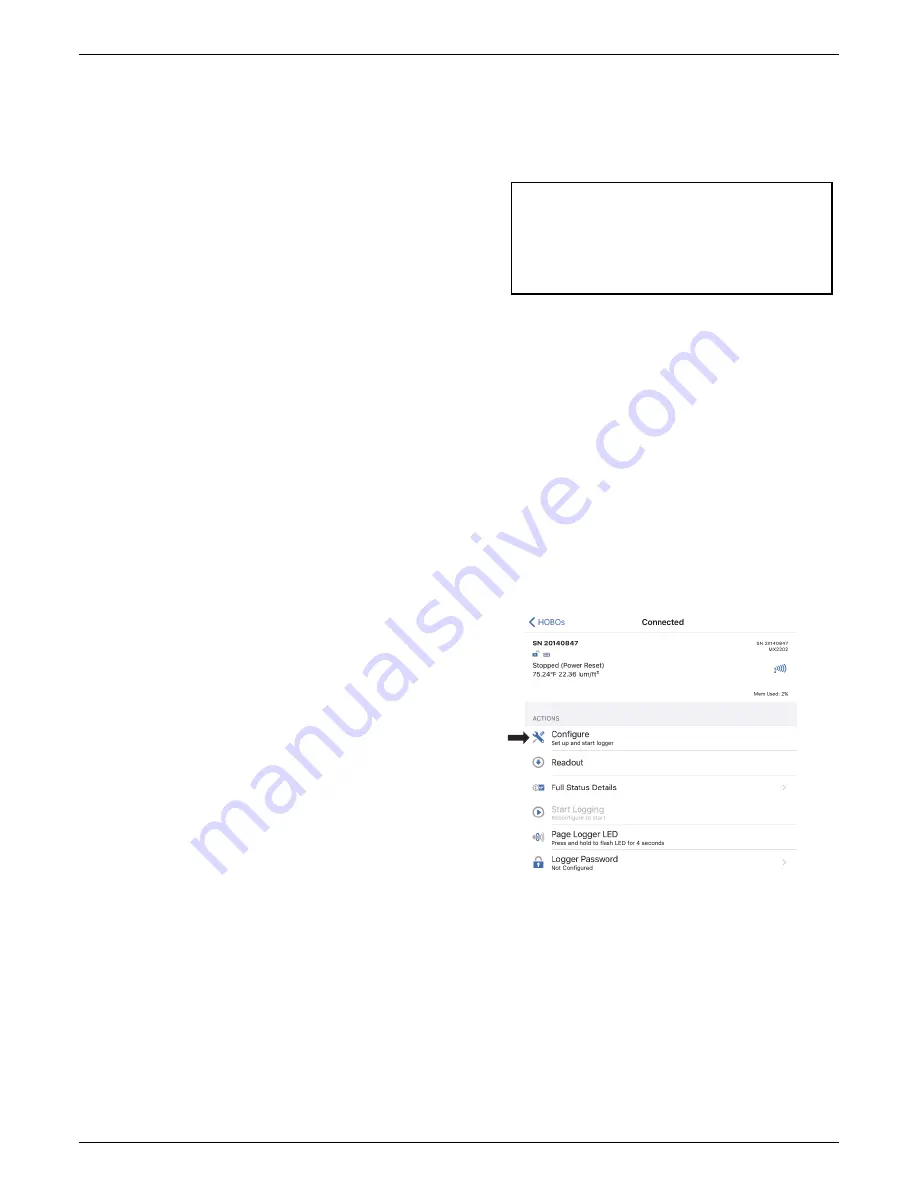
Once the logger is connected, you can select one of the
following actions:
•
Configure.
Select logger settings and load them onto the
logger to start logging. See
Configuring the Logger
.
•
Readout.
Download logger data. See
Reading Out the
Logger
.
•
Full Status Details.
Check the battery level and view the
configuration settings currently selected for the logger.
•
Start Logging.
Start recording data (if the logger is
configured to start “On Button Push” as described in
Configuring the Logger
).
•
Stop Logging.
Stop the logger from recording data. This
overrides any other Stop Logging settings that may be
configured.
•
Page Logger LED.
Press and hold this option to illuminate
the alarm and status LEDs for 5 seconds.
•
Logger Password.
Create a password for the logger that
will be required if another mobile device attempts to
connect to it. To reset a password, connect to the logger,
tap Set Logger Passkey, and select Reset to Factory
Default. You can also press the circle on the logger for 10
seconds to reset the password.
•
Update Firmware.
When new logger firmware is
available, this action appears in the list. Select it and
follow the instructions on the screen. A logger readout
will be completed automatically at the beginning of the
firmware update process. If the connection is lost
between the logger and the mobile device during the
firmware update, a Firmware Update Pending Status
displays for the logger in the HOBOs list. Connect to the
logger and select Restore Logger (or Update Firmware if
that option is available) to continue updating the
firmware.
Important:
Before updating the firmware on the
logger, check the remaining battery level by selecting
Full Status Details and make sure it is no less than 30%.
Make sure you have the time to complete the entire
update process, which requires that the logger remains
connected to the device during the upgrade.
•
Force Offload.
This may appear if an error was
encountered when loading configure settings. Select this
to offload all the data on the logger before reconfiguring
it.
Configuring the Logger
Use HOBOmobile to set up the logger, including selecting the
logging interval, start and stop logging options, and configuring
alarms. These steps provide an overview of setting up the
logger. For complete details, see the
HOBOmobile User’s Guide
.
1.
Open HOBOmobile and tap the HOBOs icon.
2.
Press the circle on the logger to wake it up. This will also
bring the logger to the top of the logger list (the logger
name will turn green). Note that the current sensor
readings are displayed even when the logger is not logging.
3.
Once connected, tap Configure.
4.
Tap Name and type a name for the logger up to 20
characters (optional). Tap Done. If no name is selected, the
logger serial number is used as the name.
5.
Tap Group to add the logger to the Favorites group, an
existing custom group, or create a new group name up to
20 characters (optional). Tap Done.
6.
Tap Logging Interval and choose how frequently the logger
will record data.
7.
Tap Start Logging and select when logging will begin:
•
Now.
Logging will begin immediately after tapping Start
in the Configure screen.
www.
GlobalTestSupply
.com
Find Quality Products Online at:


