


❏
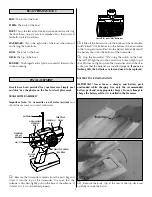
12. Replace the hatch as shown, by first placing the hole at
the front of the hatch cover over the pin at the front of the
hatch opening. Replace the body clip. The boat is powered
“UP” and ready to go!
❏
13. After running, turn the power “OFF” to your boat’s
receiver and then transmitter (always, in that order).
PLEASE READ BEFORE
Running the Hammer:
•
NEVER
attempt to swim after a stalled or capsized boat!
Wait patiently for the wind currents to return the boat to
shore or use a tennis ball attached to the end of a fishing
rod to retrieve a stalled or capsized boat.
•
It is dangerous to operate any R/C vehicle at any time that
there is not sufficient light.
•
R/C models produce vibrations which will cause screws,
nuts, bolts, etc, on your model to become loose over
time.
It is important to make sure that all hardware is
secure
before operating your model.
•
The edges of the propeller are very sharp and can cut your
fingers
if you are not careful. At no time should you ever
attempt to stop the prop with your hand. In the event that
weeds become entangled in the propeller, turn the
Hammer’s power “OFF” before attempting to remove them.
•
CAUTION:
Your Hammer may take on small amounts of
water, especially when running in rough water due to
high winds or when making tight turns. Keep a roll of
paper towels handy and dry out the hull interior after
every run.
•
Total run time of the Hammer is approximately 6-10
minutes (assuming you begin with a fully charged battery
pack). When you notice a decrease in power or sluggish
steering response, it means the battery pack is nearly
drained and it’s time to head for shore. As soon as the
boat reaches shore, turn off the power to the boat’s
receiver and transmitter (in that order).
•
CAUTION: The motor may be hot!
Allow it to cool for a
few minutes before attempting to remove the battery pack.
•
After running, store your Hammer with the hatches opened
to allow the interior to dry out completely. If you fail to do
this, it may result in corrosion of the electronic components.
•
IMPORTANT:
If, for whatever reason your boat takes on a
large amount of water causing the radio equipment to get
wet, you must do the following immediately: Remove the
battery pack and radio equipment from the boat. Allow the
components to air dry completely before reassembling.
Reinstall the components and check for proper operation
before running the boat in water.
Launch Procedure:
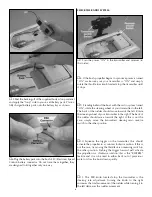
1. Turn the power “ON” to the transmitter and receiver (in
that order).
2. Gently place the boat in water that is at least 8" deep and
free of obstacles (weeds, rocks, sticks, ducks, muskrats, etc.).
3. Slowly advance the throttle to full speed and note if the
boat has a tendency to turn right or left. Adjust the steering
trim knob on your transmitter until the boat runs in a straight
line when the steering wheel is at neutral.
4. When finished running, be sure to turn the power “OFF” to
your boat and transmitter (in that order).
The Waiting Game
If your Hammer should happen to stall, wind and/or water
currents will slowly carry it to shore. The bad news is that the
boat could be carried to the opposite shore. When surveying
areas to run your boat, keep variables in mind such as wind
direction, size of the lake, strength of river currents, etc.
Above all, NEVER attempt to swim after a stalled boat.
HELPFUL TIP:
Use a fishing rod with at least 12lb. line and a tennis ball tied
to the end to retrieve a stalled boat.
GOOD LUCK AND GREAT BOATING!
RUNNING THE HAMMER
5


