6
AC50 BATTERY CHARGER SETUP
Before installing the system, connect the AC power supply to the battery charger and plug it into an electrical
outlet. Charge all the batteries while the other equipment is being installed. Charging time is about 2.5 hours.
Connect AC Power Supply
To connect the AC power supply to the battery charger:
1.
Connect the AC power supply cable connector to the power
connection on the battery charger.
2.
Connect the AC power cord to an electrical outlet.
The red lights on the charger will briefly display, and then the yellow
lights will appear and remain on.
Charging the Batteries
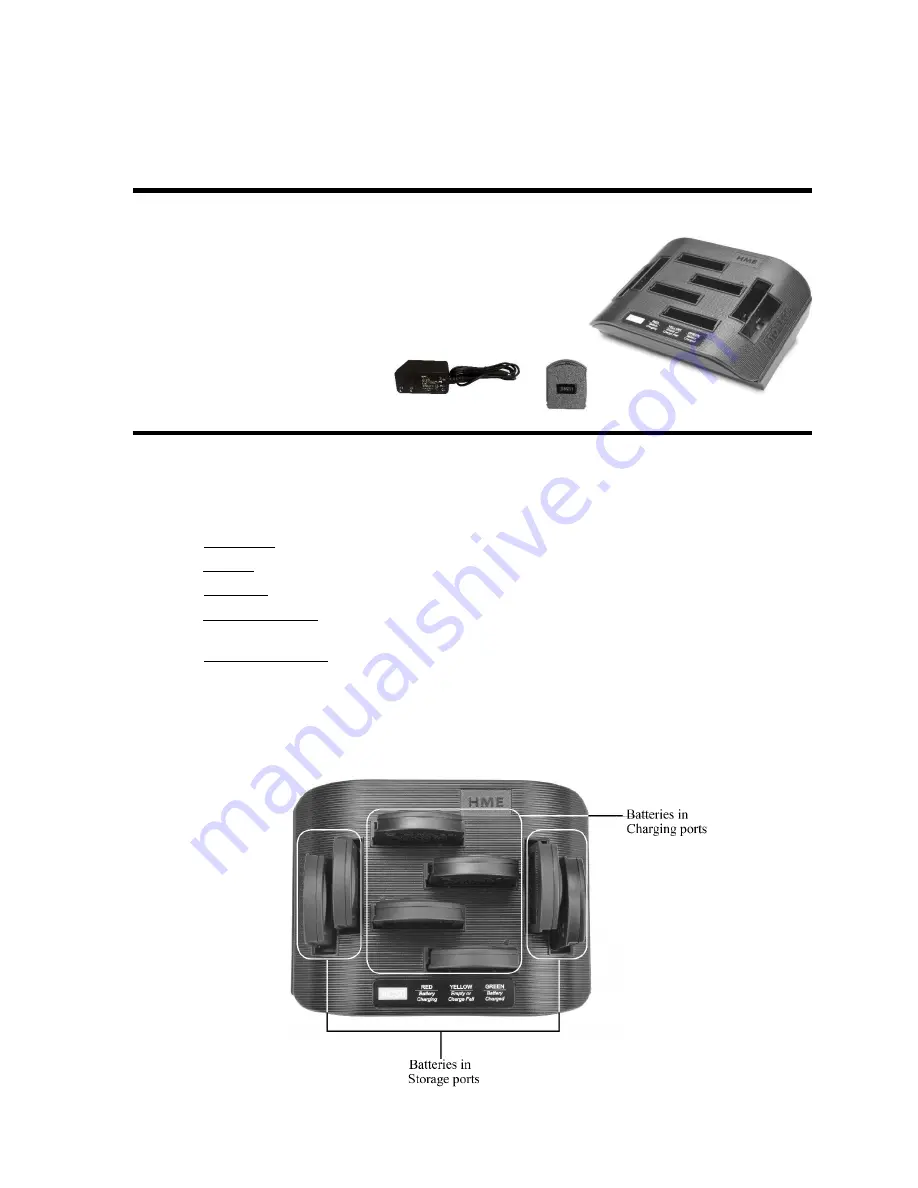
Up to four batteries can be charged in the battery charger at one time. The battery status lights next to each
charging port indicate the battery status. Up to four fully charged batteries can be stored in the battery Storage
ports. Insert a battery in each of four Charging ports until it clicks in place.
A yellow light next to a Charging port indicates that the port is
EMPTY
.
A red light next indicates that the battery port is
CHARGING
.
A green light indicates that the battery is
READY
.
A steady yellow light indicates that the
CHARGE FAILED
. If a charge fails, refer to the instructions
on the side of battery charger.
A flashing yellow light indicates
CHARGE PENDING
, which means the inserted battery is too hot.
Adjust room temperature or move the charger to a cooler area.
Store the fully charged batteries in storage ports.
IMPORTANT:
Batteries should not be left in charge ports after being fully charged. A battery left in a charging
port for more than three weeks may display the yellow indicator light, but it does not indicate a faulty battery.
Summary of Contents for DX100 EU
Page 1: ...HME 400G761 Rev A 5 4 17 DX100 EU Wireless Intercom Operating Instructions...
Page 2: ......
Page 31: ...26 GENERAL BATTERY SAFETY INSTRUCTIONS FOR BATTERY MODEL BAT41 BAT50 BAT60...
Page 32: ...27...
Page 33: ...28...
Page 34: ...29...


