5
4
objects at least 4 inches away from the unit.
4. To switch the unit off completely, withdraw the AC adaptor from the wall outlet.
Setting Clock Time
AUTOSET CLOCK
The Wave speaker system is equipped with an autoset clock, meaning the clock will automatically
set itself when plugged in. Please note: the clock will automatically default to Eastern Standard Time,
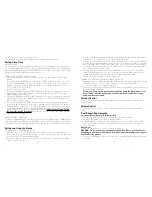
but can be adjusted by pressing the TIME ZONE button on the remote control (fig. 3) and scrolling
through the different time zone until the proper time is set.
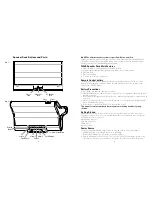
MANUALLY SETTING THE CLOCK (Fig. 2 & 3)
1. While the unit is powered OFF press EJECT on the top of the unit to expose the dock and
buttons.
2. Press and hold the SOURCE button on the unit (press TIME SET button on remote control). The
time zone will begin flashing, use the + and – buttons on the speaker or the VOL+ and VOL-
buttons on the remote control to set the desired time zone, using the list below for reference:
A1. AST A3. CST A5. PST A7. HST
A2. EST A4. MST A6. AKST
3. Press the SOURCE button again (or TIME SET button on the remote control) and the hour will
begin flashing. Use the + and – buttons on the unit or on the remote control to set the hour,
paying attention to the PM indicator.
4. Press the SOURCE button again (or TIME SET button on the remote control) and the minute will
begin flashing. Use the + and – buttons on the speaker or the VOL+ and VOL- buttons on the
remote control to set the minute.
5. Press the SOURCE button (or TIME SET button on the remote control) again to set the day of
the week, using 1 for Monday, 2 for Tuesday, 3 for Wednesday, 4 for Thursday, 5 for Friday, 6 for
Saturday, and 7 for Sunday. The 7-5-2 alarm feature allows you to set an alarm for seven days a
week, Monday through Friday, or Saturday and Sunday. So, for instance, setting a 5-day alarm
means it will go off at the same time Monday through Friday,
which is why properly setting
the day of the week is important.
Once the day of week is set, press the SOURCE button
again to exit Clock Setting mode.
DAYLIGHT SAVINGS TIME (Fig. 3)
The Wave is equipped with a DST function to adjust the time for Daylight Savings. To adjust the time,
while the unit is powered OFF, press the DST button on the remote control until the clock is adjusted
to the proper time. When observing Daylight Savings Time, the DST icon will appear on the display.
Setting and Using the Alarms
SETTING ALARM 1 or ALARM 2 (Fig. 2 & 3)
1. While the power is OFF, press EJECT on the top of the unit to expose the dock and buttons.
2. Press and hold the desired alarm button (alarm 1 or alarm 2) located on the top of the unit or on
the remote control. The hour will begin flashing.
3. Use the plus and minus buttons on the unit or Vol +/– on the remote to adjust the hour, paying
attention to the PM indicator.
4. Press the alarm button again and the minute will begin flashing. Use the plus and minus buttons
on the unit or Vol +/– on the remote control again to adjust the minute.
5. Press the alarm button again to select the source. The Wave can be set to Beep or iPod/iPhone/
iPad. Use the plus and minus buttons on the unit or Vol +/– on the remote control to select which
source you want to wake to. Please note: If you set the source to Apple Device and your device
is not docked, the alarm will default to Beep. If you do not select your source when prompted to
do so, the alarm will also default to Beep.
6. Press the alarm button again and use the Forward and Reverse to select a 7, 5, 2 day alarm
setting. 7-day will sound at the same time 7 days a week, 5-day will sound at the same time
Monday through Friday, 2-day will sound at the same time Saturday and Sunday.
7. Press the alarm button again to exit Alarm Setting mode.
TURNING OFF THE ALARM / SNOOZE OPERATION (Fig. 2 & 3)
The Unwind alarm clock is equipped with gradual wake, which means that the alarm begins soft and
slowly gets louder over the course of two minutes to ensure a non-jarring wakeup.
1. To turn off the alarm, press any button on the unit.
2. Press the snooze button located on the top of the drawer or on the remote control and the alarm
will sound again in nine minutes.
Please note: You may only press the Snooze button during the Alarm mode for one
hour (7 times). After the seventh time, the alarm will turn off and will not sound
again until the next set time.
Dimmer Control
Press the SNOOZE button to adjust the backlight intensity of clock display. This can be done at
power off stage.
Volume Control
To adjust the volume, press the “+” and “-” controls on the drawer of the unit or on the remote
control.
iPad/iPhone/iPod Operation
Listening to Music from your iPad/iPhone/iPod
1. Press the POWER button, located on top of the unit to turn the speaker ON.
2. Press the OPEN button to eject the motorized dock drawer.
3. Fit iPad/iPod/iPhone carefully onto the docking pin. Note that once your device is docked the
open/close function of the drawer is disabled so the drawer does not try to close when the
device is docked.
Please Note:
To avoid damage, do not force the device onto the docking pin
WARNING: The dock connector is designed for Apple iPad, iPhone, and iPod devices.
Attempting to attach a non-iPad/iPhone/iPod music player will damage or destroy your
device and/or the product.
4. Press the SOURCE button on the unit or on the remote control until the iPad/iPhone/iPod source
is selected.


