3.6.4 Event
3.6.4.1 Event-In
▼
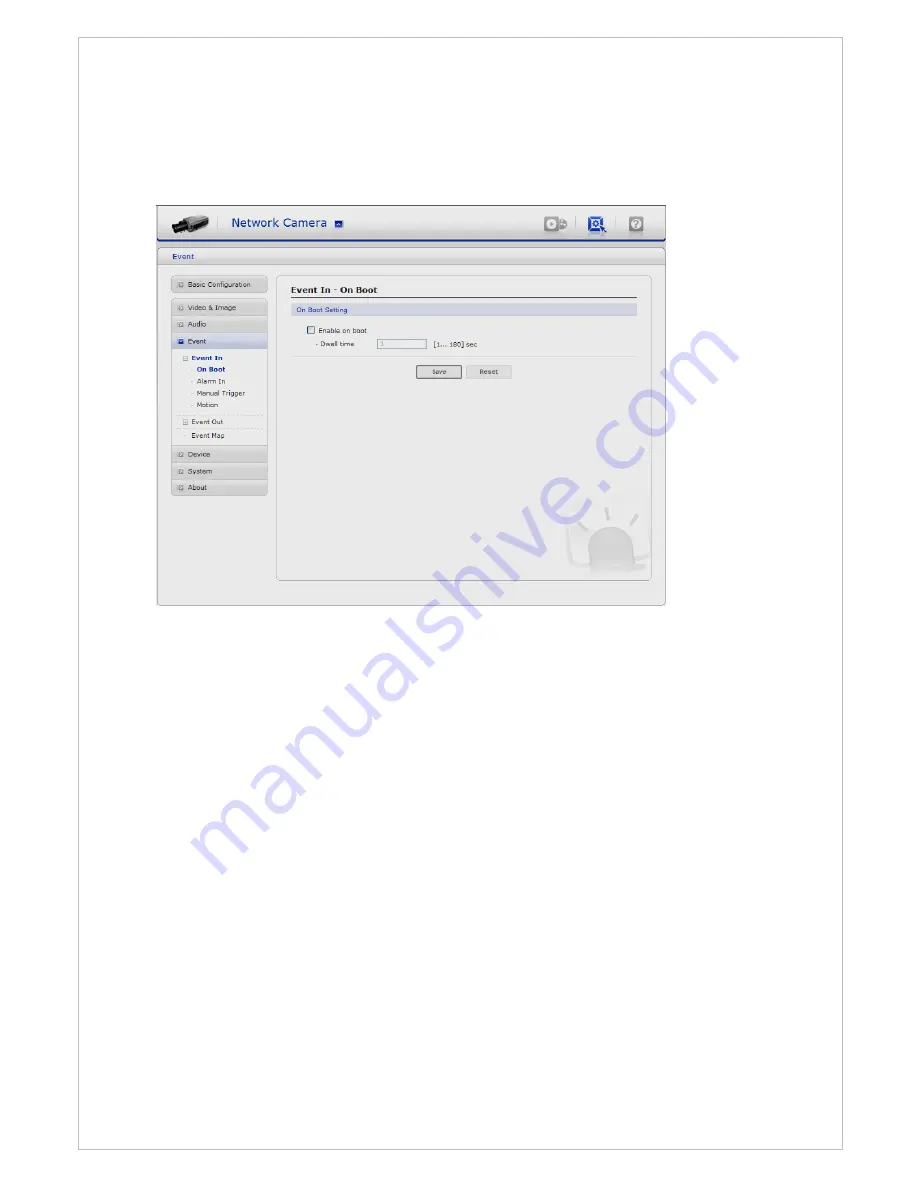
On Boot
This is used to trigger the event every time the Network Camera start. Select “Enable” to
activate the On Boot event.
37
Page 1: ...New H 264 Network Camera User s Manual English Version 1 0 Model HPCB E F 5WN9H www hitron co kr Copyright 2007 Hitron Systems Inc...
Page 2: ...owhead symbol within an equilateral triangle is intended to alert the user to the presence of uninsulated dangerous voltage within the product s enclosure that may be of sufficient magnitude to consti...
Page 3: ...O PART 15 OF THE FCC RULES THESE LIMITS ARE DESIGNED TO PROVIDE REASONABLE PROTECTION AGAINST HARMFUL INTERFERENCE WHEN THE EQUIPMENT IS OPERATED IN A COMMERCIAL ENVIRONMENT THIS EQUIPMENT GENERATES U...
Page 4: ...receptacles and the point where they exit from the apparatus 11 Only use attachments accessories specified by the manufacturer 12 Use only with the cart stand tripod bracket or table specified by the...
Page 5: ...3 Video Image 27 3 6 1 4 Audio 30 3 6 1 5 Date Time 32 3 6 2 Video Image 33 3 6 3 Audio 36 3 6 4 Event 37 3 6 4 1 Event In 37 3 6 4 2 Event Out 42 3 6 4 3 Event Map 50 3 6 5 Device 51 3 6 6 System 53...
Page 6: ...screens are also provided through an access to the web The Network Camera is a one port video Camera including two way audio fully featured for security surveillance and remote monitoring needs It is...
Page 7: ...rnal inputs and outputs can be connected to devices such as sensors and relays enabling the system to react to alarms and activate lights or open close doors Power over Ethernet Support for Power over...
Page 8: ...24V AC max 6 5Watt 1 Rs485 terminal Connects PTZ or PT device 2 Power Indicator Indicates power input 3 Status Indicator Indicates camera status 4 Video Out Connects the video output This BNC connecto...
Page 9: ...nstallation adjustment The camera supports video type auto iris lenses which adjust to changing light levels Perform the following steps to install and adjust a video type auto iris lens If necessary...
Page 10: ...ng if you want to see the brightest object and not the background objects For Level adjustments Adjust the level control for the best picture during the day A night adjustment may not provide the prop...
Page 11: ...hting from windows can considerably affect the light level of the room Back Focus adjustment For best results perform back focus adjustments at night or while using a 6 or 8 welder s glass in front of...
Page 12: ...2 Make sure the iris of the lens is wide open Do this by adjusting the camera at night or use a welders glass in front of the lens 3 Adjust the focus to the stop on the far range 4 Adjust the zoom on...
Page 13: ...45 cable to it Generally a cross over cable is used for directly connection to PC while a direct cable is used for connection to a hub IP Assignment When a camera Encoder or Decoder is first connected...
Page 14: ...tatus follows Available for connection to the camera Loading settings information of video after connecting the camera Connectable to the camera but fixed security settings password Unavailable for co...
Page 15: ...view streaming video in Microsoft Internet Explorer set your browser to allow ActiveX controls 3 1 Access from a browser 1 Start a browser Internet Explorer 2 Enter the IP address or host name of the...
Page 16: ...ch is displayed when the network camera is accessed for the setup at the first time Enter your admin name and password set by the administrator Note The default administrator username and password is...
Page 17: ...page The protocol drop down list allows you to select which combination of protocols and methods to use depends on your viewing requirements and on the properties of your network The preset drop down...
Page 18: ...View page displays the controls available for the OSD menu For more information please see 3 8 Camera Menu Control on the User s Manual Pan Tilt Zoom controls If the Network Camera has been appropria...
Page 19: ...3 5 Camera Setup Analog 3 5 1 Settings Settings can be made using the 5 buttons located on the back of the camera Structure of menu setup 19...
Page 20: ...The optimum level of brightness for the user can be achieved by adjustment EXPOSURE The EXPOSURE menu is used to set the automatic light control method for this camera SHUTTER Select the shutter mode...
Page 21: ...at a piece of while paper to obtain the optimum state under current illumination If the environment including the light source is changed you have to adjust the wide balance gain MANUAL Manual mode U...
Page 22: ...is camera can turn the IR Infrared filter on or off Mode AUTO EXT BW COLOR DAY NIGHT AUTO MODE DAY NIGHT B W MODE 3DNR Digital Noise Reduction You can configure the DNR Digital Noise Reduction related...
Page 23: ...AN TILT GAMMA Adjust the luminance 0 05 1 00 NEGA POSI Select the negative or positive mode 3 MOTION AREA SELECT Select MD area number AREA DISPLAY Select MD ON OFF LEFT RIGHT Adjust the location of t...
Page 24: ...T This mode is necessary for using the internal synchronization L L This mode is necessary for the operation of multi camera because it synchronizes the camera phase by using the external signal AC Si...
Page 25: ...the online help that explains the setup tools When accessing the Network Camera for the first time the Admin Password dialog appears Enter your admin name and password set by the administrator Note If...
Page 26: ...s viewer login Check the box to use the webcasting features Refer to 3 6 2 Video Image for more details 3 6 1 2 Network The network camera support both IP version 4 and IP version 6 Both versions may...
Page 27: ...ra Subnet mask Specify the mask for the subnet the Network Camera is located on Default router Specify the IP address of the default router gateway used for connecting devices attached to different ne...
Page 28: ...imed for use in situations where low bit rate and low resolution are mandated by other conditions of the applications like network bandwidth device size etc MPEG4 ASP Advanced Simple Profile Its notab...
Page 29: ...g the compressibility In ease case please adjust this function according to the network status and monitoring purposes The default is 2000 Kbps Frame rate Upon the real time play users should select a...
Page 30: ...ansmit audio to other clients using an external microphone and can play audio received from other clients by attaching a speaker The Setup page has an additional menu item called Audio which allows di...
Page 31: ...l Duplex mode It means that you can transmit and receive audio talk and listen at the same time without having to use any of the controls This is just like having a telephone conversation This mode re...
Page 32: ...automatically adjust for daylight savings time select the Automatically adjustment for daylight saving time changes From the Time Mode section select the preferred method to use for setting the time S...
Page 33: ...3 6 2 Video Image Basic Refer to 3 6 1 3 Video Image for more details 33...
Page 34: ...is also possible to resize or delete or move the window by selecting the appropriate window at the mouse menu on the video screen To create a mask window follow steps 1 Click the right button of mouse...
Page 35: ...bsite Copy HTML code generated on the screen and paste it in page code of the website you want to display live video Note To use webcasting service the Enable Anonymous viewer login option must be che...
Page 36: ...3 6 3 Audio Refer to 3 5 1 4 Audio for more details 36...
Page 37: ...3 6 4 Event 3 6 4 1 Event In On Boot This is used to trigger the event every time the Network Camera start Select Enable to activate the On Boot event 37...
Page 38: ...event The network camera support 1 alarm input ports Type Choose the type of alarm you wish to use from the drop down list Dwell Time Set the dwell time an event lasts for the specified dwell time fro...
Page 39: ...makes use of the manual trigger button provided on the live view page which are used to start or stop the event type manually Alternatively the event can be triggered via the product s API Applicatio...
Page 40: ...image to target specific areas Movement in the areas outside the motion windows will be ignored If part of a motion window needs to be masked this can be configured in a Mask window Pre Viewer Motion...
Page 41: ...ow A motion index is a set of parameters describing Window Name Type Threshold Sensitivity and Dwell Time Window Types is one of Motion and Mask windows Threshold Sets up the sensitivity for the motio...
Page 42: ...s from the camera to predefined addresses via SMTP Sender Enter the email address to be used as the sender for all messages sent by the Network Transmitter Interval Represents the frequency of the ema...
Page 43: ...he network camera detects an event it can record and saves images to an FTP server Images can be sent as e mail attachments Check the box to enable the service FTP Setting Server Enter the server s IP...
Page 44: ...is function is the counterpart to the pre trigger buffer described above and contains images from the time immediately after the trigger Configure as for pre event Prefix file name This name will be u...
Page 45: ...e Test button Alarm Out When the network camera detects an event it can control external equipment connected to its alarm output port Check the box to enable and then select either Enable When you sel...
Page 46: ...your PC Provide the path to the file directly or use the Browse button to locate it Then click the Upload button An audio file for Audio Alert can be made by Audio Recorder tool in the NCTitanium soft...
Page 47: ...top playing audio Procedures to make an audio file in G 711 format for Audio Alert 1 Connect the microphone in your PC 2 Click the Capture button and talk to the microphone to record the audio or voic...
Page 48: ...work transmitter detects an event you can make a PTZ camera connected to its RS485 port to move to a predefined preset position Check the box to enable the service and return to the Home position once...
Page 49: ...llows you to change the settings and establish a schedule for each event trigger from the Network Camera You can register the event map up to max 15 Click Add button to make a new event map and you ca...
Page 50: ...must first be configured on the Event In page Enter a message you want to send Audio Alert Select a Audio alert file the Network Transmitter output when audio alert event triggered The Audio alert fi...
Page 51: ...bps Data bits Select Data Bits in the drop down list Default None Parity bits Select Parity Bits in the drop down list Default 8 bits Stop bits Select Stop Bits in the drop down list Default 1 bit Fa...
Page 52: ...enter the system information This page is very useful when you refer device information after installation Device Name Configuration Enter the device name Location Configuration Enter the location in...
Page 53: ...mous viewer login to the Live View page as described below User Setting Check the box to enable anonymous viewer login to the Network Camera without the user account When using the user account users...
Page 54: ...for the administrator Operator and Viewer to enable HTTPS connection set to HTTP by default HTTP HTTPS HTTP HTTPS Upload Certificate To use HTTPS for communication with the Network Camera An official...
Page 55: ...sses added to the list are set as allowed or denied addresses All other IP addresses not in this list will then be allowed or denied access accordingly that is if the addresses in the list are allowed...
Page 56: ...Automatically adjustment for daylight saving time changes From the Time Mode section select the preferred method to use for setting the time Synchronize with computer time sets the time from the cloc...
Page 57: ...3 6 6 4 Network Setting in regard to network can be executed Settings for IP DNS Host Name Port and ARP Ping can be established along with setting for DDNS uPnP QoS and SNMP 57...
Page 58: ...P Automatically use the DNS server settings provided by the DHCP server Click the View button to see the current settings Use the following DNS server address to enter the desired DNS server by specif...
Page 59: ...the DDNS server Registered host Enter an address of the DDNS server Username Enter an ID to access to the DDNS server Password Enter a password to be used for accessing the DDNS server Confirm Enter...
Page 60: ...nction is for sending Video and Audio to Multicast group Enable Multicast Check the box to enable multicast operation Multicast destination IP Enter an IP between 224 0 0 0 and 239 255 255 255 Althoug...
Page 61: ...ng systems and clients that support this protocol Note UPnP must be installed on your workstation if running Windows XP To do this open the Control Panel from the Start Menu and select Add Remove Prog...
Page 62: ...y use and thus control over bandwidth races between applications DSCP Settings For each type of network traffic supported by your network video product enter a DSCP Differentiated Services Code Point...
Page 63: ...e network to the outside that is the Internet Security on the private network LAN is increased since most broadband routers are pre configured to stop attempts to access the private network LAN from t...
Page 64: ...g Select this option to manually select a NAT router and enter the external port number for the router in the field provided Notes If you attempt to manually enter a port that is already in use an ale...
Page 65: ...subnet mask the system time Default The default button should be used with caution Pressing this will return all of the Network Camera s settings to the factory default values including the IP addres...
Page 66: ...nce Logs The network Camera support system log information Click the System Log button to get the log data Update Server Server Report Click the Server Report button to get the important information a...
Page 67: ...3 8 Camera Menu Control You can control camera menu in the live screen Press the button on the left top in the live screen to activate the camera manual panel Camera Menu Panel 67...
Page 68: ...Left Right button Go into the sub menu items Execute the command exit Change value Navigate through the menu items Up Down button Navigate through the menu items PAN TILT Speed It sets a speed when a...
Page 69: ...p the preset programming menu Auto Scan Pressing the Scan will bring up the Auto Scan programming menu Tour Pressing the Tour button will bring up the tour programming menu directly Pattern Pressing t...
Page 70: ...t Button 1 Switch off the Network Camera by disconnecting the power adapter 2 Press and hold the Control Button with a straightened paperclip while reconnecting the power 3 Keep the Control button pre...
Page 71: ...ed properly Check the voltage level of the Network Camera Cable for video is shielded Camera number does not match the number on PC Program or Web browser Check the camera ID of the 1CH Network Camera...
Page 72: ...Balance On Low Middle High Off Electric Shutter Speed Auto Flickerless Manual 256x 1 60 1 100 000 Sharpness On Off Level adjustable Flip Horizontal Vertical Rotate Effect D Zoom x32 Pan Tilt Nega Free...
Page 73: ...erminal RS485 Tx Tx Buttons Side Up Down Left Right Enter Rear Factory Reset LED Indicators Power Status Network Auto IRIS Output 4 Pin mini Din jack Standard connection Lens Mount C CS mount Selected...