background image


1-4


StarBoard


FX-77G/FX-63G/FX-82WG


Contents

English 

1.3 Role of Each Part 

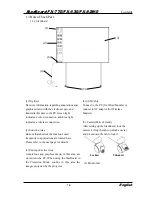
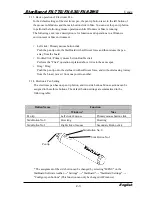
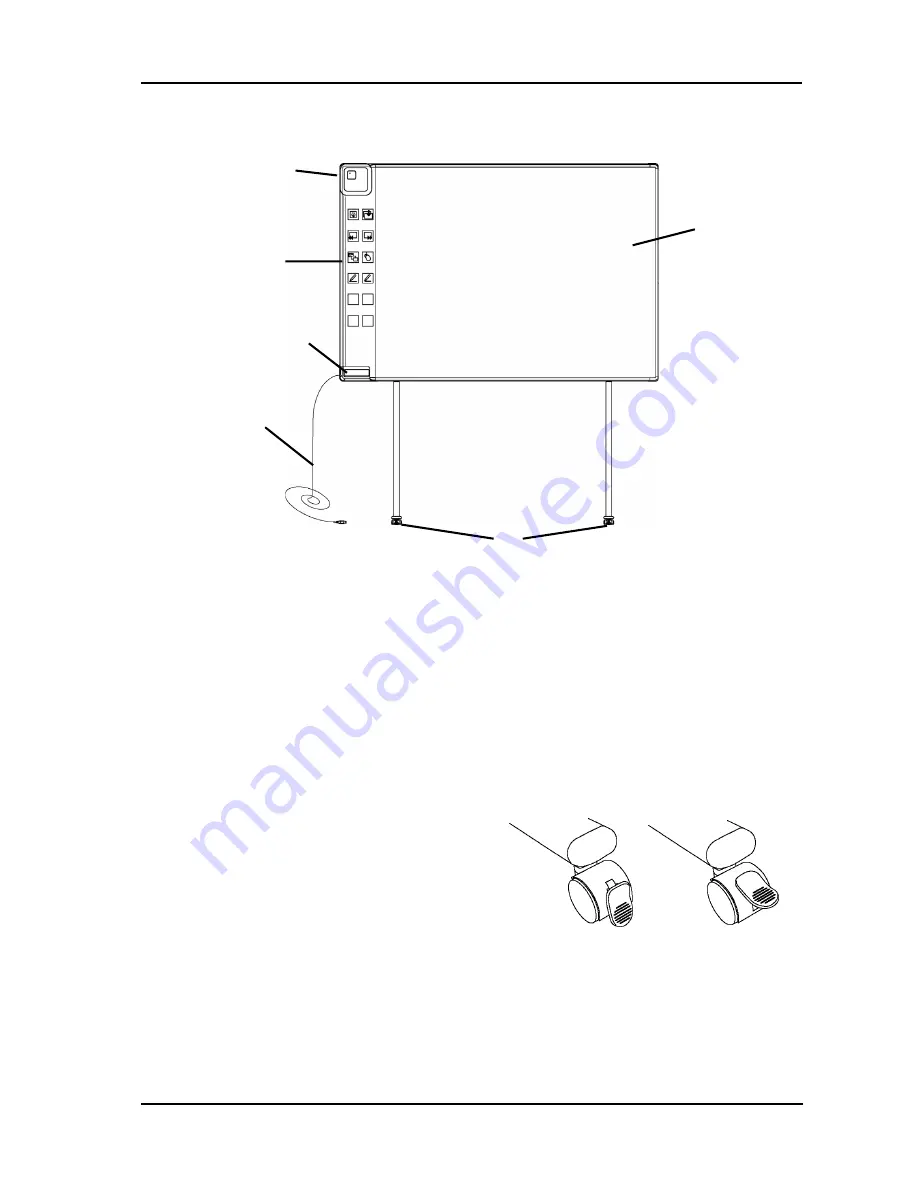
1.3.1 StarBoard 


(1) Digitiser 
Receives information regarding annotations and 
graphics drawn with the electronic pen, and 
transmits this data to the PC. Green light 
indicates a wired connection, and blue light 
indicates a wireless connection. 
 
(2) Function Area 
Buttons that shortcut the functions used 
frequently in applications are located here. 
Please refer to the next page for details. 


(3) Pen Input Active Area 
Annotations and graphics drawn in this area are 
stored into the PC. When using the StarBoard in 
the Projection Mode, confine to this area the 
images projected by the projector. 


(4) USB Cable 
Connect to the PC (for Wired Models) or 
connect to AC adaptor (for Wireless 
Models). 
 
(5) Casters(Parts of stand) 
After setting up the StarBoard, lock the 
casters. Lift up the tab to unlock a caster, 
and press down the tab to lock it. 


Locked Unlocked 

 
 (6) Pen Holder 


(1)

(2)

(3) 

(5)

(6)

(4)

Summary of Contents for StarBoard FX-63G

Page 1: ...questing a separate copy of this User s Guide specify FX ML100701 Read this User s Guide and carefully retain it for future reference Before using this product carefully read and fully understand the safety instructions Store this User s Guide nearby for ease of reference FX ML100701 ...

Page 2: ...mes no liability and makes no warranty either express or implicit regarding the contents of this user s guide Also the company makes no warranty as to the product s suitability merchantability or fitness for a particular intended use All products of Hitachi Software Engineering Co Ltd described in this user s guide are presently for sale or are site licensed Users who purchased the aforesaid produ...

Page 3: ...StarBoard FX 82WG Wired AH00138 StarBoard FX 82WG Wireless K W033 021 Floor Stand The StarBoard FX 77G and StarBoard FX 63G and StarBoard FX 82WG incorporate eBeam technology licensed from Luidia Inc eBeam is a trademark of Luidia Inc Windows 2000 Windows XP are trademarks of Microsoft Corporation U S and in other countries Mac and Mac OS are trademarks of Apple Inc registered in the U S and other...

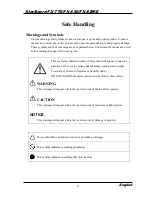
Page 4: ...his symbol will appear to raise the attention of the user to existing risks that may cause harm to people To avoid any chances of injuries or possibly death DO NOT IGNORE the safety instructions that follow this symbol WARNING This warning will appear where there exists a risk of death or fatal injuries CAUTION This warning will appear where there exists a risk of moderate or light injuries NOTICE...

Page 5: ...this product If a foreign object falls on top of or inside this product it may lead to personal injury or damage to the product NOTICE Do not use a USB cable other than the one supplied Use of a USB cable other than the one supplied may result in malfunction Do not place heavy objects on pull on or subject the USB cable to excess heat Failure to comply may result damage to the USB cable Always gra...

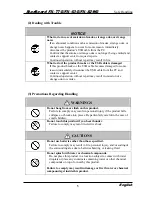
Page 6: ...ation without repair may result in emission of a strange odor or smoke 3 Precautions Regarding Handling WARNINGS Do not hang from or climb on this product Failure to comply may result in personal injury if the product falls collapses or breaks into pieces Be particularly careful in the case of small children Do not touch this product if you hear thunder Failure to comply may result in electric sho...

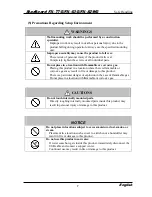
Page 7: ...tive core electrical short or severing of the cable 4 Precautions Regarding Moving the Product CAUTIONS Always use two or more people to move this product This product is a very large and heavy precision instrument Always use two or more people and take great care when moving this product Result in the personal injury or breakdown if the product falls over NOTICE Always disconnect the USB cable fr...

Page 8: ...here there is flammable or corrosive gas may result in fire or damage to this product There is a particular danger of explosion in the case of flammable gas Do not place in a location with flammable or corrosive gas CAUTIONS Do not touch internally mounted parts Directly toughing internally mounted parts inside this product may result in personal injury or damage to this product NOTICE Do not plac...

Page 9: ...tion and or shock of impact may harm internal components of this product resulting in damage to it Do not set up this product in a location subject to vibration or shock of impact Do not set up this product near a high voltage line or power source If this product is set up near high voltage lines or power sources it might receive interference Do not set up in a location subject to direct sunlight ...

Page 10: ...p away from other electric devices Microwave may cause the interference Precautions Regarding Operation In the following cases unplug the product from the mains and ask the dealer a After the mains lead or power supply plug is damaged b After a liquid is spilled onto the main unit c After the main unit is exposed to rain or water d After this product malfunctions even when operated according to th...

Page 11: ...ng on the wall selected For details consult your dealer P 1 9 Before installation take the wall strength into consideration Before using the StarBoard make sure that it has been fastened securely so that it will not fall Also verify that the wall mounting bracket is strong enough to support a weight of approximately 88 2lb 40 kg P 1 9 Be sure to install batteries correctly Do not install batteries...

Page 12: ...Method 1 9 1 4 3 How to Connect When Using Projection Mode 1 11 2 Usage 2 1 2 1 Basic Usage 2 1 2 1 1 Preparation 2 1 2 1 2 How to Use Electronic Pen 2 2 2 1 3 Basic operation of Electronic Pen 2 3 2 1 4 Electronic Pen Setting 2 3 2 1 5 Replacing Electronic Pen Tip 2 4 2 2 How to Use StarBoard in Projection Mode 2 5 2 2 1 Wired Connection Windows version 2 5 2 2 2 Wired Connection Mac version 2 6 ...

Page 13: ...e PC screen The input characters or drawn images are imported as digital data in real time into the PC where they can be saved or printed Available immediately after starting the PC For Windows After the provided StarBoard Software is installed onto the PC StarBoard can be used as soon as the PC is started Compatible with PowerPoint presentations Characters or images can be written into presentati...

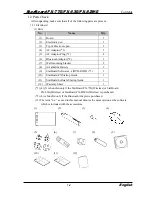
Page 14: ... mounting bracket 2 8 AA alkaline Battery 2 9 StarBoard Software x x DVD ROM 3 1 10 StarBoard FX Startup Guide 1 11 StarBoard Software Startup Guide 1 12 Warranty Sheet 1 1 4 5 is bundled only if the StarBoard FX 77G Wireless or StarBoard FX 63G Wireless or StarBoard FX 82WG Wireless is purchased 2 6 is bundled only if the Bluetooth Adapter is purchased 3 The term x x as used in this manual denote...

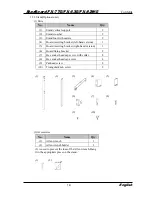
Page 15: ...t left hand version 1 5 Board receiving bracket right hand version 1 6 Board fixing bracket 2 7 Hex socket head cap screw with collar 8 8 Hex socket head cap screw 4 9 Panhead screw 8 10 Triangular knob screw 2 1 2 3 4 5 6 7 8 9 10 2 Accessories No Name Qty 1 Allen wrench 1 2 Allen wrench holder 1 2 is used to prevent the loss of the Allen wrench Hang it in the appropriate place on the stand 1 2 ...

Page 16: ... used frequently in applications are located here Please refer to the next page for details 3 Pen Input Active Area Annotations and graphics drawn in this area are stored into the PC When using the StarBoard in the Projection Mode confine to this area the images projected by the projector 4 USB Cable Connect to the PC for Wired Models or connect to AC adaptor for Wireless Models 5 Casters Parts of...

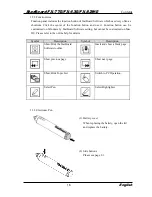
Page 17: ...ndows by StarBoard Software setting but cannot be customized on Mac OS Please refer to the online help for details Symbol Description Symbol Description Show Hide the StarBoard Software toolbar Insert and show a blank page Show previous page Show next page Show Hide Topic List Switch to PC Operation Select Pen Select Highlighter 1 3 3 Electronic Pen 1 Battery cover When replacing the battery open ...

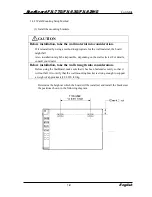
Page 18: ...ow temperature or humidity or that are exposed to direct sunlight 1 4 1 Stand Setup Method Reconfirm that all parts are present before assembling and setting up the stand 1 Stand Assembly Assemble the stand according to the following diagram Numbers in the diagram correspond to numbers in the parts list on page 1 3 CAUTION Fasten the screws tightly Otherwise the stand might fall and cause injury o...

Page 19: ...board will be installed and use the square holes on the back of the board to hang it on the board receiving brackets b Verify that one of the board s square holes is attached securely to the board receiving bracket on each side c Tighten triangular knob screw to fasten the board to the board fixing bracket on each side CAUTION This work should be performed by at least two people The board might fa...

Page 20: ...riangular knob screw at the bottom of each side b Raise the board and re hang it by attaching the square holes for the desired height to the receiving brackets c Fasten the triangular knob screw at the bottom of each side CAUTION Fasten the screws tightly The board might fall and cause injury or its impact might cause damage This work should be performed by at least two people The board might fall...

Page 21: ...erial into consideration If it is installed by using a method inappropriate for the wall material the board might fall Also installation might be impossible depending on the wall selected For details consult your dealer Before installation take the wall strength into consideration Before using the StarBoard make sure that it has been fastened securely so that it will not fall Also verify that the ...

Page 22: ...cause damage NOTE The equipment might malfunction if set up in an excessively bright location If the ceiling lights are too bright it will be necessary to adjust the brightness by turning off the lights etc Either avoid setting it up in a location exposed to direct sunlight or near a window or use curtains etc to block the sunlight Otherwise the equipment might malfunction If multiple systems are ...

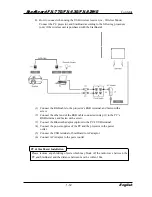
Page 23: ...edure 1 Connect the RGB cable to the projector s RGB terminal and fasten with the integral screws 2 Connect the opposite side of the RGB cable connected in step 1 to the PC s RGB terminal and fasten with the integral screws 3 Connect the USB cable from StarBoard to the USB terminal of the PC 4 Connect the power supplies of the PC and the projector to the mains RGB RGB USB Projector RGB Cable Power...

Page 24: ...with a screw 2 Connect the other end of the RGB cable connected in step 1 to the PC s RGB terminal and fasten with a screw 3 Connect the Bluetooth adaptor option to the PC s USB terminal 4 Connect the power supplies of the PC and the projector to the power outlet 5 Connect the USB terminal of StarBoard to AC adaptor 6 Connect AC Adaptor to the power outlet Please remove any shielding objects which...

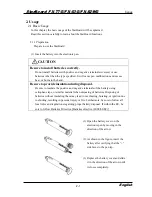
Page 25: ...closes completely CAUTION Be sure to install batteries correctly Do not install batteries with positive and negative terminals reversed or use batteries other than the type specified It will cause pen malfunctions and excess heat or burns to the hand Be sure to provide insulation during disposal Be sure to insulate the positive and negative terminals of the battery using cellophane tape or similar...

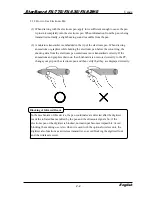
Page 26: ... the electronic pen sometimes is not transmitted correctly If the annotations and graphics drawn on the whiteboard are not stored correctly to the PC change your grip on the electronic pen and then verify that they are displayed correctly In the mechanism of this device the pen coordinates are detected after the digitiser reads the infrared beam emitted by the pen and the ultrasonic signals So if ...

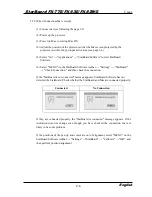
Page 27: ...m the Click operation explained above twice in the same spot Drag Drag Push the pen tip onto the starboard with sufficient force and without releasing it away from the broad move it from one point to another 2 1 4 Electronic Pen Setting The electronic pen has one pen tip button and two side buttons Mouse actions can be assigned to these three buttons The default button settings are summarized in t...

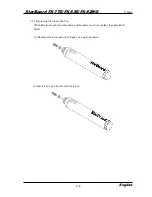
Page 28: ... 82WG English 2 1 5 Replacing Electronic Pen Tip When Electronic pen tip wears down and becomes too short replace it as described below 1 Remove electronic pen tip by finger or a pair of pincers 2 Insert a new pen tip into electronic pen ...

Page 29: ...Board icon on the desktop If the No connection icon in below appears on the Tasktray it means that the StarBoard is not connected Make sure that the StarBoard and the PC are properly connected Connected No Connection If the StarBoard is properly connected the icon changes to Connected as above If the icon does not change despite correcting the connection there may be some other problem For details...

Page 30: ...oftware toolbar Settings StarBoard Check Connection and then check the connection If the StarBoard is not connected message appears StarBoard Software has not detected the StarBoard Check whether the StarBoard and Mac are connected properly Connected No Connection If they are connected properly the StarBoard is connected message appears If the indication does not change even though you have checke...

Page 31: ...efer to USB Bluetooth Adapter Installation Manual provided with the Bluetooth Dongle 2 2 4 Wireless Connection Mac version 1 Connect devices following the page 1 12 2 Power up the projector 3 Power up PC to start up Mac 4 Adjust the position of the projector so that the Mac screen projected by the projector is within the pen input active area see page 1 4 In case of using Bluethooth adaptor other ...

Page 32: ...her than the above Contact customer support Is the USB cable connected to the AC adapter Connect the USB cable to the AC adapter Is the Bluetooth receiver attached to the PC Connect the Bluetooth receiver Bluetooth adapter etc to the PC Is the green LED on the digitizer lit Check the USB cable and AC adapter Are the Bluetooth adapter and StarBoard positioned too far apart With the Bluetooth adapto...

Page 33: ...ls on battery replacement see page 2 1 of this User s Guide The StarBoard Software file may be corrupt or the software installation may not have been completed correctly Uninstall and then reinstall the StarBoard Software For details on installing StarBoard Software see the StarBoard Software x x Installation Guide Is there a nearby light source or sound source with a wavelength close to that of t...

Page 34: ...rectly Perform the pen alignment correctly For details see page x x in the StarBoard Software x x Installation Guide The tip of the Electronic pen and pen cursor are not aligned Other than the above Contact customer support Has the StarBoard been installed in the proper orientation Adjust the position of the StarBoard and projector Is the PC screen being projected inside the StarBoard s input area...

Page 35: ...mption 100 240V 0 2 A 100 240V 0 2 A AC adaptor output voltage power consumption 5 0 V 0 5 A 5 0 V 0 5 A Weight of main unit weight including stand 17 kg 34 kg 12 kg 29 kg Bundled software StarBoard Software 1 set Ambient temperature 16 35 C 2 Environmental conditions Humidity 20 80 Battery life Continuous operating time Approximately 90 hours 3 1 This product uses infrared and ultrasonic as digit...

Page 36: ...umption 5 0 V 0 5 A Weight of main unit weight including stand 18 kg 35 kg Bundled software StarBoard Software 1 set Ambient temperature 16 35 C 2 Environmental conditions Humidity 20 80 Battery life Continuous operating time Approximately 90 hours 3 1 This product uses infrared and ultrasonic as digitiser technology Please avoid using this product near the devices areas such as place to be expose...

Page 37: ...t rubbing or striking the StarBoard surface with a fingernail or other hard object may result in scratching 2 Cleaning the electronic pen To clean the electronic pen use a neutral cleansing agent Do not apply the neutral cleansing agent directly but rather dampen a soft wet cloth with a mixture of water and the cleaner and wring it out thoroughly before wiping Never use solvents such as thinner D ...

Page 38: ...refer to the warranty sheet for this product s warranty service period 4 Even during the warranty period there will be a repair charge in the following cases 1 If the registration card accompanying the warranty is not returned to our company 2 If the warranty is not presented 3 If specified fields on the registration card accompanying the warranty are not completed or if the wording has been chang...

Page 39: ...ise Authorisation number it might not be covered by warranty 6 As a rule the customer is responsible for shipping charges required to send all or part of the product for repair etc Our company will assume responsibility for the return shipping to the customer 7 This warranty does not cover labour fees for repair associated equipment assembly or disassembly 8 Incidental damage caused by the failure...

Reviews: