--- 20 ---
9. REPAIR GUIDE
WARNING : Without fail, remove the Model EB 14B or EB 1430H Battery from the main body before
starting repair or maintenance work. Because the tool is cordless, if the battery is left in and
the switch is activated inadvertently, the motor will start rotating unexpectedly, which could
cause serious injury.
9-1. Precautions in Disassembly and Reassembly
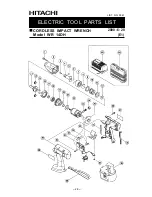
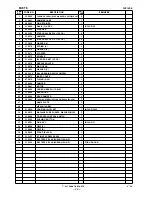
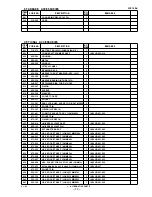
The [Bold] numbers correspond to the item numbers in the Parts List and the exploded assembly diagram.
9-1-1. Disassembly
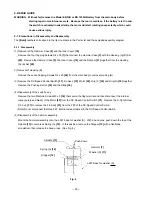
(1) Removal of the Hammer Case [2] and the Inner Cover [19]
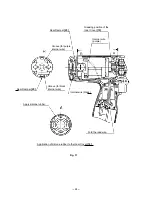
Remove the four Tapping Screws D4 x 35 [1] that connect the Hammer Case [2] with the Housing (A).(B) Set
[29]. Remove the Hammer Case [2], the Inner Cover [19] and the Damper [21] together from the Housing
(A).(B) Set [29].
2) Removal of Housing (B)
Remove the seven Tapping Screws D4 x 20 [26] from the main body to remove Housing (B).
(3) Remove the DC-Speed Control Switch [31], Fin Ass'y [33], Motor [22], Grip (F) [34] and Grip (R) [35] together.
Remove the Pushing Button [32] and the Strap [36].
(4) Disassembly of the switch ass'y
Remove the two Machine Screws M3 x 5 [30] that secure the flag terminal and then disconnect the internal
wires (purple and black) of the Motor [22] from the DC-Speed Control Switch [31]. Remove the S-Tight Screw
D3.5 x 6 [37] to remove the Fin Ass'y [33] from the FET of the DC-Speed Control Switch.
(Note) Do not disconnect the three FET internal wires soldered to the DC-Speed Control Switch.
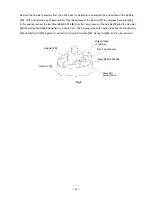
(5) Disassembly of the hammer assembly
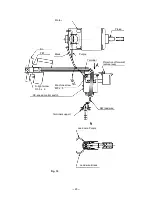
Mount the hammer assembly onto the J-297 base for washer (S). With a hand pres, push down the top of the
Spindle [13] to compress Spring (A) [10]. In this position, remove the Stopper [12] with a flat-blade
screwdriver, then release the hand press. (See Fig. 8.)
Spindle [13]
J-297 Base for washer (S)
Washer (S) [11]
Hammer [7]
Stopper [12]
Spring (A) [10]
Push down
Fig. 8


