background image

ANTENNA/CABLE CONNECTIONS 


24

channel while viewing another. Scrambled channels can not be recorded with this connection. 

RECORDING HINT 

1) VCR power and the "VCR" indicator must be on. 
2) Turn on the TV and Box. 
3) Set the channel to be recorded on the VCR. 
4) Set the TV and Box to channel 3 or 4. 
5) Set the CH3/CH4 switch on the back of the VCR to match the channel set on the TV. 
6) To view ONE channel while recording ANOTHER the "VCR" indicator must be off. 
7) Or for AUTOMATIC TIMER RECORDING the "VCR" indicator must be off after step [11] on 
page 25. 
8) Set the channel to be viewed on the Box. 

Note:

 If you wish to see the VCR menu, view what you are recording or playing a tape with this 

connection, the "VCR" indicator must be on and the Box channel must match the channel 
selected on the back of the VCR. (CH 3 or 4) 

Note to CATV system installer 

This reminder is provided to call the CATV system installer's attention to Article 820-40 of the 
NEC that provides guidelines for proper grounding and, in particular, specifies that the cable 
ground shall be connected to the grounding system of the building, as close to the point of 
cable entry as practical. 

Summary of Contents for VT-MX431A

Page 1: ... when the end of a tape is reached Direct Button Operation 2 Step Picture Search Operation Still Digital Auto Tracking DTR Auto Repeat Rental Play Mode Three different tape speeds SP LP SLP IRT Instant Recording Timer 1 Year 7 events including Daily and Weekly Timer Recording Auto Return Time Search Quick Find Index Search Slow Motion HITACHI HOME ELECTRONICS AMERICA INC 3890 Steve Reynolds Blvd N...

Page 2: ...CONNECTIONS 21 RECORDING HINT 22 RECORDING HINT 23 RECORDING HINT 24 SETTING THE CH3 CH4 SWITCH 25 CONNECTING TO INPUT JACKS 26 INPUT SELECT 26 A V TERMINALS 27 INSTALLING THE BATTERIES 28 SET UP FOR USE 29 CHANNEL SET UP Automatic 30 TO SELECT A DESIRED CHANNEL 30 pg 15 CLOCK SET UP 31 TO CHANGE CLOCK SETTING 32 TO DELETE OR ADD CHANNELS 33 CHANNEL SET UP AGAIN 34 SELECTING THE LANGUAGE 35 PLAYBA...

Page 3: ...RTED AUTOMATIC TIMER PROGRAM 60 CANCELING OR CHECKING THE START END TIME 60 AUTO RETURN 61 WATCH THE RECORDED PROGRAM 61 COPYING A VIDEO TAPE 62 TO MONITOR THE RECORDING 62 ON SCREEN DISPLAY 63 DIGITAL DISPLAY 64 SPECIAL FEATURES 65 REAL TIME TAPE COUNTER 65 AUTO REWIND 65 CONTROLLING YOUR TV OR CABLE CONVERTER WITH THE VCR S REMOTE 66 REMOTE CONTROL OF THE CABLE CONVERTER 67 PROGRAMMING THE REMOT...

Page 4: ...oduct from the wall outlet before cleaning Do not use liquid cleaners or aerosol cleaners Use a damp cloth for cleaning EXCEPTION A product that is meant for uninterrupted service and that for some specific reason such as the possibility of the loss of an authorization code for a CATV converter is not intended to be unplugged by the user for cleaning or any other purpose may exclude the reference ...

Page 5: ...ugs convenience receptacles and the point where they exit from the appliance 13 Outdoor Antenna Grounding If an outside antenna or cable system is connected to the video product be sure the antenna or cable system is grounded so as to provide some protection against voltage surges and built up static charges Article 810 of the National Electrical Code ANSI NFPA No 70 provides information with rega...

Page 6: ...ore the video product to its normal operation e If the video product has been dropped or damaged in any way f When the video product exhibits a distinct change in performance this indicates a need for service 20 Replacement Parts When replacement parts are required be sure the service technician has used replacement parts specified by the manufacturer or have the same characteristics as the origin...

Page 7: ...nse heat Avoid dusty or humid places Avoid places with insufficient ventilation for proper heat dissipation Do not block the ventilation holes on the sides of the VCR Install unit in a horizontal position Avoid locations subject to strong vibration Do not place the VCR near strong magnetic fields Avoid moving VCR to locations where temperature differences are extreme Do not place the VCR directly ...

Page 8: ...not pull on the power cord when disconnecting it from AC wall outlet Grasp it by the plug If by accident water is spilled on your VCR unplug the power cord immediately and take the unit to our Authorized Service Center for servicing Do not put your fingers or objects into the VCR cassette holder Do not place anything directly on top of the VCR ...

Page 9: ...ture condensation may occur inside the unit when it is moved from a cold place to a warm place or after heating a cold room or under conditions of high humidity Do not use the VCR at least for 2 hours until its inside is dry ...

Page 10: ...pplicable copyright laws We assume no responsibility for the unauthorized duplication use or other acts which infringe upon the fights of copyright owners WARNING TO PREVENT ELECTRIC SHOCK MATCH WIDE BLADE OF PLUG TO WIDE SLOT FULLY INSERT The serial number of this product may be found on the back of the VCR No other VCR has the same serial number as yours You should record the number and other vi...

Page 11: ...ATTERIES 13 SET UP FOR USE 14 CHANNEL SET UP Automatic 14 CLOCK SET UP 15 TO DELETE OR ADD CHANNELS 16 CHANNEL SET UP AGAIN 16 SELECTING THE LANGUAGE 16 PLAYBACK 17 NORMAL PLAYBACK 17 PICTURE SEARCH 17 STILL PICTURE 17 VERTICAL HOLD CONTROL 18 TRACKING ADJUSTMENT 18 SLOW MOTION 18 COUNTER MEMORY 18 SPECIAL PLAYBACK 19 AUTO REPEAT PLAYBACK 19 RENTAL PLAYBACK 19 INDEX SEARCH 20 QUICK FIND 21 TIME SE...

Page 12: ...PYING A VIDEO TAPE 27 ONSCREEN DISPLAY 28 DIGITAL DISPLAY 28 SPECIAL FEATURES 28 REAL TIME TAPE COUNTER 28 AUTO REWIND 28 CONTROLLING YOUR TV OR CABLE CONVERTER WITH THE VCR S REMOTE 29 REMOTE CONTROL OF THE CABLE CONVERTER 29 REMOTE CONTROL OF THE TV 30 TROUBLESHOOTING GUIDE 31 MAINTENANCE 32 TECHNICAL SPECIFICATIONS 32 CABLE CHANNEL DESIGNATIONS 33 ...

Page 13: ...perform the desired function Does not occur when using the timer recording 2 Step Picture Search Operation You can view a video program at a high speed or super high speed in either a forward or reverse direction Super high speed is available in LP and SLP mode only Still Freeze the picture at any time for close viewing of a particular scene Digital Auto Tracking DTR Automatically adjusts the trac...

Page 14: ...e contents of the recorded program s using the index mark Index search Lets you Index the start of a recording Slow Motion You can view the video program at a slower than normal playback speed Slow speed can be controlled by pressing the F FWD button faster or the REW button slower ...

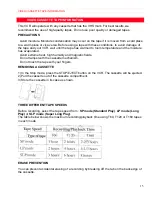
Page 15: ... has evaporated Avoid extreme heat high humidity and magnetic fields Do not tamper with the cassette mechanism Do not touch the tape with your fingers REMOVING A CASSETTE 1 In the Stop mode press the STOP EJECT button on the VCR The cassette will be ejected 2 Pull the cassette out of the cassette compartment 3 Store the cassette in its case as shown THREE DIFFERENT TAPE SPEEDS Before recording sel...

Page 16: ...cord on the tape again cover the hole with plastic tape INSERTING A CASSETTE Insert the cassette in the direction as shown Push in gently but continuously on the center back of the cassette until it is drawn into the VCR The VCR will automatically turn on ...

Page 17: ...er program Press to add or delete channel numbers during channel preset only on the remote control 3 STOP button Press to stop the tape motion EJECT button Press to remove a tape from the VCR only on the VCR button Press to enter digits when setting program For example setting clock or timer program Press to select the setting modes from the on screen menu only on the remote control 4 PLAY button ...

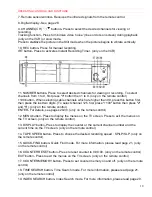
Page 18: ... 125 first press 100 button then press 2 and 5 only on the remote control ENTER For details see pages 29 30 only on the remote control 12 MENU button Press to display the menus on the TV screen Press to exit the menus on the TV screen only on the remote control 13 DISPLAY button Press to display the counter or the current channel number and the current time on the TV screen only on the remote cont...

Page 19: ... the remote control VCR position to view playback to monitor video recordings or watch TV using the VCR tuner TV position to watch TV or to view one program while recording another 25 MODE SELECT buttons only on the remote control CATV button For details see page 29 TV button For details see page 30 VCR button For details see pages 29 30 26 Power cord Connect to a standard AC outlet 120V 60Hz 27 A...

Page 20: ...PREPARATION FOR USE 20 PREPARATION FOR USE ...

Page 21: ...k of your VCR 3 Connect one end of the coaxial cable supplied to the ANT OUT Bottom jack of your VCR 4 Connect the other end of the coaxial cable supplied to the UHF VHF antenna jack of your TV You can record one channel while viewing another The same goes for Automatic Timer Recording and IRT For details please refer to Recording on page 22 Note The connection of an indoor antenna with a VCR may ...

Page 22: ...r must be on 2 Turn on the TV and Box 3 Set the channel to be recorded on the Box 4 Set the TV and VCR to channel 3 or 4 5 Set the CH3 CH4 switch on the back of the VCR to match the channel set on the TV and VCR 6 Press the RECORD button or for AUTOMATIC TIMER RECORDING the VCR must stay on channel 3 or 4 at step 9 on page 25 Continued on the next page Some customers with cable boxes may record on...

Page 23: ...nd VCR 6 Press the RECORD button or for AUTOMATIC TIMER RECORDING the VCR must stay on channel 3 or 4 at step 9 on page 25 7 Set the A B switch to the other side or for AUTOMATIC TIMER RECORDING set the A B switch to the other side after step 12 on page 25 8 Select the channel to be viewed on the TV Note If you wish to see the VCR menu view what you are recording or playing a tape with this connec...

Page 24: ...TIMER RECORDING the VCR indicator must be off after step 11 on page 25 8 Set the channel to be viewed on the Box Note If you wish to see the VCR menu view what you are recording or playing a tape with this connection the VCR indicator must be on and the Box channel must match the channel selected on the back of the VCR CH 3 or 4 Note to CATV system installer This reminder is provided to call the C...

Page 25: ...Playback mode or when the VCR is in the VCR position your TV will receive signals from the VCR on either channel 3 or 4 To use the VCR with your TV set the selector switch to CH3 or CH4 which is located in the back of your VCR whichever is not used for normal broadcasts in your area Then set your TV to the same channel ...

Page 26: ...tch on the back of the VCR to match the channel selected on the TV 3 Connect the audio video cables to the audio video input jacks on the back of the VCR Now connect the other end of the cables to the audio video output jacks on the source 4 Press the CHANNEL CH or button to select AUX which will appear on the TV screen or AU on the digital display of the VCR You may also select the AUX setting by...

Page 27: ...ou may connect your VCR s AUDIO VIDEO OUTPUT jacks to the audio video input jacks on back of your TV Direct audio video connections usually result in a better picture and sound quality for tape playback Please see your TV s owner s manual for A V input connections ...

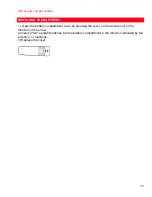
Page 28: ...TERIES 1 Open the battery compartment cover by pressing the cover on the remote unit in the direction of the arrow 2 Insert 2 AA penlight batteries into the battery compartment in the direction indicated by the polarity markings 3 Replace the cover ...

Page 29: ...the back of VCR CH3 or CH4 Then the channel you wish to record or view may be selected on the cable box or satellite box Follow the steps below once Repeat it only if there is a power failure or if the VCR is unplugged for more than 30 seconds In these cases the programmed channels are erased You must follow the steps below before attempting to play or record a video tape If you want to play or re...

Page 30: ...SH or ESPANOL Spanish by using the PLAY or STOP button Then press the MENU or F FWD button NOTE This WILL NOT change the audio sound coming out of the VCR only the screen menu 5 Begin Channel preset Press the MENU F FWD or REW button once The tuner scans and memorizes all active channels in your area The VCR distinguishes between standard TV channels and cable channels 6 After scanning The tuner s...

Page 31: ...rs The number buttons on the remote control do not work in this Menu mode When you press the F FWD button during steps 2 to 6 you may move forward to the next step Press the REW button to go back one step from the current step during steps 3 to 7 2 Select the month Press the PLAY or STOP button repeatedly until the desired month appears Example March 03 Then the press F FWD button 3 Select the day...

Page 32: ...ze the clock with the correct time When unplugging the AC cord or if there is a power failure for more than 30 seconds you may have to reset the clock If the display shows an abnormal reading or no reading unplug the power cord for more than 30 seconds Then plug it back in And reset clock TO CHANGE CLOCK SETTING 1 Press the MENU button until the INITIALIZE menu appears 2 Press the PLAY or STOP but...

Page 33: ... menu appears 2 Select CHANNEL SET UP Confirm CHANNEL SET UP is pointed to then press the F FWD button 3 Select ADD DELETE CH Press the PLAY or STOP button to point to ADD DELETE CH Then press the F FWD button 4 Enter the desired channel number Press the number buttons or the PLAY or STOP button until your desired channel number appears Example CH02 5 Delete it from memory Press the F FWD or REW b...

Page 34: ...the VCR to match the channel you selected CH 3 or CH 4 Now select the Box to the channel you wish to view or record Use the remote control for this procedure 1 Press the MENU button until the INITIALIZE menu appears 2 Confirm CHANNEL SET UP is pointed to then press the F FWD button 3 Confirm AUTO TUNING is pointed to then press the F FWD button After scanning the tuner stops at the lowest memorize...

Page 35: ...ntil the INITIALIZE menu appears 2 Press the PLAY or STOP button to point to LANGUAGE SELECT Then press the F FWD button 3 Select ENGLISH or ESPANOL Spanish by using the PLAY or STOP button 4 Press the RESET EXIT button to return to TV mode NOTE If for some reason the menu is in Spanish press the MENU button until PARA INICIAR menu appears press the PLAY button to point to SELEC IDIOMA press the F...

Page 36: ...PLAYBACK 36 PLAYBACK ...

Page 37: ...utomatically 2 To begin playback Press the PLAY button NOTE If any menu is activated on the TV screen the PLAY button on the remote control does not function Press the RESET EXIT button to clear the menu Then press the PLAY button If a tape is already in the VCR with power off 2A Using button on the VCR Just press the PLAY button on the VCR Power will automatically turn on and playback will start ...

Page 38: ...In this mode the sound will be muted 1 You may view a video tape at a high speed in either a forward or reverse direction by pressing the F FWD or REW button in the SP LP SLP modes 2 Press it again and the VCR will now search in super high speed in the LP SLP modes only 3 Press the PLAY button to return to normal speed ...

Page 39: ...E button on the remote control during playback Press the PLAY button to return to playback You can advance the picture by one frame at a time by pressing the PAUSE button on the remote control during the still mode If it is left in the Still mode for more than five minutes the VCR will automatically switch to the Stop mode ...

Page 40: ...only when the picture begins to vibrate vertically stabilize the picture by pressing the CHANNEL CH or button NOTES If the picture is distorted or rolling vertically adjust vertical hold control on your TV Most newer TV s do not have a user adjustable vertical hold control ...

Page 41: ...s you can adjust the tracking control manually by pressing the CHANNEL or button on the VCR until the streaks disappear To return to the DTR function stop the tape once and start playback again You can reduce the noise lines by pressing the CHANNEL CH or button in slow mode too Slow tracking adjustment will not be set automatically NOTE In Still mode press the SLOW button and press the CHANNEL CH ...

Page 42: ...R mutes the sound during slow motion You can control the speed by pressing the F FWD button faster or the REW button slower Press the PLAY button to return to normal playback NOTE If it is left in the Slow mode for more than five minutes the VCR will automatically go into the Stop mode ...

Page 43: ...mote control If necessary press the COUNTER RESET button again to reset the counter to 0 00 00 3 Select the Counter Memory mode Press the COUNTER MEMORY button on the remote control until M appears on the TV screen The COUNTER MEMORY button does not function if the Auto Repeat mode is set to ON In this case set the Auto Repeat mode to OFF 4 Begin recording or playback Press the REC or PLAY button ...

Page 44: ...mote control for the following procedure The PWR and the VCR indicator must appear on the VCR s digital display Turn on the TV and set the TV to channel 3 or 4 Now set the CH3 CH4 switch on the back of the VCR to match the channel selected on the TV ...

Page 45: ...p mode Repeat playback mode will start automatically If the on screen menu still remains press the RESET EXIT button to exit the menu Once you select the Auto Repeat mode it stays in effect even after you turn off the VCR The COUNTER MEMORY button does not function if the Auto Repeat mode is set to ON In this case set the Auto Repeat mode to OFF To stop playback press the STOP button TO EXIT THE A...

Page 46: ...n until the VCR SET UP menu appears 3 Select RENTAL Press the PLAY or STOP button to point to RENTAL 4 Select RENTAL to ON Press the F FWD button so that RENTAL ON appears Once you select the Rental mode it stays in effect even after you turn off the VCR To stop playback press the STOP button TO EXIT THE RENTAL PLAY MODE Repeat steps 1 to 3 and press the F FWD button so that RENTAL OFF appears Pow...

Page 47: ...ue with step 3 1 Select SEARCH SELECT Press the MENU button until the SEARCH SELECT menu appears 2 Select INDEX SEARCH Press the PLAY or STOP button to point to INDEX SEARCH Then press the F FWD button 3 Enter your desired number Press the PLAY or STOP button until the number of programs that you want to skip appears Example 03 for 3 programs The Index Search mode will be cancelled if the procedur...

Page 48: ...l You can also begin the Quick Find by the following procedure 1 Select SEARCH SELECT Press the MENU button until the SEARCH SELECT menu appears 2 Select QUICK FIND Confirm QUICK FIND is pointed to then press the F FWD button The VCR begins the Quick Find TO SKIP TO THE BEGINNING OF NEXT PROGRAM Press the QUICK FIND button on the remote control TO VIEW AT NORMAL SPEED Press the PLAY button The Qui...

Page 49: ...IME SEARCH Then press the F FWD button 3 Enter your desired time Press the PLAY or STOP button until your desired time appears 2 50 stands for 2 hours 50 minutes The Time Search mode will be cancelled if the procedures are not activated in 30 seconds 4 Begin Time Search By pressing the REW or F FWD button the VCR will rewind or fast forward to the specified point The time counts down as the search...

Page 50: ... the VCR indicator must appear on the VCR s digital display Turn on the TV and set the TV to channel 3 or 4 Now set the CH3 CH4 switch on the back of the VCR to match the channel selected on the TV Insert a cassette tape with its erase prevention tab in place If necessary rewind or fast forward the tape to the point at which you want to begin recording ...

Page 51: ...TIONS on pages 11 and 12 before proceeding to the next step 2 Select the tape speed Press the TAPE SPEED button on the remote control to select the desired tape speed SP LP SLP 3 Begin recording Press the REC button The REC indicator appears on the display NOTE If any menu is activated on the TV screen the REC button on the remote control does not function Press the RESET EXIT button to clear the ...

Page 52: ...arily stop recording Press the PAUSE or REC button to resume recording NOTE When the VCR is in the Pause mode you may view the time remaining with marks on the TV screen Each mark represents one minute After five minutes the VCR will automatically switch to the Stop mode to prevent tape damage When there is 1 minute remaining one will flash ...

Page 53: ...he channel you want to view at the TV follow the steps below NOTE If you have a cable box or satellite box connected to this VCR please refer to ANTENNA CABLE CONNECTIONS on pages 11 and 12 before proceeding to the next step 4 Select the TV mode Press the VCR TV button on the remote control so that the VCR indicator on the VCR s digital display disappears 5 Select the channel on the TV Set the TV ...

Page 54: ...1 Select the VCR mode Press the VCR TV button on the remote control so that the VCR indicator appears on the display 2 Select channel 3 or 4 on the TV Turn on the TV and set the TV to channel 3 or 4 Now set the CH3 CH4 switch on the back of the VCR to match the channel selected on the TV ...

Page 55: ...n the remote control or the CHANNEL CH or button 2 Begin IRT Press the REC IRT button on the VCR as many times as needed The recording length will be determined by the number of times you press the REC IRT button Each additional push will increase the recording time by 30 minutes It can be set for up to 8 hours Recording starts immediately when the REC IRT button is pressed whether you are watchin...

Page 56: ...TIMER RECORDING 56 TIMER RECORDING ...

Page 57: ... Clock must be set to the correct time and date before setting the timer Insert a cassette tape with its erase prevention tab in place If necessary rewind or fast forward the tape to the point at which you want to begin recording Avoid overlap of programs There is a case that a program will not be performed When programs overlap The program with an earlier start time has priority Once the earlier ...

Page 58: ...button until the desired month appears Example 05 for May Then press the F FWD button Next press the PLAY or STOP button until the desired day appears and then press the F FWD button Example 06 for 6th 5 Set the start hour Press the PLAY or STOP button until the desired hour appears Example 07 Then press the F FWD button 6 Set the start minute Press the PLAY or STOP button until the desired minute...

Page 59: ...TOP button until the desired tape speed appears Example SP 11 Finish setting the program Press the F FWD button Program 1 is now completed To set another program repeat steps 2 to 11 Press the RESET EXIT button to return to original mode 12 Set the timer Press the POWER button to turn off The indicator appears on the VCR s digital display Please see HINTS FOR TIMER RECORDING on page 26 for more in...

Page 60: ... TIMER PROGRAM 1 Turn the power on 2 Repeat steps 1 to 3 on page 24 3 Go to the digit you want to change by using the F FWD button or REW button 4 Enter correct numbers by using the PLAY or STOP button 5 Press the RESET EXIT button to return to original mode 6 Press the POWER button to return to timer stand by mode STOPPING A STARTED AUTOMATIC TIMER PROGRAM Press the STOP EJECT button on the VCR N...

Page 61: ...e VCR SET UP menu appears 2 Select AUTO RETURN Press the PLAY or STOP button to point to AUTO RETURN 3 Select AUTO Press the F FWD button so that AUTO appears next to AUTO RETURN 4 Exit the Auto Return mode Press the RESET EXIT button to return to original mode NOTE To exit the auto return programming repeat steps 1 to 2 Then press the F FWD button AUTO will then disappear from the menu Press the ...

Page 62: ...der Connecting to input jacks 5 Press the REC button on the editing recording VCR 6 Begin playback of the tape in the source playing VCR For best results during dubbing use the VCR s front panel controls whenever possible The remote control might affect the playback VCR s operation Always use video quality shielded cables with RCA type connectors Standard audio cables are not recommended You can u...

Page 63: ...n To check the Count Clock and Channel number press the DISPLAY button on the remote control Each time you press the DISPLAY button TV screen will change as shown below It is normal for the status display STOP PLAY etc and the tape speed display SP LP or SLP to disappear after 5 seconds ...

Page 64: ...3 Cassette indicator Lights up when there is a tape in the VCR 4 VCR indicator Indicates that the VCR is in the VCR position 5 REC indicator Lights up when the VCR is in the Recording mode Flashes when a recording has been paused 6 Clock Feature Channel indicator Indicates the current time when the clock is set and briefly displays which feature the VCR is currently performing as the illustration ...

Page 65: ...wound further than 0 00 00 on the tape counter AUTO REWIND When the end of a tape is reached during recording playback or fast forward the tape will automatically rewind to the beginning After rewinding finishes the VCR will eject the tape and turn itself to off The tape will not auto rewind during timer recording or Instant Recording Timer When the Counter Memory is activated the tape will rewind...

Page 66: ...ay still be able to program the remote for your TV Every TV that comes with a remote control is set up to detect certain infrared signals You need to program the VCR s remote control to send signals that your TV will recognize and respond to Here s what to do Compatibility The remote control is designed to be operated with many televisions and cable converters but will not work with every one made...

Page 67: ... your brand is not on the chart just go through all the button combinations until you find the one that works best TO OPERATE THE CABLE BOX ONCE THE REMOTE IS PROGRAMMED FOR IT 1 Press the CATV button and then the button of the function you want For example Press the CATV button and the CH and the cable converter station will change to the next higher station NOTE Also you may change the channels ...

Page 68: ...S If that button combination does not change the TV channel go through the whole list of button combinations one by one until you find one that does change your TV channel Also if your brand of TV is not listed in the chart try all the number buttons One of them may work for you If the TV channel still doesn t change after going through all the button combinations listed it is likely that you will...

Page 69: ...E Also you may change the channels at the TV by using the number buttons If you can not change the channels at the TV by using the number buttons press the ENTER button after you press the number buttons It may change channels at the TV 2 Return to the VCR function mode Press the VCR button to operate your VCR with the remote again ...

Page 70: ...ng the CHANNEL or button on the VCR No picture but the audio Head cleaning may be necessary is OK in playback consult our nearest Authorized Service Center No picture or poor Set your TV to the VCR mode picture on playback and or press the VCR TV button on the remote control so that the VCR indicator appears on the display Fine tune your TV On the air TV programs Re check the ANT IN and ANT cannot...

Page 71: ...e exposed surfaces HEAD CLEANING Playback picture may become blurred or interrupted while the TV program reception is clear Dirt accumulated on the video heads after long periods of use or the usage of rental or worn tapes can cause this problem If a streaky or snowy picture appears during playback the heads of your VCR may need to be cleaned 1 Please visit your local Audio Video store and purchas...

Page 72: ...Type Auto programming frequency synthesis Power Input AC120V 60Hz Power Consumption 16 W nominal Cabinet Size 14 1 4 W x 3 5 8 H x 9 1 16 D 36 0cm W x 9 2cm H x 23 0cm D Weight 5 51 lbs 2 5 kg approx Storage Temperature 4ºF to 131ºF Operating Temperature 41ºF to 104ºF Accessories 1 coaxial cable Part No 5857952 1 remote control unit Part No HL 11072 2 AA batteries Check your cable company s compat...

Page 73: ...ubscribe to cable TV the channels are displayed as 1 125 Cable companies often designate channels with letters or letter number combinations Please check with your local cable company The following is a chart of common cable channel designations Click for cable chart ...

Reviews: