


13
EN
Auto Return
When timer recording is finished, the VCR will automatically
rewind the tape to the beginning where it started recording. If
there are any remaining programmes including Daily,
Everyday, & Weekly, AUTO RETURN will not operate.
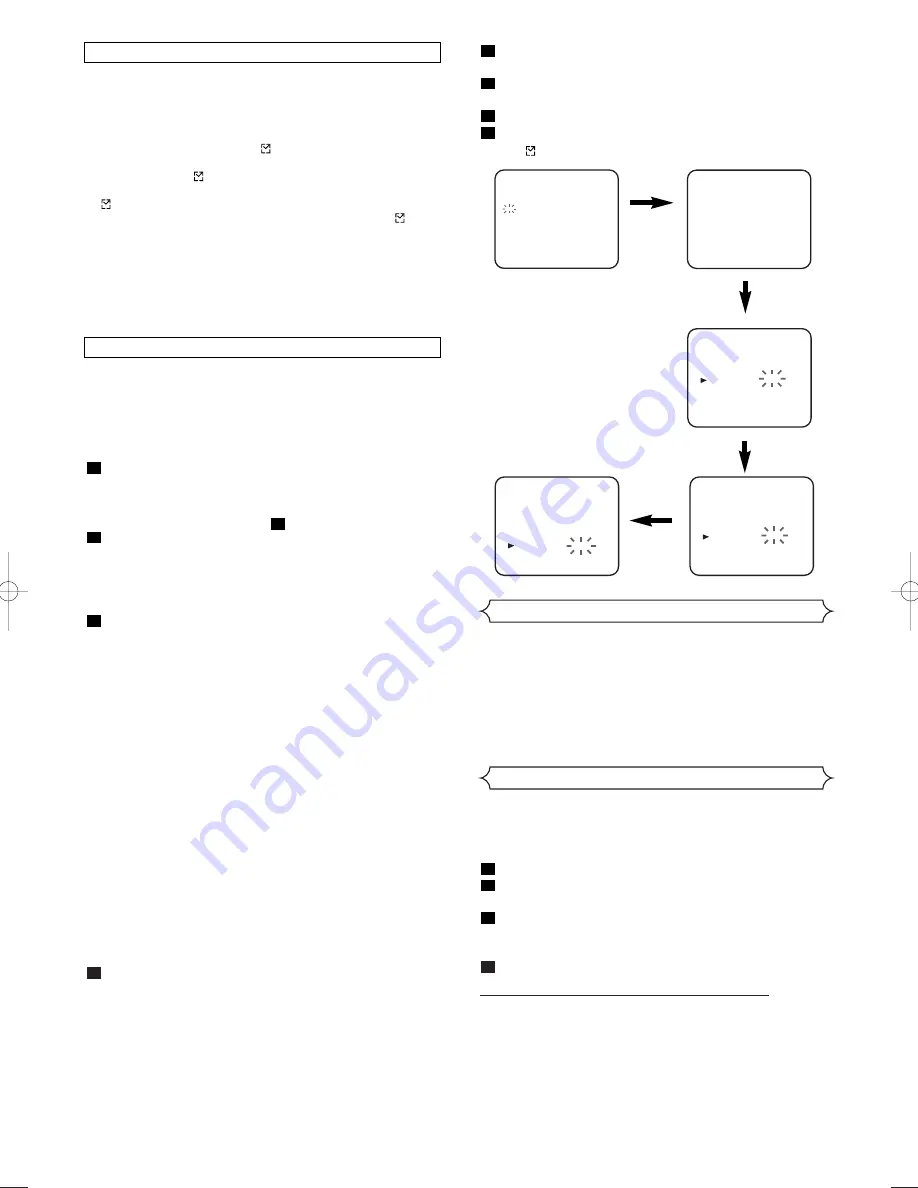
Press the MENU button
.
Press the PLAY/
o
or STOP/
L
button repeatedly to point
to “SET UP”, then press the F.FWD/
B
button.
Press the PLAY/
o
or STOP/
L
button to point to “AUTO
RETURN”, then press the F.FWD/
B
button.
[ON] will appear next to “AUTO RETURN”.
Press the MENU button
.
WATCH THE RECORDED TIMER PROGRAMME
Press the OPERATE button to turn on the VCR, then press
the PLAY button.
4
3
2
1
VIDEO Plus+ system
PlusCode No.
- - - - - - - - -
1 2 3 4 5 6 7 8 9
VIDEO Plus+ system
PlusCode No.
TIMER NUMBER 1
START
END
DATE
CHANNEL
SPEED
PDC
06/05 SA
19:30
20:30
16
SP
OFF
TIMER NUMBER 1
START
END
DATE
CHANNEL
SPEED
PDC
06/05 SA
19:30
20:30
16
SP
OFF
TIMER NUMBER 1
START
END
DATE
CHANNEL
SPEED
PDC
ON
06/05 SA
19:30
20:30
16
SP
PDC (Programme Delivery Control)
The PDC system looks for the start signal several hours
before published start time and for several hours afterwards.
This means that if the programme is broadcast anytime dur-
ing this period it will be recorded correctly.
Please note that if you have set an incorrect TIMER setting, it
will stay in the memory until you cancel it (see page 12 for
details on how to cancel a programme).
Y
ou can programme the timer using the PlusCode numbers
that are printed in TV guide magazine. You can set eight pro-
grammes to record.
• Use the remote control for the this procedure.
• Insert a cassette tape with its erase-prevention tab in
place. (If necessary, rewind or fast forward the tape to the
point at which you want to begin recording.)
Press the VIDEO Plus+ button.
NOTE:
If you have not set the clock yet, the “CLOCK” set-
ting menu will appear. If this happens, follow the instructions
in the “Setting the Clock” section. After the clock has been
set you may continue with step
.
Enter the PlusCode number
for the programme you want to record by using the
number buttons (0~9) on your remote control.
• If you make a mistake whilst entering the PlusCode num-
ber you can erase each digit in turn by pressing the
REW/
s
button.
For a once off recording press the VIDEO Plus+ button.
• If you want to repeat this recording on a daily or weekly
basis then select one of the following options before press-
ing the VIDEO Plus+ button.
•
FOR DAILY RECORDING:
To record a TV programme at
the same time on the same channel, from Monday to Friday.
• Press the DAILY/WEEKLY button repeatedly to select
“DAILY (MO-FR)”, then press the VIDEO Plus+ button.
•
FOR EVERYDAY RECORDING:
To record a TV programme
at the same time on the same channel every day.
• Press the DAILY/WEEKLY button repeatedly to select
“DAILY (MO-SU)”, then press the VIDEO Plus+ button.
•
FOR WEEKLY RECORDING:
To record a TV programme
at the same time on the same channel every week.
• Press the DAILY/WEEKLY button repeatedly to select
“WEEKLY”, then press the VIDEO Plus+ button.
NOTES:
• If the PlusCode number is not available, it will be cleared
automatically when you press the VIDEO Plus+ button.
Enter the correct PlusCode number and press the VIDEO
Plus+ button again.
• If the PlusCode number flashes when you press the
VIDEO Plus+ button, this means that the PlusCode num-
ber you entered was incorrect or the timer recording you
just programmed and another timer recording overlap.
Confirm the channel number, then, press the F.FWD/
B
button.
• If your local channel information is programmed in VCR’s
memory, your local channel number appears automatically.
• If your local channel information is not programmed in VCR’s
memory, “– –” or an incorrect channel number may appear.
In this case, press the PLAY/
o
or STOP/
L
button repeatedly
until your desired channel number appears. Then, press the
F.FWD/
B
button.
• When you select the channel number using the PLAY/
o
or
STOP/
L
button, it memorises in VCR’s memory.
4
3
2
2
1
Timer Recording Using the VIDEO Plus+
®
System
Press the PLAY/
o
or STOP/
L
button repeatedly until the
desired tape speed appears.
Press the PLAY/
o
or STOP/
L
button to set PDC “ON” or
“OFF”.
Press the MENU button to exit.
Press the OPERATE button to activate the timer.
The
indicator on the display comes on.
8
7
6
5
Hint for Timer Recording
• If there is a power failure or the VCR is unplugged for more
than 1 minute, the clock setting and all timer settings will be
lost.
• If the tape runs out before the end time, the VCR will switch
to the Stop mode immediately, eject the tape and the VCR
power will be turned off. The
indicator will flash.
• If a tape is not in the VCR, timer recording cannot be per-
formed and the
indicator flashes. If an erase-prevention
tab of the tape is missing, the tape will be ejected and the
indicator will flash. Please insert a recordable tape.
• When all the Timer Recordings are completed, the
indi-
cator also flashes. To play or eject the recorded tape,
press the OPERATE button first, and then press the
PLAY or EJECT button.
• The TV that is connected to your VCR may be turned on or
off when the VCR is in the Timer-recording mode.
• The VCR will only perform a timer recording after it has been
placed into standby mode.
HG260BD.QX4 04.3.8 7:37 PM Page 13


