background image


35

Notes: 

• Recording will not start unless the cassette has the safety tab in place. If this tab has been 
removed, the VCR will eject the tape. 
• Press the PAUSE button to set the VCR to the recording pause mode. Press the button again 
to re-start recording. 
• If you stay in PAUSE mode for more than 5 minutes, the VCR automatically switches to 
STOP mode to protect the tape. 

7 Press the STOP button to finish recording. 


RECORDING A PROGRAM -RECORDING TIPS 

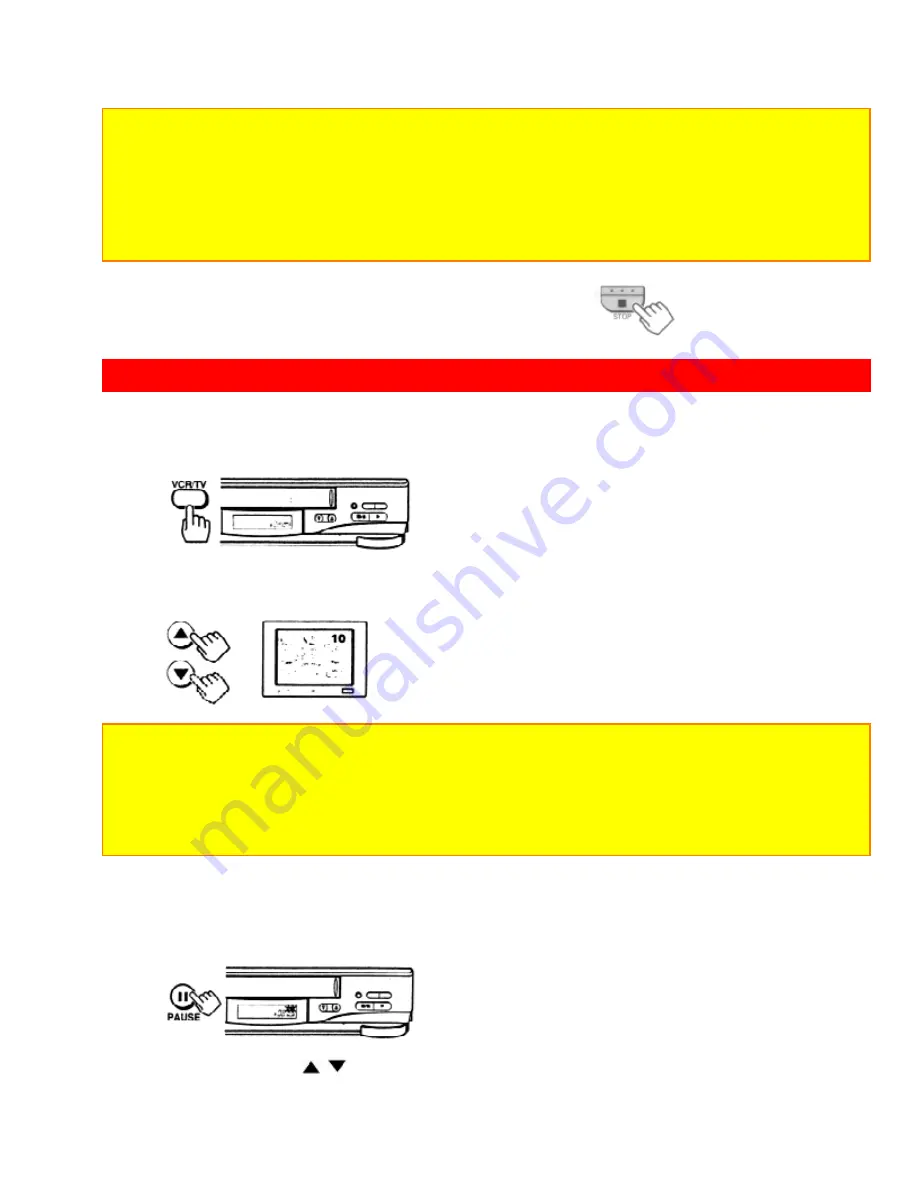
To watch one program while recording another 

1 Once you have set the VCR for recording, press the VCR/TV button. 

The VCR indicator disappears. Now, you will be viewing through your TV only. 


2 Switch channels using your TV controls or the VCR remote, if it's programmed 
to control your TV (see page 39). 


Notes: 

• You can check on the recording by pressing 

VCR/TV

 again. This will switch you back to 

viewing through the VCR, and you'll see the program you are recording. 
• 

If you're hooked up with an audio/video cable: 

Switch the TV from 

AUX

 or 

VIDEO

 mode 

back to the TV mode, then select the channels you want to watch, as described in Step 2. 
Switch TV back to 

AUX

 or 

VIDEO

 to monitor your recording. 

To change the channel being recorded 

Remote Control Illustration 

1 Press the PAUSE button to stop the recording temporarily. 


2 Press the CH (

/

) button or number buttons to change the channel to the 

one you prefer. 

Summary of Contents for VT-FX621A

Page 1: ...y synthesized tuner provides easy preset tuning of up to 68 broadcast TV channels and 125 cable channels VHS Hi Fidelity sound in playback On screen programming guide Hitachi Home Electronics America Inc HITACHI HSC CANADA INC 3890 Steve Reynolds Blvd Norcross GA 30093 3300 Trans Canada Highway Pointe Claire Tel 770 279 5600 Quebec H9R 1B1 CANADA Tel 514 697 9150 HITACHI SALES CORPORATION OF HAWAI...

Page 2: ...E TIME COUNTER 31 RECORDING A PROGRAM 32 RECORDING A PROGRAM RECORDING TIPS 35 INSTANT RECORDING TIMER 37 DELAYED RECORDING 38 PROGRAM REVIEW 42 PROGRAMMING THE VCR REMOTE TO CONTROL YOUR TV 43 PROGRAMMING THE VCR REMOTE TO CONTROL YOUR CABLE BOX 45 INTEGRATING YOUR STEREO SYSTEM WITH YOUR VCR 46 COPYING TAPES FROM A CAMCORDER 47 COPYING FROM ONE VCR TO ANOTHER VCR DUBBING 48 PROBLEM GUIDE MAINTEN...

Page 3: ... modifications not expressly approved by the party responsible for compliance could void the user s authority to operate the equipment Note to CATV system installer This reminder is provided to call the CATV system installer s attention to Article 820 40 of the NEC that provides guidelines for proper grounding and in particular specifies that the cable ground shall be connected to the grounding sy...

Page 4: ...onsult your video dealer or local power company For video products intended to operate from battery power or other sources refer to the operating instructions 6 Overloading Do not overload wall outlets and extension cords as this can result in a risk of fire or electric shock Overloaded AC outlets and extension cords are dangerous and so are frayed power cords damaged or cracked wire insulation an...

Page 5: ...the manufacturer or sold with the video product Any mounting of the product should follow the manufacturer s instructions and should use a mounting accessory recommended by the manufacturer 11A An appliance and cart combination should be moved with care Quick stops excessive force and uneven surfaces may cause the appliance and cart combination to overturn 12 Outdoor Antenna Grounding If an outsid...

Page 6: ... servicing to qualified service personnel 18 Conditions Requiring Service Unplug this video product from the wall outlet and refer servicing to qualified service personnel under the following conditions a When the power supply cord or plug is damaged b If liquid has been spilled or objects have fallen into the video product c If the video product has been exposed to rain or water d If the video pr...

Page 7: ...on Page 1 POWER button 2 2 Infrared receiver 8 3 Cassette compartment 9 4 REC IRT button 31 5 REW button 23 6 F FWD button 23 7 PLAY button 24 8 STOP EJECT button 9 9 CHANNEL up down 31 TRACKING buttons 23 VCR Display 10 AM PM indicators 18 11 Time 18 Tape counter 28 Tape remaining or 28 VCR mode indicator 22 PLAY playback 22 SRCH double speed play 25 visual search and skip playback appears during...

Page 8: ...or 37 Accessories supplied Check and identify the accessories supplied If any are missing or appear damaged consult your dealer Remote Cable for connecting Batteries for remote control this VCR to a TV control handset R6 VCR Customer Controls Item No Function Page 19 AUDIO IN L R jacks 41 20 VIDEO IN jack 43 21 IN FROM ANT signal input 10 22 OUT TO TV signal to TV 10 23 VIDEO OUT jack 11 24 AUDIO ...

Page 9: ... 8 VOL button increase or decrease the audio volume 39 9 PROGRAM programming button 35 10 REW button fast rewind or search 23 11 PLAY button playback 20 12 REC record button 31 13 STOP button stops play record function 20 14 PAUSE button 24 15 F FWD button fast forward or search 25 16 LAST CH button switches to the TV channel you watched previously during the current viewing session 39 17 CH chann...

Page 10: ... batteries 1 Push the mark and hold it then slide the cover in the direction of the arrow to remove it Note When replacing the batteries remove the old batteries and keep the POWER button depressed for 10 seconds before inserting fresh batteries 2 Install batteries Align the positive and negative polarity marks on the batteries with those indicated on the remote control 3 Slide the cover in the di...

Page 11: ...receiver and press the required button on the remote control Note If the remote does not work even at close range try replacing the batteries with two fresh AA batteries CASSETTE TAPES Types Only use video cassettes with the mark in this VCR The table shows the recording time of different cassettes To get the best quality picture record at standard recording speed SP This VCR does not record at th...

Page 12: ... gently into the slot on the front of the VCR The VCR automatically turns on and the Tape In indicator turns on when the cassette is in place Removal Press the STOP EJECT button on the VCR The cassette will come partially out of the compartment so you can pull it out The Tape In indicator turns off The cassette can be ejected with the power on or off BASIC ANTENNA HOOKUP A WITH THIS HOOKUP YOU CAN...

Page 13: ...rn it off Press the PLAY button on front of the VCR Pressing the CHANNEL button alterantes between RFCH 03 channel 3 and RFCH 04 channel 4 in the VCR s display Display the channel which is not used by a commercial channel in your area ADVANCED ANTENNA HOOKUP AV HOOKUP B WITH THIS HOOKUP YOU CAN WATCH AVAILABLE TV CHANNELS RECORD AND WATCH THE SAME CHANNEL RECORD ONE CHANNEL AND WATCH ANOTHER Hooku...

Page 14: ...n Switch the RF Channel When the VCR is on its video signal can come into your TV on either channel 3 or channel 4 You need to select the appropriate channel When the power is turned on press the POWER button to turn it off Press the PLAY button on front of the VCR Pressing the CHANNEL button alterantes between RFCH 03 channel 3 and RFCH 04 channel 4 in the VCR s display ...

Page 15: ...AME CHANNEL RECORD ONE CHANNEL AND WATCH ANOTHER Hookup D Illustration BASIC CABLE HOOKUP WITH CABLE BOX E WITH THIS HOOKUP YOU CAN WATCH AVAILABLE CABLE CHANNELS RECORD AND WATCH THE SAME CHANNEL YOU CAN T RECORD ONE CHANNEL AND WATCH ANOTHER ALL CHANNEL SELECTIONS MUST BE MADE AT THE CABLE BOX BE SURE TO CONSULT YOUR CABLE BOX MANUAL FOR THE CABLE BOX OUTPUT CHANNEL Hookup E Illustration ...

Page 16: ...L button alterantes between RFCH 03 channel 3 and RFCH 04 channel 4 in the VCR s display Display the channel which is not used by a commercial channel in your area ADVANCED CABLE HOOKUP WITH CABLE BOX F WITH THIS HOOKUP YOU CAN WATCH AVAILABLE CABLE CHANNELS RECORD AND WATCH THE SAME CHANNEL YOU CAN T RECORD ONE CHANNEL AND WATCH ANOTHER ALL CHANNEL SELECTIONS MUST BE MADE AT THE CABLE BOX BE SURE...

Page 17: ... WATCH THE SAME CHANNEL RECORD ONE CHANNEL AND WATCH ANOTHER TO RECORD ALL CHANNEL SELECTIONS MUST BE MADE AT THE CABLE BOX BE SURE TO CONSULT YOUR CABLE BOX MANUAL FOR THE CABLE BOX OUTPUT CHANNEL Hookup G Illustration SETTING THE CLOCK Note An antenna or cable must be connected to the VCR before you begin this operation ...

Page 18: ...u may view all the on screen instructions in English French or Spanish When you first set up your VCR it will be set to English Press the 8 button for French or the 9 button for Spanish 2 Press the 3 button to bring up the CLOCK SET menu The white dash appears for the item to be changed on the screen as you proceed 3 Press the number buttons to fill the hour and minutes Click to see remote control...

Page 19: ...e week will appear by itself 8 Press the GUIDE button The VCR clock is now set and should show the correct time of day on the VCR s display Notes The clock uses the 12 hour system You set it for AM or PM An illogical time like 13 for the hour or 20 for the month will not be accepted If you press the wrong digit exit the screen by pressing GUIDE and recall the screen to enter the correct setup PRE ...

Page 20: ...ar on the TV screen 4 Press the 4 button to select the CHANNEL PRESET operation 5 Press the 1 button to select the type of receiving setup you have CATV1 Ordinary cable ANT Internal or external antenna CATV2 Alternate cable If CATV1 doesn t give you the channels you expect 6 Press the 2 button The VCR will automatically store channels received in your area It takes about 2 3 minutes After the chan...

Page 21: ...the CH channel button or numbered buttons to check the channels you can receive To add or erase channels The auto channel set procedure may memorize channels that are blank have snowy pictures or interference You may skip these channels by erasing them Very weak stations might not be memorized at all You may receive these stations by adding them 1 Press the GUIDE button Click to see remote control...

Page 22: ...ess the STOP button to delete the channel or press the PLAY button to add it 6 Press the GUIDE button to return to regular viewing Auto blue setting 1 Turn on the TV and select the video channel 3 or 4 Or if you are hooked up with an audio video cable set the TV to AUX or VIDEO 2 Press the GUIDE button Click to see remote control illustration ...

Page 23: ...nction may not operate even if you specify ON During playback this function does not operate OFF The AUTO BLUE feature is switched off 5 Press the GUIDE button to end the setting PLAYBACK To playback a recorded tape 1 Turn on the TV and select the video channel 3 or 4 Or if you are hooked up with an audio video cable set the TV to AUX or VIDEO 2 Insert a recorded tape The power comes on automatica...

Page 24: ...t any time Manual Rewind 1 Press the STOP button to end playback Click to see remote control illustration 2 Press the REW button The VCR rewinds the tape all the way to the beginning then stops Press the EJECT button on the VCR to eject the tape Rewinding the tape Movie Return If your videocassette has the safety tab removed the VCR will stop and automatically rewind the videocassette eject it and...

Page 25: ... rewind fast forward speed then press the stop button To remove noise from the picture Auto Tracking Pressing the PLAY button starts the auto tracking feature which automatically adjusts playback to eliminate static lines or picture noise that may appear on the screen Manual Tracking Scratched tapes or poorly recorded tapes may require additional picture adjustment You can do this with the remote ...

Page 26: ...during the PAUSE mode first set the VCR to the SLOW mode by pressing the 4 button during playback and then press the CH or button on the remote control to minimize the noise bars see page 25 If the screen jitters during PAUSE press the CH or button to minimize the jitter If you press the DISPLAY button when viewing a video cassette the display as shown appears for several seconds so you can see th...

Page 27: ...ay Skip playback While playing back your tape you can skip forward by pressing the 6 button The tape will search ahead about a minute then resume playing Slow motion 1 Press the PLAY button 2 Press the 4 button to slow the playback speed 3 Press the PLAY button to return to play back at normal speed ...

Page 28: ... and hold it you can search backward or forward through the tape at a higher speed while viewing it Press PLAY and REW then hold REW for backward search at a higher speed Press PLAY and F FWD then hold F FWD for forward search at a higher speed Release REW or F FWD to return to normal playback Choosing a mode for audio playback The VCR records the same audio on both the Hi Fi and linear tracks on ...

Page 29: ...nusual or there is no audio select LINEAR 4 Press the GUIDE button to end the setting USING THE INDEX FEATURE To find specific sections on a tape using the INDEX feature Jump to an Index Mark with INDEX A quick way to access specific program segments is with the index search feature This lets you move through a tape that has several recordings on it by searching for the INDEX mark This function on...

Page 30: ... corner of the screen When the VCR finds an index mark it plays 15 seconds of the program that begins at that spot 3 If this is the program you were looking for press the PLAY button for normal playback To stop the index search before an index mark is reached press the STOP button Note If there are no index marks on the tape the VCR will just rewind to the beginning or fast forward to the end VIEW...

Page 31: ...pe is inserted will appear 2 minutes after playback or recording is started the tape remaining time is displayed Press the CLEAR button repeatedly to switch the type of the tape used The correct remaining time will appear AUTO T 120 or shorter tape T 160 T 140 or T 160 tape T 180 T 180 tape T 210 T 210 tape Notes The tape remaining time is not displayed correctly for a tape without any recordings ...

Page 32: ... button to rewind the tape It will automatically stop at the stop where you cleared the counter in step 3 Press the PLAY button to watch the tape from the selected spot Notes Press the DISPLAY button to turn the counter display off The selected spot will stay in memory until you set a new one or until the tape is ejected During super rewind fast forward the tape does not stop automatically even if...

Page 33: ...s long as you do not sell the material You must act responsibly in this area check into the matter if you are unsure Basic recording steps Note You may use a blank tape or you may record over a previously recorded erasable tape 1 Turn on TV and select the video channel 3 or 4 Or if you are hooked up with an audio video cable set the TV to AUX or VIDEO 2 Insert a blank or erasable tape The power co...

Page 34: ...rding time on a single tape 5 Press the CH button or the number buttons to select the channel you want to record Example Select channel 8 100 ENT and 2 and 4 for channel 124 6 Press the REC button on the remote control or the REC IRT button on the VCR Recording will start and the REC indicator on the VCR will appear ...

Page 35: ...dicator disappears Now you will be viewing through your TV only 2 Switch channels using your TV controls or the VCR remote if it s programmed to control your TV see page 39 Notes You can check on the recording by pressing VCR TV again This will switch you back to viewing through the VCR and you ll see the program you are recording If you re hooked up with an audio video cable Switch the TV from AU...

Page 36: ...an Index Mark with INDEX To record a Second Audio Program SAP Some stations transmit a Second Audio Program such as in a second language If a station broadcasts in SAP the SA indicator will display on your TV screen You can set the VCR to record a second audio program by activating the SAP option Remote Control Illustration How to set the SAP option 1 Press the GUIDE button 2 Press the 2 button to...

Page 37: ...INSTANT RECORDING TIMER Using the Instant Recording Timer IRT The Instant Recording Timer REC IRT button on the VCR will let you make a simplified timer recording without having to use the programming timer In order to set the IRT properly the clock must be set before starting 1 Follow the steps 1 through 5 on Basic recording steps on pages 30 and 31 2 Press the REC IRT button twice to indicate th...

Page 38: ... recording while in the IRT mode 1 Press the POWER button 2 Press the STOP button within 10 seconds This can be done either on the VCR or with the remote control DELAYED RECORDING Setting the VCR to record later ...

Page 39: ... Be sure that the clock is set to the correct time Date and day of the program Starting time Ending time Channel to be recorded Blank or erasable videocassette safety tab intact Delayed Recording Steps You set up the delayed recording using the on screen Easy Guide System 1 Insert blank or erasable tape The power comes on automatically and the tape indicator lights on the display If a cassette wit...

Page 40: ... starts at 6 00 PM and ends at 6 30 PM on 7 10 97 at the EP recording speed Remote Illustration 4 Press the 1 button to bring up the screen for One Time Recording 5 Press the 0 and 8 buttons to select channel 8 Note Remember to press 0 before single digit channel numbers times and dates If you want to record from an external equipment press the AVX button to select LINE 1 or LINE 2 instead of the ...

Page 41: ...on 7 Press the 2 button for PM 8 Enter the end time by pressing 0 6 3 and 0 for 6 30 The VCR automatically selects PM for you 9 Enter the recording date by pressing 0 7 1 and 0 for 7 10 97 Click to see remote control illustration 10 Press the 5 button to select the recording speed EP 11 Press the PROGRAM button to set the program in memory ...

Page 42: ...ER button 2 Press the STOP button within 10 seconds This can be done either on the VCR or with the remote control When you have set up all the timed recordings you want Don t forget to load a videocassette with the safety tab still attached to record on If using a cable box turn on the cable box and tune it to the channel you want to record before the time the recording is to begin Important Your ...

Page 43: ... pressing the 1 button to cycle through all the programs you have preset The screen will display the next program if there are more or it will switch back to the main menu 4 Press the GUIDE button to end PROGRAMMING THE VCR REMOTE TO CONTROL YOUR TV The VCR remote control can be programmed to control many TV brands that are remote controlled 1 Turn on the TV 2 Point VCR remote control toward TV ...

Page 44: ... Magnavox 4 Mitsubishi CH Sanyo 5 JVC 100 ENT Gold star 1 6 Sharp 1 LAST CH Toshiba 7 Sharp 2 DISPLAY Gold star 2 8 Note If your TV brand is not listed on the Set Up Chart try all the buttons listed in the chart until the TV changes channels If the TV channel does not change you won t be able to program the remote for your TV Using the VCR remote to control your TV picture of remote 1 Press the TV...

Page 45: ...d cable box 3 Press and hold the CATV button 4 Press the remote button corresponding to your cable box as shown in the set up chart The cable box channel will change to confirm that the remote control has been set Cable Box Press CATV and this number button Jerrold 1 1 Jerrold 2 2 Jerrold 3 3 Hamlin 4 Zenith 5 Scientific Atlanta 6 Pioneer 7 Philips 8 Note If your cable box is not listed on the Set...

Page 46: ...udio only recordings for up to 6 hours on a T 120 video cassette tape Receive quality stereo sound from your VCR through your stereo system Use the VCR as an extra audio tape deck for dubbing Stereo System Hookup Illustration To record from stereo BEFORE YOU BEGIN Make sure the VCR is connected to your stereo system as shown above Make sure that STEREO audio is selected from the VCR Set Up Menu as...

Page 47: ...STOP button or remote control to stop recording COPYING TAPES FROM A CAMCORDER Hookup You may use your VCR to copy tapes from any camcorder onto standard VHS cassette tapes NOTE If your camcorder is not stereo has only one audio plug connect it to the AUDIO IN L input on the front of the VCR It is not necessary to connect the S VIDEO jack To copy from a camcorder ...

Page 48: ...rol The VCR will go into Record Pause 3 Press the PLAY button on the camcorder You will see the camcorder tape being played on the TV 4 When you see the part of the Camcorder tape you wish to copy press the PAUSE button again to release pause and start copying the camcorder tape Press the stop button to finish recording COPYING FROM ONE VCR TO ANOTHER VCR DUBBING Hookup If you have two VCRs you ma...

Page 49: ...rs in the display 2 Press the REC then PAUSE buttons on VCR 1 The VCR will go into Record Pause 3 Press the PLAY button on VCR 2 You will see the taped program being played on the TV 4 When you see the part of the program you wish to record press the PAUSE button on VCR 1 again to release pause and start recording ...

Page 50: ...recordings The VCR power must be turned off to activate timer recording Clock is not set correctly Programs entered incorrectly Programs exceed the length of the cassette Use the EP recording speed for maximum programming Safety tab has been removed from cassette Snowy picture in playback Snow or picture noise is normal during search still and slow Playback Head cleaning may be required Tape is wo...

Page 51: ...annels Canada 178 channel tuning ability 122 cable channels Type Auto programming frequency synthesis Power Input AC 120V 60 Hz Power Consumption 20W nominal Cabinet Size 14 15 16 W x 3 11 16 H x 10 11 16 D 38 0 cm W x 9 3 cm H x 27 1 cm D Weight 7 7 lbs 3 5 kg Storage Temperature 4 F to 131 F Operating Temperature 41 F to 104 F Accessories 1 coaxial cable Part No EW10251 1 remote control unit Par...

Page 52: ...52 You must state your zip code when calling In Canada MONTREAL 514 956 9882 TORONTO 905 821 4545 VANCOUVER 604 526 7881 ...

Reviews: