background image

20

GB

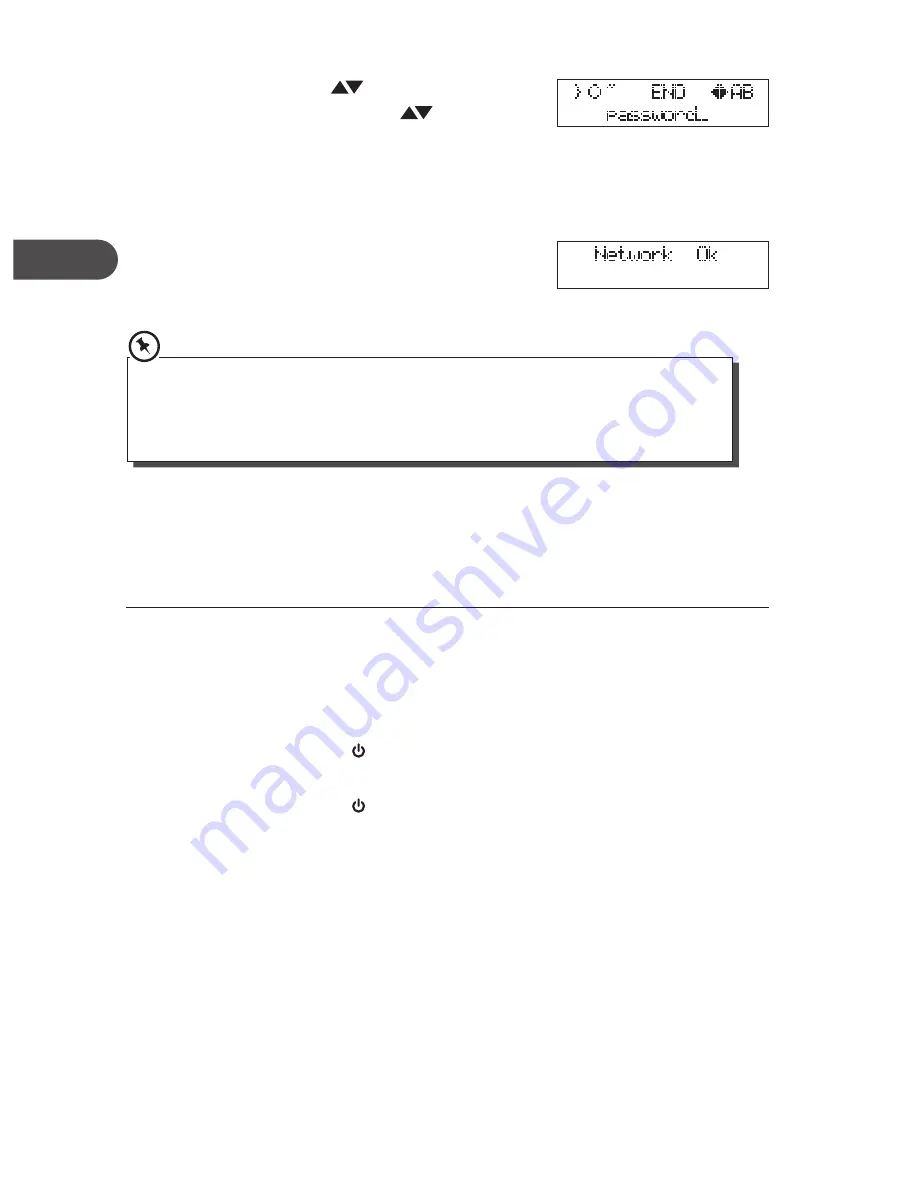
6. 

Turn the SCROLL 

 control on the 

unit or press the SCROLL 

 buttons 

on the remote control to select “END”, 

and then press the SELECT button 

on the unit or the remote control to 

complete type in.

7. 

If the WEP/WPA key input is correct, the 

display will show “Network Ok”.

8. 

The initial setting is now completed.

General Operation

Powering ON/OFF

When you first connect the unit to the mains socket. The unit will be in 

STANDBY mode.
• 

Press the STANDBY   button on the unit or the remote control to 

switch the unit on.

• 

Press the STANDBY   button on the unit or the remote control to 

switch the unit back to standby mode.

• 

Disconnect the mains plug from the mains socket if you want to 

switch the unit off completely.

After the first network connection completes, the unit may automatically 

update the settings for functionality enhancement through the network. 

After the update, the unit will reconnect to the network and is ready to use. 

This may take a few minutes.

KHi340E_IB_GB_110520.indd   20

20/05/2011   1:42 PM

Summary of Contents for KHI340E

Page 1: ...Instruction Manual KHI340E Internet FM Radio GB ...

Page 2: ......

Page 3: ... Range 13 Connections 14 Mains Power 14 Using Earphones 14 Connecting to Auxiliary Equipment 15 Connecting to the Internet 16 Connecting to Your Home Network 16 Switching on Your Unit for the First Time 19 General Operation 20 Powering ON OFF 20 Selecting Modes 21 Adjusting the Volume 21 The Menu Structure 22 Internet Radio Operation 23 Location 23 Genre 24 Search 24 Storing Stations 25 Recalling ...

Page 4: ... a Stored Station 31 Alarm Clock Setting 32 Settings the Alarm 32 To Cancel the Alarm 33 Settings the Sleep Timer 34 Snooze Function 34 Other Connections 35 Auxiliary Input 35 Settings 36 Network Config 36 Version 37 Upgrade Firmware 37 Language 37 Factory Reset 38 Register 38 Set Time Date 38 Backlight 39 UPnP 39 WiFi Strength 39 Maintenance 40 Cleaning the Unit 40 Troubleshooting 40 Hints and Ti...

Page 5: ...r splashing or objects filled with liquids such as vases to be placed on the equipment DON T place hot objects or naked flame sources such as lighted candles or nightlights on or close to equipment High temperatures can melt plastic and lead to fires DON T use makeshift stands and NEVER fix legs with wood screws to ensure complete safety always fit the manufacturer s approved stand or legs with th...

Page 6: ...herwise the batteries may leak and cause damage Store unused batteries in their packaging and away from metal objects which may cause a short circuit resulting in leakage or in extreme cases fire or even an explosion Never dispose of batteries in fire as this can cause them to explode Please recycle dead batteries do not put with the normal household waste Supervise children if they are replacing ...

Page 7: ...e the unit well away from heat sources such as radiators or gas electric fires Avoid exposure to direct sunlight and other sources of heat Naked Flames Never place any type of candle or naked flame on the top of or near the unit Moisture To reduce the risk of fire electric shock or product damage do not expose this unit to rain moisture dripping or splashing No objects filled with liquids such as ...

Page 8: ... batteries away from young children and make sure that the battery holder tray is secure in the remote control Seek medical advice if you believe a cell has been swallowed Please dispose of batteries correctly by following the guidance in this manual Supervision Children should be supervised to ensure that they do not play with the unit and the remote control Never let anyone especially children p...

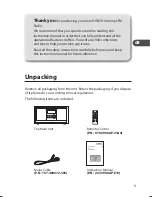
Page 9: ...ou fully understand all the operational features it offers You will also find some hints and tips to help you resolve any issues Read all the safety instructions carefully before use and keep this instruction manual for future reference The Main Unit Remote Control P N 070 3906AP 01A0 Mains Cable P N 157 469072 305 Instruction Manual P N 227 3906AP E13 SEEK SCROLL VOLUME STANDBY BROWSE SLEEP BACK ...

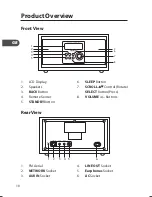
Page 10: ...BACK Product Overview Front View Rear View 1 2 4 3 5 7 6 2 8 1 LCD Display 2 Speakers 3 BACK Button 4 Remote Sensor 5 STANDBY Button 1 FM Aerial 2 NETWORK Socket 3 AUX IN Socket 6 SLEEP Button 7 SCROLL Control Rotate SELECT Button Press 8 VOLUME Buttons 4 LINE OUT Socket 5 Earphones Socket 6 AC Socket 1 2 3 4 5 6 ...

Page 11: ...5 P5 Button 16 P6 Button 17 P8 Button 18 SCROLL Buttons Remote Control SEEK SCROLL VOLUME STANDBY BROWSE SLEEP BACK REPLY SNOOZE SELECT MODE P8 P7 P2 P5 P4 P6 P3 P1 1 2 3 9 4 6 7 8 5 10 12 13 14 15 16 17 11 18 Remove the Insulating Strip from the Remote Control Remove the insulating mylar strip from the battery if the battery is being used for the first time It is located at the bottom back side o...

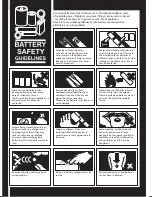
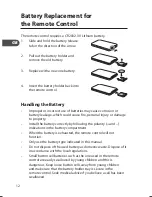
Page 12: ...ce with the local regulations Small button cell batteries such as the one used in the remote control are easily swallowed by young children and this is dangerous Keep loose button cells away from young children and make sure that the battery holder tray is secure in the remote control Seek medical advice if you believe a cell has been swallowed Battery Replacement for the Remote Control The remote...

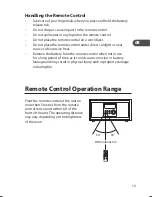
Page 13: ... control Do not spill water or any liquid on the remote control Do not place the remote control on a wet object Do not place the remote control under direct sunlight or near sources of excessive heat Remove the battery from the remote control when not in use for a long period of time as it could cause corrosion or battery leakage and may result in physical injury and or property damage including f...

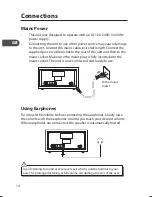
Page 14: ...y inserted into the mains socket The unit is now connected and ready to use AUX IN NETWORK FM ANT LINE OUT AC 100 240V To the mains socket Using Earphones Turn down the volume before connecting the earphones Slowly raise the volume with the earphones on until you reach your desired volume When earphones are connected the speaker is automatically muted AUX IN NETWORK FM ANT LINE OUT AC 100 240V Avo...

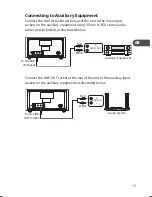
Page 15: ...bles not included as illustrated below Connect the LINE OUT socket at the rear of the unit to the auxiliary input sockets on the auxiliary equipment as illustrated below AUX IN NETWORK FM ANT LINE OUT AC 100 240V To the AUX IN Socket AUDIO OUT R Red White L AUX IN NETWORK FM ANT LINE OUT AC 100 240V To the LINE OUT Socket AUDIO IN R Red White L Auxiliary Equipment Audio System ...

Page 16: ...bject to radio frequency interference AUX IN NETWORK FM ANT LINE OUT AC 100 240V 1 WAN 2 3 4 To the NETWORK Socket Wired Router Internet Ethernet Cable not included This unit cannot be connected to a standalone modem directly A router or a modem incorporated with a router has to be used When plugging or unplugging the LAN cable hold the plug portion of the cable When unplugging do not pull on the ...

Page 17: ...PC The network configuration and connection method may vary depending on the equipment in use and the network environment The unit is equipped with a wireless module which supports 802 11b g standards This unit cannot be connected to the standalone modem directly A router or a modem incorporated with a router has to be used Since there are various connection configurations please follow the specif...

Page 18: ... 3 4 To the NETWORK Socket Computer Modem Router Ethernet Cable not included Connecting to Computer This radio can be connected to PC via a wired or wireless modem router To playback music files from PC make sure the unit and computer are in the same network ...

Page 19: ...lly detect either WEP or WPA key input depending on Wi Fi modem router setting 5 Turn the SCROLL control on the unit or press the SCROLL buttons on the remote control to select alphanumberic letters and then press the SELECT button on the unit or the remote control to input Switching on Your Unit for the First Time When you first connect the unit to the mains socket the unit will be in STANDBY mod...

Page 20: ...to the mains socket The unit will be in STANDBY mode Press the STANDBY button on the unit or the remote control to switch the unit on Press the STANDBY button on the unit or the remote control to switch the unit back to standby mode Disconnect the mains plug from the mains socket if you want to switch the unit off completely After the first network connection completes the unit may automatically u...

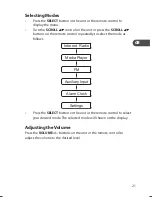
Page 21: ...emote control repeatedly to select the mode as follows Internet Radio Media Player FM Auxiliary Input Alarm Clock Settings Press the SELECT button on the unit or the remote control to select your desired mode The selected mode will shown on the display Adjusting the Volume Press the VOLUME buttons on the unit or the remote control to adjust the volume to the desired level ...

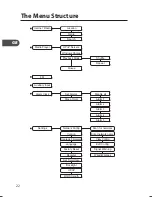
Page 22: ...Windows Shares Playback Mode Queue Network Config Version Upgrade Firmware Language Factory Reset Register Set Time Date Backlight UPnP WiFi Strength Disable all Alarm 1 Alarm 2 Shuffle Repeat Alarm 3 Alarm 4 Alarm 5 Scan for networks Enter network name View Config Edit Config Signal Warning Wired Wireless Set Alarms Sleep Timer ...

Page 23: ...ncrease connectivity either use a wired connection or move the unit nearer to the router Location 1 During Internet Radio mode turn the SCROLL control on the unit or press the SCROLL buttons on the remote control to select Location and then press the SELECT button on the unit or the remote control to confirm 2 Turn the SCROLL control on the unit or press the SCROLL buttons on the remote control to...

Page 24: ...ress the SCROLL buttons on the remote control to select Search and then press the SELECT button on the unit or the remote control to confirm 2 Turn the SCROLL control on the unit or press the SCROLL buttons on the remote control to select alphanumberic letters and then press the SELECT button on the unit or the remote control to select Repeat this step to input all letters 3 Turn the SCROLL contro...

Page 25: ...calling a saved station you will save the current station and overwrite the previous one Internet stations which enable you to choose what you listen to Some Internet radio stations can provide a number of options associated with their station for example some stations enable you to listen to programmes that have already been broadcast When you select a radio statio that has this facility the stat...

Page 26: ...press the SELECT button on the unit or the remote control to confirm 4 After you have chosen the day you may be able to choose the Start Time Set the Start Time by turning the SCROLL control on the unit or by pressing the SCROLL buttons on the remote control Press the SELECT button on the unit or the remote control to confirm 5 Programmes which enable you to choose the time also enable you to fast...

Page 27: ...s Found on the display 4 Turn the SCROLL control on the unit or press the SCROLL buttons on the remote control to select desired UPnP and then press the SELECT button on the unit or the remote control to confirm If access is denied from the UPnP server Empty will show on the display 5 The setting is now complete On a PC Media Sharing is only available when the network is set as a private one Acces...

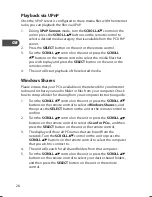
Page 28: ...ur audio folder or files from your computer Check how to setup a folder for sharing from your computer instruction guide 1 Turn the SCROLL control on the unit or press the SCROLL buttons on the remote control to select Windows Shares and then press the SELECT button on the unit or the remote control to confirm 2 Turn the SCROLL control on the unit or press the SCROLL buttons on the remote control ...

Page 29: ...ck Shuffle and Repeat Mode 1 Under Media Player menu turn the SCROLL control on the unit or press the SCROLL buttons on the remote control to select Playback mode Press the SELECT button on the unit or the remote control to confirm 2 Turn the SCROLL control on the unit or press the SCROLL buttons on the remote control to select Shuffle on off Press the SELECT button on the unit or the remote contr...

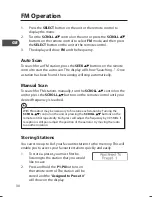
Page 30: ...the unit or press the SCROLL buttons on the remote control until your desired frequency is reached With FM radio it may be necessary to fine tune each station by Turning the SCROLL control on the unit or pressing the SCROLL buttons on the remote control repeatedly Each press will adjust the frequency by 0 05MHz If reception is still poor adjust the position of the aerial or try moving the radio to...

Page 31: ...ntrol The stored stations will be saved into the memory and turning off the power will not erase it Storing a new station into a present location will erase the previously stored station in that location If you press and hold the Preset 1 8 buttons for too long while recalling a saved station you will save the current station and overwrite the previous one ...

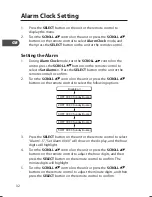
Page 32: ...SCROLL buttons on the remote control to select the following options Disable all 1 OFF 00 00 Sunday Buzzer 2 OFF 00 00 Sunday Buzzer 3 OFF 00 00 Sunday Buzzer 4 OFF 00 00 Sunday Buzzer 5 OFF 00 00 Sunday Buzzer 3 Press the SELECT button on the unit or the remote control to select Alarm 1 5 Set Alarm 00 00 will show on the display and the hour digits will highlight 4 Turn the SCROLL control on the ...

Page 33: ...tored in the memory can be chosen as the alarm wake up mode Internet radio wake up can be set only when the radio is connected to the Internet network 9 Press the SELECT button on the remote control to select 10 The alarm setting is now complete 11 The display will show the current time and alarm time in brackets on the display during standby mode You are not able to choose Internet radio mode to ...

Page 34: ...lay all night 1 During Alarm Clock mode turn the SCROLL control on the unit or press the SCROLL buttons on the remote control to select Sleep Timer Press the SELECT button on the unit or the remote control You may set the sleep timer up to 3 hours and 15 minutes to confirm 2 Alternatively press the SLEEP button on the remote control Sleep Timeout will show on the display Turn the SCROLL control on...

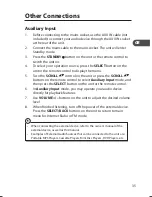
Page 35: ...the SCROLL buttons on the remote control to select Auxiliary Input mode and then press the SELECT button on the unit or the remote control 6 In Auxiliary Input mode you may operate your audio device directly for playback features 7 Use VOLUME buttons on the unit to adjust the desired volume level 8 When finished listening turn off the power of the external device Press the SELECT BACK buttons on t...

Page 36: ... unit or the remote control to confirm 2 Turn the SCROLL control on the unit or press the SCROLL buttons on the remote control to select following settings and then press the SELECT button on the unit or the remote control to confirm Scan for Networks To search all available wireless networks Enter network name To search a network name manually View Config To display configuration information Such...

Page 37: ...T button on the unit or the remote control to check for new firmware to update 3 Turn the SCROLL control on the unit or press the SCROLL buttons on the remote control to select YES to download new firmware or select NO to cancel Language 1 Turn the SCROLL control on the unit or press the SCROLL buttons on the remote control to select Language Press the SELECT button on the unit or the remote contr...

Page 38: ...ime Date manually 1 Turn the SCROLL control on the unit or press the SCROLL buttons on the remote control to select Set Time Date Press the SELECT button on the unit or the remote control to confirm 2 The display shows Set Time Turn the SCROLL control on the unit or press the SCROLL buttons on the remote control to adjust the hour digits and then press the SELECT button on the unit or the remote c...

Page 39: ...on the unit or press the SCROLL buttons on the remote control to select UPnP Press the SELECT button on the unit or the remote control to confirm 2 Press the SELECT button on the unit or the remote control again to select Device Name 3 Turn the SCROLL control on the unit or press the SCROLL buttons on the remote control and then press the SELECT button on the unit or the remote control to select A...

Page 40: ...hat you have configured a static IP address on the radio To configure the DHCP you must read the instructions supplied with the wireless access point 3 Check that your firewall is not blocking any outgoing ports As a minimum the radio needs access to UDP and TCP ports 80 554 1755 5000 and 7070 To configure the Access Port Control you must read the instructions supplied with the wireless access poi...

Page 41: ...one Make sure the plastic sheet has been removed from the remote control Remove any obstacles between the remote control and the unit The unit does not respond when pressing any buttons The unit may freeze up during use Switch the unit off and then on again to reset the unit Radio Poor FM reception Make sure the FM aerial wire is fully extended Electrical interference in your home can cause poor r...

Page 42: ...inals Network Socket x 1 Earphones Socket x 1 LINE OUT Socket x 1 AUX IN Socket x 1 Frequency Range FM 87 5 108 MHz Power Supply AC 100 240V 50 60Hz Output Power 2W x 2 Standy Power Consumption 1 8W Net Weight 1 44kg Dimensions 113mm D x 246mm W x 135mm H Features and specifications are subject to change without notice ...

Page 43: ......

Page 44: ...e the return and collection systems available If the batteries or accumulators included with this equipment display the chemical symbol Hg Cd or Pb then it means that the battery has a heavy metal content of more than 0 0005 Mercury or more than 0 002 Cadmium or more than 0 004 Lead All trademarks are the property of their respective owners and all rights are acknowledged In the unlikely event of ...

Reviews: