13
ENGLISH
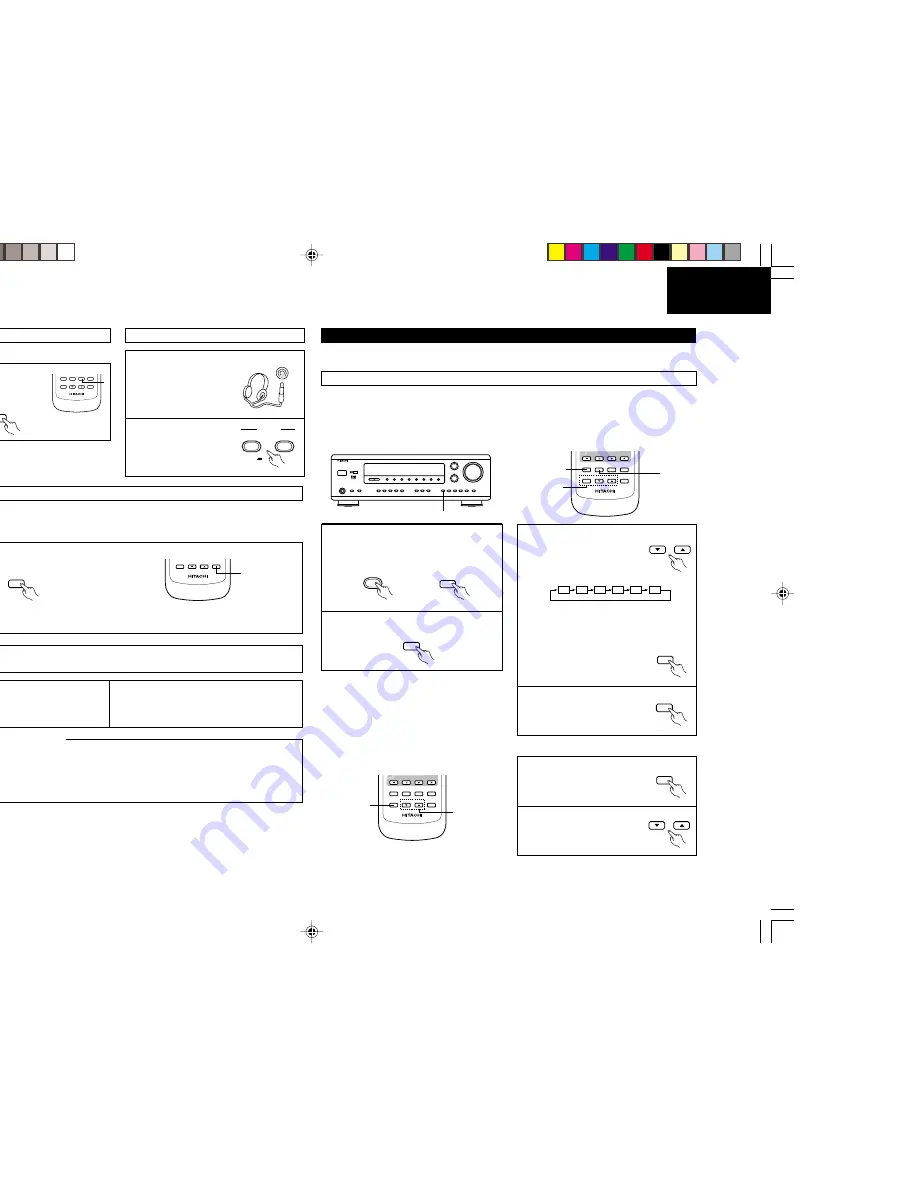
Using the muting function
Listen with headphones
1
Press the MUTING button.
• Cancelling MUTING mode.
Press the MUTING button
again.
• Caution:
Switching off the power of the unit and the remote
control unit will cancel the settings.
1
Connect the headphones
to the headphones jack of
the front panel.
2
Press the SPEAKER A or
B button to turn the
speaker off.
Use this to turn off the audio output temporarily.
MUTING
T.TONE
CH SELECT
VIDEO SELECT
STATUS
SURR.MODE
REMOTE CONTROLLER
RB - DD1
MUTING
CH
VCL
1
PHONES
ON
SPEAKER
A
B
Front panel display
1
Press the STATUS button.
• The input and output sources and the surround setting, etc., appear in order on the display each time
the button is pressed.
When an operation is performed on the remote control unit, that operation appears on the display, making it
possible to check the operation visually.
The set’s operating status can also be checked on the display using the procedure described below.
STATUS
CH SELECT
STATUS
REMOTE CONTROLLER
RB - DD1
CH
VCL
1
Recording the program source
(recording the source currently being monitored)
1
Follow steps 1 to 3 under “Playing the analog
program source”.
2
Start recording on the tape or video deck.
For instructions, refer to the component’s
operating instructions.
Simultaneous recording
The signals of the source selected with the function selector button are output simultaneously to the MD/
TAPE OUT and VCR REC OUT jacks.
If a total of two tape and/or video decks are connected and set to the recording mode, the same source can
be recorded simultaneously on each deck.
In addition, if the TAPE MONITOR (MD/TAPE MON) button is pressed, the audio signals from the tape deck
are output to the VCR AUDIO REC OUT jacks.
2
Tape monitor function
When a three-head tape deck is used, the sound actually being recorded can be monitored during recording by
pressing the MD/TAPE MON button.
Press the button again to cancel monitoring.
NOTE :
• Digital input signals cannot be recorded. To record, connect to the analog input terminals.
Before playing with the surround function
Before playing with the surround function, be sure to use the test tones to adjust the playback level from the
different speakers.
This adjustment can be performed with the remote control unit, as described below.
Adjusting with the remote control unit using the test tones is only effective in the DOLBY PRO LOGIC, DOLBY
DIGITAL and DTS modes.
The adjusted levels are automatically stored in the memory.
1
Set the Dolby Pro Logic, Dolby Digital or
DTS modes.
2
Press the test tone button.
3
Test tones are produced from
the speakers in the order
shown below, at 4 second in-
tervals for the first two cycles,
2 second intervals after that.
Use the channel volume adjust buttons to
adjust so that the volume of the test tones is
the same for all the speakers.
Press the channel select button
to select the speaker to be
adjusted, if necessary.
4
After completing the adjustment,
press the test tone button again.
1
Press the channel select button
to select the speaker to be
adjusted.
2
Adjust the level of the selected
speaker.
After adjusting using the test tones, adjust the channel levels either according to the playback sources or to suit
your tastes, as described below.
+
-
+
-
1
DOLBY
D I G I TA L
3
1
2,4
VOLUME
CHANNEL
T.TONE
CH SELECT
VIDEO SELECT
STATUS
SURR.MODE
REMOTE CONTROLLER
RB - DD1
MUTING
CH
VCL
TV
DOLBY/DTS
SURROUND
SURR.MODE
T.TONE
CH
VOL
FL
C
FR
SR
SL
SW
CH SELECT
T.TONE
CH SELECT
CH
VOL
2
1
VOLUME
CHANNEL
T.TONE
CH SELECT
VIDEO SELECT
STATUS
SURR.MODE
REMOTE CONTROLLER
RB - DD1
MUTING
CH
VCL
TV
• USING THE SURROUND FUNCTION
You may enjoy an analog or digital surround system for your connected audio/video source.
*1_011-018 HTA-DD3E_EN
7/29/02, 3:41 PM
13


