background image


1

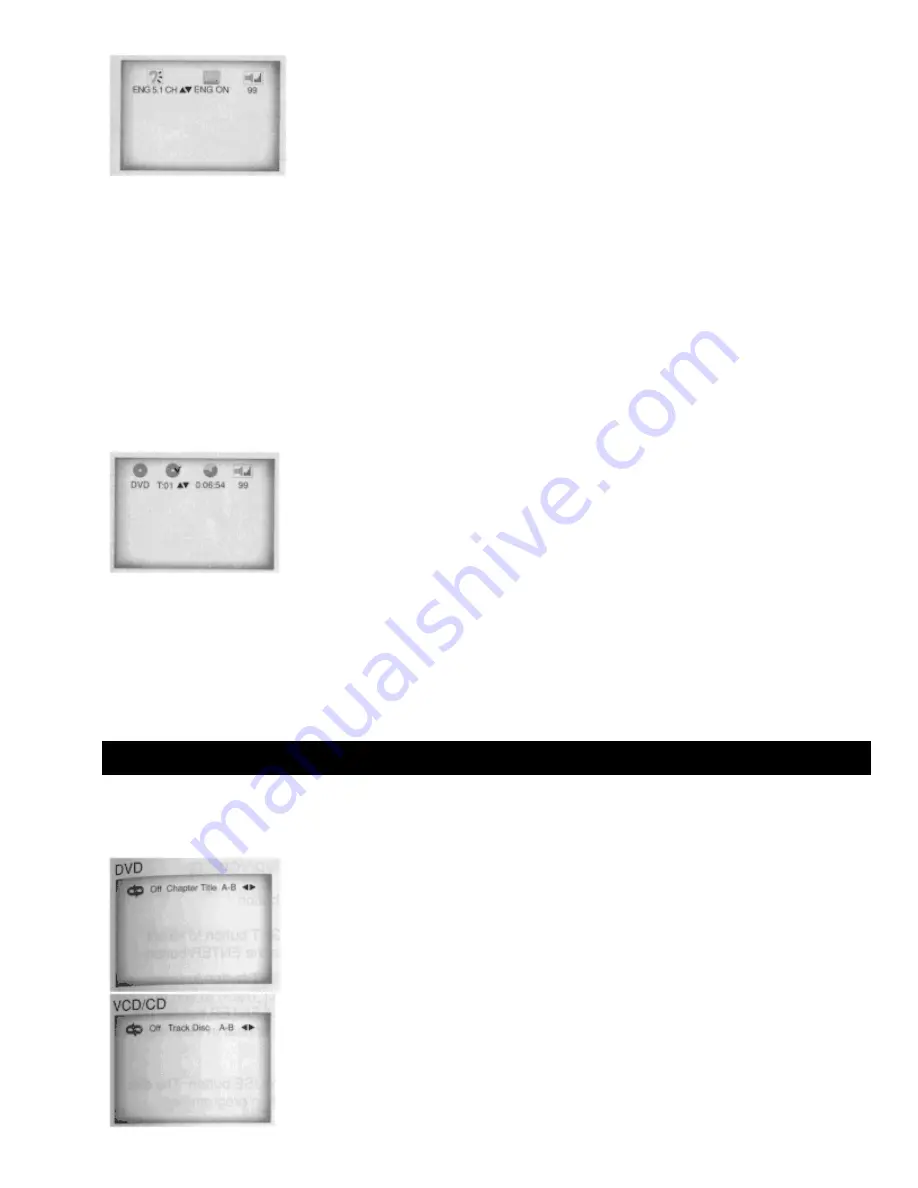
  During playback, press the DISPLAY button on the remote. 

•  Current Title, Chapter number and elapsed time will be displayed. 
•  Use the LEFT/RIGHT button to select a Title or a Chapter number. 
•  Use the UP/DOWN button or Number buttons to enter a different Title or Chapter number, then press the ENTER button. 
•  To enter the time from which you want to start, use the LEFT/RIGHT button to select, then use the Number buttons to 
enter the time. Then press the ENTER button. 

2

  Press the DISPLAY button on the remote twice. 

•  Current Audio, Subtitle and volume control will appear. 
•  To make the screen disappear, press the DISPLAY button again. 

When Playing a CD/VCD 


1

  During playback, press the DISPLAY button on the remote. 

•  Current Track number, elapsed time and volume control will be displayed. 
•  Use the LEFT/RIGHT button to select a Track. Use the UP/DOWN button or Number buttons to enter a different Track 
number and then press the ENTER button. 
•  To enter the time from which you want to start, use the LEFT/RIGHT button to select, then use the Number buttons to 
enter the time. Then press the ENTER button. 

•  To make the screen disappear, press the DISPLAY button again. 

Repeat Playback 

Repeat the current Track, Chapter, Title, a chosen section (A-B) or all the disc (Only VCD/CD) 

Using the REPEAT button 


Summary of Contents for DV-P305U

Page 1: ...HITACHI DVD PLAYER MODEL DV P305U Instruction manual To obtain the best performance and ensure years of trouble free use please read this instruction manual completely ...

Page 2: ...ion to an Audio System 13 Connection to a TV 13 Connection to a TV For Video 14 Basic Functions 15 Playing a Disc 15 Before Playback 15 Playback 15 Using the Search and Skip Functions 16 Searching through a Chapter or Track 16 Skipping Tracks 16 Using Menu Screen on Disc for Playback 17 When Playing a DVD 17 When playing a VCD version 2 0 17 Using Top Menu Screen on Disc to Play DVD 18 Using the D...

Page 3: ... 28 Using the Zoom and 3D Sound Functions 28 Using the Zoom Function DVD VCD 28 Using the 3D Sound Function 29 Changing Setup Menu 30 Using the Setup Menu 30 Setting Up the Language Features 30 Using the Player Menu 31 Using the Disc Menu Language 31 Setting Up the Language Feature 31 Using the Audio Language 31 Using the Subtitle Language 32 Setting Up the Parental Control 33 Setting Up the Audio...

Page 4: ...B digital device pursuant to Part 15 of the FCC rules These limits are designed to provide reasonable protection against harmful interference in a residential installation This equipment generates uses and can radiate radio frequency energy and if not installed and used in accordance with the instructions may cause harmful interference to radio communications However there is no guarantee that int...

Page 5: ... move the player while a disc is being played or the disc may be scratched or broken and the player s internal parts may be damaged Do not put a flower vase filled with water or any small metal objects on the player Be careful not to put your hand into the disc tray Do not place anything other than the disc in the disc tray Exterior interference such as lightening and static electricity can affect...

Page 6: ...ures Excellent Sound The Dolby Digital system developed by Dolby Labs provides crystal clear sound reproduction Screen Video with MPEG 2 compression technology Both regular and widescreen 16 9 pictures can be viewed Slow Motion An important scene can be viewed in slow motion Program Playback You can program Chapter Track to play in desired order Parental Control The parental control allows users t...

Page 7: ...capable of playing the following types of discs with the corresponding logos Disc Types Logos Recording Types Disc Size Max Playing Time Characteristics DVD Audio Video 12 Cm Single sided 240 min Double sided 480 min DVD contains excellent sound and video due to Dolby Digital and MPEG 2 system Various screen and audio functions can be easily selected through the on screen menu 8 Cm Single sided 80...

Page 8: ...on the rear panel of the player Description Front Panel Front Panel Controls STANDBY ON When the unit is first plugged in the indicator lights When STANDBY ON is pressed the lamp goes out and the player is turned on DISC TRAY Press OPEN CLOSE to open and close the disc tray DISPLAY Operation indicators are displayed here OPEN CLOSE Press to open and close the disc tray PLAY PAUSE Begin or pause di...

Page 9: ... 5 DVD Title number 6 DVD Chapter number 7 Video Audio CD Track number 8 Repeat play mode 9 Linear PCM audio output 10 Dolby Digital audio output 11 DTS Digital Theater System audio output Digital only 12 MPEG 2 Audio output 13 Displays various messages concerning operations such as PLAY STOP LOAD RANDOM no DISC No disc loaded OPEN The disc tray is open LOAD Player is loading disc information ...

Page 10: ...s 3 REPEAT Button Allows you to repeat play a title chapter track or disc 4 A B REPEAT Button Marks a segment to repeat between A and B 5 SETUP Button Brings up the DVD player s Setup menu 6 MODE Button Allows you to program a specific order 7 SEARCH Buttons Allows you to search forward backward through a disc ...

Page 11: ...ns on a disc 15 OPEN CLOSE Button To open or close the disc tray 16 3D SOUND Button To activate the 3D sound 17 ZOOM Button To magnify part of a picture 18 CLEAR Button Removes menus or status displays from the screen 19 BOOKMARK Button To rapidly return to a location of disc 20 PLAY PAUSE Button Begin Pause disc play 21 RETURN Button Returns to a previous menu 22 DISPLAY Button Displays the curre...

Page 12: ...r television 4 S VIDEO OUT JACK Use the S Video cable to connect this jack to the S Video jack on your television for a higher quality picture The S Video must be selected in the VIDEO OUT SELECT 5 COMPONENT VIDEO OUT JACKS Use these jacks if you have a TV with Component Video in jacks These jacks provide Pr Pb and Y video Along with S Video Component Video provides the best picture quality The Y ...

Page 13: ...TV and other components before you connect or disconnect any cables Refer to owner s manual of the additional components you are connecting for more information for those particular components Connection to an Audio System Method 1 DVD Player 2ch Stereo Amplifier or Dolby Pro Logic Decoder Method 2 DVD Player Amplifier with Dolby Digital Decoder DTS Decoder Connection to a TV TV Normal Widescreen ...

Page 14: ...IDEO OUT SELECT Method 3 DVD Player TV with Component Video Jacks If the Y Pb or Pr is selected in the VIDEO OUT SELECT NOTE If the VIDEO OUT SELECT SWITCH on the rear panel is set to Y Pb or Pr the S Video may not work If the VIDEO OUT SELECT SWITCH is set to S Video the Y Pb or PR may not work After correcting the switch turn power off and then on again ...

Page 15: ...opped so when you press PLAY again it will pick up where you left off unless the disc is removed the STOP button is pressed twice or the player is unplugged NOTE If the player is left for an approximate 5 minutes in pause mode it will stop The power is automatically turned off after approximately 30 minutes have elapsed in the stop mode auto power off feature If the player is left in the stop mode...

Page 16: ...D SEARCH button on the remote and press again to search at a faster speed 2X 4X 8X 16X 32X normal speed in order on DVD Press the REVERSE or FORWARD SEARCH button on the remote and press again to search at a faster speed 4X 8X normal speed in order on VCD and CD To return to normal speed playback press the PLAY PAUSE button Skipping Tracks 2 Press the NEXT SKIP or BACK SKIP button during playback ...

Page 17: ...ll appear With some discs the Menu screen will automatically appear The Menu screen varies depending on the discs 2 Use the UP DOWN LEFT RIGHT button to select the desired item With some DVDs you can use the number buttons to select the item 3 Press the ENTER button Play the disc following the Menu When playing a VCD version 2 0 1 Play a VCD version 2 0 The Menu screen will appear 2 Use the number...

Page 18: ...ed Use the Top Menu screen to play such DVDs for convenience 1 Press the TOP MENU button The Top Menu screen will appear The Top Menu screen varies according to the disc 2 Use the UP DOWN LEFT RIGHT button to select the desired item With some DVDs you can use the number buttons to select the item 3 Press the ENTER button Play the disc following the Top Menu NOTE Some discs may not have Top Menu So...

Page 19: ...volume control will appear To make the screen disappear press the DISPLAY button again When Playing a CD VCD 1 During playback press the DISPLAY button on the remote Current Track number elapsed time and volume control will be displayed Use the LEFT RIGHT button to select a Track Use the UP DOWN button or Number buttons to enter a different Track number and then press the ENTER button To enter the...

Page 20: ...in then press the LEFT RIGHT button to select Off and press ENTER Using the A B REPEAT button 1 Press the A B REPEAT button at the point where you want repeat play to start A 2 Press the A B REPEAT button at the 2 point where you want repeat play to stop B The A B Repeat that you set will play until you turn off Repeat 3 To return to normal playback press the A B REPEAT button again NOTE DVD repea...

Page 21: ...t Chapter or Track to add to program Press the ENTER button The selected numbers appear in the Program Order box 4 Press the PLAY PAUSE button The disc will be played back in programmed order Random Playback DVD VCD CD 1 Press the MODE button in the stop mode 2 Use the LEFT RIGHT button to select RANDOM Press the ENTER button The disc will be played back in random order NOTE Depending on the disc ...

Page 22: ...ect TRACK VIEW Press the ENTER button 3 Select the desired view by pressing the UP DOWN or LEFT RIGHT buttons 4 Press the ENTER button Index View VCD Displays the equally divided 9 views of the current playing Track 1 Press the TOP MENU button during playback 2 Press UP DOWN button to select INDEX 2 VIEW Press the ENTER button 3 Select the desired view by pressing UP DOWN or LEFT RIGHT buttons 4 P...

Page 23: ...nd the TRACK VIEW will be displayed directly When pressing the TOP MENU on DVD The disc s Top Menu will come up When pressing the TOP MENU on CD The unit enters the INTRO mode INTRO lets you listen to the beginning of each Track for about 10 seconds ...

Page 24: ...On VCD CD Using the MENU Button When playing a DVD 1 Press the MENU button 2 Use the UP DOWN LEFT RIGHT button to select AUDIO information 3 Press the ENTER button 4 Use the UP DOWN LEFT RIGHT button to select the desired language on a DVD 5 Press the ENTER button When playing a VCD In disc version 2 0 the MENU button works as a conversion switch between MENU ON and MENU OFF mode When playing a VC...

Page 25: ... A DVD disc can contain up to 8 Audio languages How to have the same Audio language come up whenever you play back a DVD Refer to Setting Up the Language Features on page 30 ...

Page 26: ...itle languages are represented by abbreviations Using the MENU button When playing a DVD 1 Press the MENU button 2 Use the UP DOWN LEFT RIGHT button to select SUBTITLE information 3 Press the ENTER button 4 Use the UP DOWN LEFT RIGHT button to 4 select the desired language 5 Press the ENTER button When playing a VCD In disc version 2 0 the MENU button works as a conversion switch between MENU ON a...

Page 27: ... is disc dependent and may not work with all DVDs This function does not work when a DVD has not been recorded with a multi camera angle system Using the Master Volume Control Functions Press the DISPLAY button twice Use the UP DOWN button to select a suitable volume Master Volume Control function lets you adjust the volume of the player s output This is useful for matching the player s output lev...

Page 28: ...e the LEFT RIGHT button to select a marked scene 3 Press the PLAY PAUSE button to skip to the marked scene Clearing a Bookmark 1 During playback press the BOOKMARK button on the remote 2 Use the LEFT RIGHT button to select the bookmark number you want to delete 3 Press the CLEAR button to delete a bookmark number Press the BOOKMARK button to turn off display NOTE Up to three scenes may be marked a...

Page 29: ...roduce a greater surround effect This feature is useful when you are using the DVD player with a two channel stereo through the analog outputs Discs which are recorded with LPCM or DTS will not work When the DIGITAL OUTPUT is set to BITSTREAM in the Setup Menu the 3D Sound function will not work 1 During playback press the 3D SOUND button The 3D SOUND mark will be displayed on screen Be sure the D...

Page 30: ...ge 31 Use the Subtitle preference menu to select the language the disc s Subtitles are to be displayed in 5 PARENTAL Setup of the Parental Level See page 32 Allows users to set the level necessary to prevent children from viewing unsuitable movies such as those with violence X rating etc 6 AUDIO OPTIONS Setup of the Audio Options See page 33 7 DISPLAY OPTIONS Setup of the Display Options See page ...

Page 31: ...s the RETURN button Using the Disc Menu Language e g Setting up in ENGLISH This function changes the language only for the text on the Disc Menu screens 1 Press the SETUP button when in stop mode 2 Use the UP DOWN button to select Disc Menu 3 Press the ENTER button 4 Use the UP DOWN button to select ENGLISH Select OTHERS if the language you want is not listed 5 Press the ENTER button ENGLISH is se...

Page 32: ...in stop mode 2 Use the UP DOWN button to select Subtitle 3 Press the ENTER button 4 Use the UP DOWN button to select ENGLISH Select AUTOMATIC if you want the Subtitle language to be the same as the language selected as the audio preference Select OTHERS if the language you want is not listed Some discs may not contain the language you select as your initial language in that case the disc will use ...

Page 33: ...d Enter your password again The Parental Control screen appears 5 About the Rating Level The Rating Level will work only when Use Password is set to Yes To unlock the player use LEFT RIGHT to select No Use UP DOWN to select Rating level Press ENTER Use UP DOWN to select the level e g Level 6 and press ENTER The disc that contains Level 7 will now not play To cancel the rating level use LEFT RIGHT ...

Page 34: ...sure to select the correct Digital Output 2 DTS ON Outputs DTS BITSTREAM via digital output only Select DTS when connecting to a DTS DECODER OFF Doesn t output DTS signal 3 DYNAMIC COMPRESSION ON To select dynamic compression OFF To select the standard range 4 2X SCAN AUDIO ON Turns 2X audio on OFF Turns 2X audio off Though 2X SCAN AUDIO is ON in the Setup Menu no sound will be heard on discs whic...

Page 35: ...creen messages on or off 4 FRONT DISPLAY Adjust the brightness of the unit s front panel display 5 BLACK LEVEL Adjust the brightness of screen 4 Use the UP DOWN button to select the desired item Press the LEFT RIGHT and then the ENTER button 1 TV ASPECT 4 3 LETTER BOX Select when you want to see the total 16 9 ratio screen DVD supplies even though you have a TV with a 4 3 ratio screen Black bars w...

Page 36: ... It makes the Front Panel Display dim AUTO DIM It makes the Front Panel Display dim automatically when playing a DVD 5 BLACK LEVEL NOTE Certain audio features of this product manufactured under a license from Desper Products Inc Spatializer 3 D Stereo Spatializer N 2 2 and the circle in square are trademarks owned by Desper Products Inc Manufactured under license from Dolby Laboratories Dolby Pro ...

Page 37: ... angles 3 The feature is not available at the moment P17 22 P25 29 Disc Menu doesn t appear Check if the disc has a Menu P24 25 Playback mode differs from the Setup Menu selection Some of the functions selected in the Setup Menu may not work properly if the disc is not encoded with the corresponding function P29 35 The screen ratio cannot be changed The Screen Ratio is fixed on your DVDs P34 35 No...

Page 38: ... COMPACT DISC Reading Speed 1 2 to 1 4 m sec Maximum Play Time 20 min VCD 12 cm Reading Speed 1 2 to 1 4 m sec Maximum Play Time 74 min Video Audio Video Output Composite Video 2 channel 1 0 Vp p 75 Q load Y 1 0 Vp p 75 Q load Pr 0 70 Vp p 75 Q load Component Video Pb 0 70 Vp p 75 Q load S VIDEO Luminance Signal 1 0 Vp p 75 Q load Chrominance Signal 0 286 Vp p 75 Q load Audio Output 2 Channel L 1 ...

Page 39: ...rest you Just present proof of purchase and or delivery receipts to the Hitachi Authorized Service Facility and service will be rendered in accordance with the terms of the limited warranty as stated on your warranty card or operating guide Should you have any questions regarding in warranty service operation or technical assistance please contact HITACHI AMERICA LTD HOME ELECTRONICS DIVISION 1855...

Reviews: