background image

LO C ATION CONTROLS

Front View

Side View

Rear View

3

1

2

3

4

5

6

7

8

9

10

11

12

15 16 17 21

22

1314

18

19

20

23

1. TINT
2. SHARPNESS 
3. COLOR 
4. BRIGHTNESS
5. CONTRAST 
6. VOLUME
7. VIDEO 1
8. VIDEO 2 
9. S-VIDEO

10. POWER BUTTON
11. POWER LED LAMP
12. AC INLET

13. VIDEO 1 IN
14. VIDEO 2 IN
15. VIDEO 1 OUT
16. VIDEO 2 OUT
17. S-VIDEO
18. AUDIO V1 IN
19. AUDIO V2 IN
20. AUDIO S-VIDEO IN
21. AUDIO V1 OUT
22. AUDIO V2 OUT
23. AUDIO S-VIDEO OUT

Summary of Contents for CPX1403MS

Page 1: ... KEEP THIS USER MANUAL FOR FUTURE REFERENCE For future reference record the serial number of your colour monitor SERIAL No The serial number is located on the rear of the monitor USER MANUAL MANUEL D UTILISATION BEDIENUNGSANLEITUNG MANUAL DE USUARIO MANUALE DI ISTRUZIONI ...

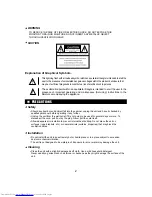
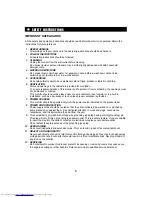
Page 2: ...trician for replacement of the obsolete outlet 10 Protect the power cord from being walked on or pinched particularly at plugs convenience receptacles and the point where they exit from the apparatus 11 Only use attachments accessories specified by the manufacturer 12 Use only with the cart stand tripod bracket or table specified by the manufacturer or sold with the apparatus When a cart is used u...

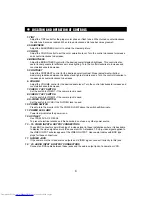
Page 3: ...solid object fall into the cabinet unplug the unit and have it checked by qualified personnel before operating it any further Unplug the unit from the wall outlet if it is not going to be used for several days or more To disconnect the cord pull it out by the plug Never pull the cord itself Allow adequate air circulation to prevent internal heat buildup Do not place the unit on surfaces rugs blank...

Page 4: ...3 1 TINT 2 SHARPNESS 3 COLOR 4 BRIGHTNESS 5 CONTRAST 6 VOLUME 7 VIDEO 1 8 VIDEO 2 9 S VIDEO 10 POWER BUTTON 11 POWER LED LAMP 12 AC INLET 13 VIDEO 1 IN 14 VIDEO 2 IN 15 VIDEO 1 OUT 16 VIDEO 2 OUT 17 S VIDEO 18 AUDIO V1 IN 19 AUDIO V2 IN 20 AUDIO S VIDEO IN 21 AUDIO V1 OUT 22 AUDIO V2 OUT 23 AUDIO S VIDEO OUT ...

Page 5: ...se to increase and counterclockwise to decrease 7 VIDEO 1 TACT SWITCH Set the switch to VIDEO 1 if the camera jack is used 8 VIDEO 2 TACT SWITCH Set the switch to VIDEO 2 if the camera jack is used 9 S VIDEO TACT SWITCH Set the switch to S VHS if the S VIDEO jack is used 10 POWER SWITCH Press to turn the monitor ON The POWER LAMP above the switch will illuminate 11 POWER LED LAMP Power lamp indica...

Page 6: ... camera VCR Audio Audio signal cable Y C S VHS S VHS Signal cable Audio S VIDEO connection Select input S VIDEO button Read the installation operation manual thoroughly before connecting equipment Turn off the power source before connecting the monitor and external equipment VIDEO 1 Connection Select input VIDEO 1 button VIDEO 2 Connection Select input VIDEO 2 button POSSIBLE CONNECTIONS 5 ...

Page 7: ...is provided 7 POWER SOURCES This monitor should be operated only from the power source indicated on the product label 8 POWER CORD PROTECTION Power supply cords should be routed so that they are not likely to be walked on or pinched by items placed on or against them Pay particular attention to cords and plugs convenience receptacles and the point where they exit from the unit 9 This equipment is ...

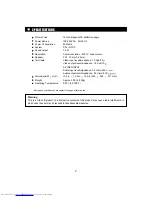
Page 8: ...el impedance 1 0 Vpp 75 S VIDEO INPUT Audio input level impedance 0 3 Vrms 25K Audio output level impedance 0 3 Vrms 4 7K Dimensions W H D 13 8 in 12 9 in 14 6 in 350 328 371 mm Weight Approx 30 9 lb 14Kg Operating Temperature 0 40 32 106 F Design and specifications are subject to change without notice 7 SPECIFICATIONS Warning This is a Class B product In a domestic environment this product may ca...

Page 9: ...47 Milano Italia ITALY Tel 39 02 487861 Tel 39 02 38073415 Servizio Clienti Fax 39 02 48786381 2 Email customerservice italy hitachi eu com HITACHI Europe AB Box 77 S 164 94 Kista SWEDEN Tel 46 0 8 562 711 00 Fax 46 0 8 562 711 13 Email csgswe hitachi eu com HITACHI EUROPE S A S Lyon Office B P 45 69671 BRON CEDEX FRANCE Tel 33 04 72 14 29 70 Fax 33 04 72 14 29 99 Email france consommateur hitachi...

Reviews: