background image

GB   

- 7 -

Before Switching on your TV

Power connection

IMPORTANT:

 The TV set is designed to operate on

 220-240V

AC, 50 Hz.

• After unpacking, allow the TV set to reach the ambient room

temperature before you connect the set to the mains.

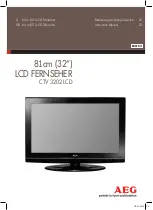
Connections to the RF input socket

• Connect the aerial or cable TV plug into the RF input socket

on the back of the TV.If you are also connecting a video re-

corder /satellite receiver, plug the aerial into this equipment

first and then connect the RF output socket from this device

to the RF input on the back of the TV.

VHF/UHF

W

795($53$1(/

&$%/(79

How to connect other devices

IMPORTANT:

 Switch off the TV before connecting any external

device.
Sockets for external connections are at the front or back of the

TV. For connection of other devices via Euroconnector refer to

the manuals of the related devices.

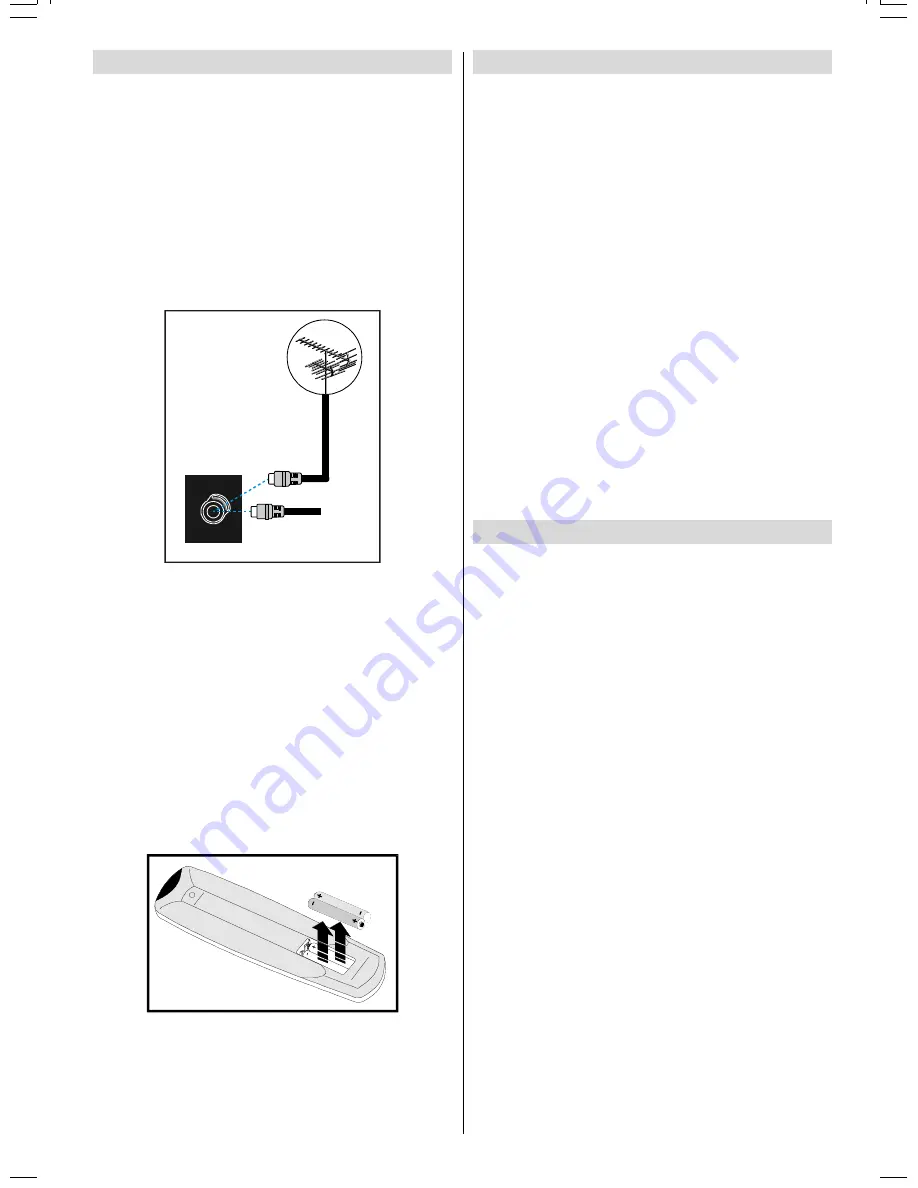
Inserting batteries in the remote control

handset

• Place the batteries in the right directions as seen below.
• Remove the battery cover located on the back of the handset

by gently pulling upwards from the indicated part.

• Insert two

 AAA (R03) 

or equivalent type batteries inside.

• Replace the battery cover.

NOTE: 

Remove batteries from remote control handset when

it is not to be used for a long period.Otherwise it can be dam-

aged due to any leakage of batteries.

Switching the TV ON/OFF

To switch the TV on

Your TV will switch on in two steps:

1-

 Press the power button located on the front of the TV. Then

the TV switches itself to standby mode and the 

RED LED

located below the TV turns on.

2-

 To switch on the TV from stand-by mode either:

Press a digit button on the remote control so that a programme

number is selected,
or,
Press Programme Up or Down buttons on the front of the TV

or on the remote control, so that last switched off programme

is selected.
In either case the TV will switch on and the 

RED LED

 will turn

to

 GREEN

.

To switch the TV off

• Press the stand-by button on the remote control, so the TV will

switch to stand-by mode and the

 GREEN


LED

 will become

RED

,

or,
Press the power button located on the front of the TV, so the TV

will switch off and the 

GREEN LED

 will turn off.

Operating the TV

You can operate your TV both using the remote control

handset and  onset buttons.

Operating with the buttons on the TV set

Volume setting and programme selection can be made using

the buttons on the front panel.

Volume Setting

• Press “

- V

” button to decrease volume or “

V+

” button to in-

crease volume, so a volume level scale (slider) will be dis-

played at the middle of the bottom on the screen.

• By pressing both the “

V +

” and “

- V

”  buttons at the same time

you can enter Main menu.

Programme Selecting

• Press “

P +

” button to select the next programme or

“

- P

” button to select the previous programme.

Operating with Remote Control

The remote control handset of your TV is designed to control

all the functions of the model you selected. The functions will

be described in accordance with the menu system of your TV.
Functions of the menu system are described in Menu System

section.

Volume Setting

Press “

VOL+

” button to increase volume. Press “

VOL-

” button

to decrease volume. A volume level scale (slider) will be dis-

played at the middle of the bottom on the screen.

ENG-(C1426R)-3716-AV-3040-AK36-MN1P-VST-BSI-T3X-5003XXXX.p65

18.04.2003, 09:54

7

Summary of Contents for C1426R

Page 1: ...GB Instructions for use C1426R ...

Page 2: ...ons on the TV set 7 Operating with Remote Control 7 Menu System 8 Sound Menu 8 Picture Menu 9 Feature Menu 10 Install Menu 10 Programme Menu 11 Other Features 12 TV Status 12 Programme Swap P P 12 Double digit 12 Personal Preferences PP 12 Picture Mode 12 Sleep Timer Last Minute Indicator 12 Mute Indicator 12 No Signal 12 Blue Background During No Signal 12 Picture Mode 12 Volume Bar 12 AV Modes 1...

Page 3: ...ursor Up Cursor Right VOL VOL Volume Volume Yellow FEATURE Feature Menu Blue INSTALL Installation Menu External Source AV 1 F AV RGB Teletext Buttons Teletext Update Hold Index Page Reveal Expand Time Mix TV Quit Menu Red SOUND Sound Menu Green PICTURE Picture Menu Programme Down Cursor Down Cursor Left Menu Change Picture Preset Mute ...

Page 4: ...an be connected to your TV The connection diagrams show the back of the TV where the different equipment should be connected REARPANEL DECODER FORSATELLITERECEIVER VIDEO HEADPHONE AUDIO CAMERA POWER Power On Off V Volume Volume P Program Program Front AV input AUDIO Audio left white VIDEO VCR yellow Headphone ...

Page 5: ...ou can obtain better picture quality if you connect a SCART lead to EX TERNAL Then select the appropriate AV mode by pressing the 9 button TV and Video Recorder If your video recorder has a SCART socket please connect it to the TV using a SCART lead Your TV should also be connected to your video recorder using the aerial RF output socket Please note using a SCART lead will produce better qualitiy ...

Page 6: ...t off as it may contain a special radio interference filter the removal of which could lead to impaired performance If you wish to extend the lead obtain an appropriate safety ap proved extension lead or consult your dealer Observe the manufacturers instructions when connecting ex tension leads to the TV Check the fuse rating on the new plug this should be fitted with a 5 Amp fuse which conforms t...

Page 7: ...cified by the manufacturer or have the same specifications as the original one Unauthorized substitutions may result in fire elec trical shock or other hazards 7 Servicing Please refer all servicing to qualified personnel Do not remove the back cover as this may result in an electric shock 8 X rays This television has sheilding for protection against the emis sion of X rays 9 Flame sources Do not ...

Page 8: ...LED located below the TV turns on 2 To switch on the TV from stand by mode either Press a digit button on the remote control so that a programme number is selected or Press Programme Up or Down buttons on the front of the TV or on the remote control so that last switched off programme is selected In either case the TV will switch on and the RED LED will turn toGREEN To switch the TV off Press the ...

Page 9: ...pulation of a multi function system The TV is controlled by choosing the commands which are displayed on the screen Press the button The Main menu will be displayed at the middle on the screen All the selected items in this menu system is indicated with CYAN characters and with an arrow on the leftside of items To select a sub menu use or button and press or button Each option can also be selected...

Page 10: ...ess Press button to increase peaking level Press button to decrease peaking level Mode This item is used to change the picture size By pressing or button you may choose one off two op tions These are 4 3 16 9 and AUTO 4 3 This option forces the picture ratio to 4 3 mode 16 9 This option forces the picture ratio to 16 9 mode AUTO This option is available only if your TV has WSS feature This allows ...

Page 11: ... remote control handset In this case the front panel buttons except the Switch On Off button will not work 6 3 7 0 5 2 1 8 2 2 1 6 Selecting Menu Language Menu language can be chosen by pressing or button on LANGUAGE item 6 3 7 0 5 2 1 8 2 2 1 6 To Store Settings In Feature menu all settings are stored automatically Install Menu To enter the Install menu directly press the BLUE button or Press but...

Page 12: ...to select the other letters or button can be used If the cursor is at the last letter of the Programme Name pressing button moves the cursor at the beginning On the contrary if the cursor is at the beginning of the Programme Name pressing button moves the cursor at the end 35 35 35 35 35 35 8726725 16 57 7 1 0 After changing the name by pressing the RED button STORE it is stored After activating t...

Page 13: ...d with it after 3 seconds If there is only one minute of the countdown left of the timer it is displayed automatically on the upper left of the screen and stayed there until finishing Then TV goes automatically to stand by Mute Indicator It is placed in the upper middle of the screen when enabled and it stays there until it is disabled To cancel mute there are two alternative the first one is pres...

Page 14: ...While Teletext Mode is on pressing will change the mode to TV one more press to will change the mode fromTV to the latestTeletext page we left In theTV mode enter a page number using digit keys As you enter digits first line of teletext page will appear on top screen and will remain there until the requested page is found Then teletext line will be replaced by page number to indicate that page has...

Page 15: ...rial connected properly Are the plugs connected tightly to the aerial socket Is the aerial cable damaged Are suitable plugs used to connect the aerial If you are in doubt consult your dealer No Picture means that your TV is not receiving any transmis sion Have you pressed the correct keys on the remote con trol Try once more Sound You can not hear any sound Did you perhaps interrupt the sound pres...

Page 16: ...intained or modified by any person other than an Hitachi authorised engineer iii The product serial number has not been removed or altered This guarantee does not apply to product acquired second hand or for commercial or communal use This guarantee does not cover the replacement of exhausted batteries the adjustment of user controls or aerial alignment Any parts replaced under this guarantee shal...

Page 17: ...47 Milano Italia ITALY Tel 39 02 487861 Tel 39 02 38073415 Servizio Clienti Fax 39 02 48786381 2 Email customerservice italy hitachi eu com HITACHI Europe AB Box 77 S 164 94 Kista SWEDEN Tel 46 0 8 562 711 00 Fax 46 0 8 562 711 13 Email csgswe hitachi eu com HITACHI EUROPE S A S Lyon Office B P 45 69671 BRON CEDEX FRANCE Tel 33 04 72 14 29 70 Fax 33 04 72 14 29 99 Email france consommateur hitachi...

Reviews: