24
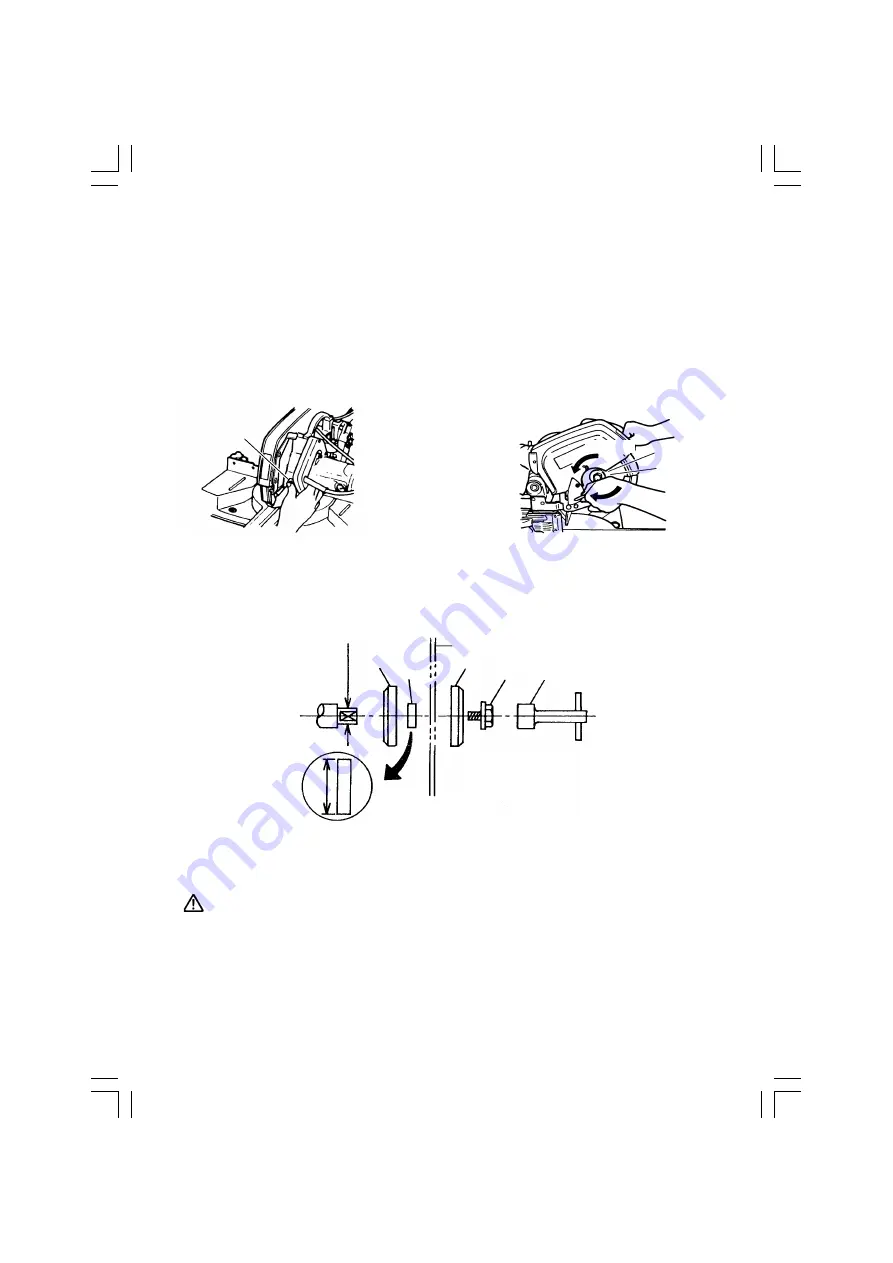
1. Mounting the saw blade (Fig. 30-a and Fig. 30-b)
(1) Press in spindle lock and loosen bolt with 10mm box wrench (standard accessory).
Since the bolt is left-hand threaded, loosen by turning it to the right as shown in
Fig. 30-b.
NOTE:
If the spindle lock cannot be easily pressed in to lock the spindle, turn the
bolt with 10mm box wrench (standard accessory) while applying pressure
on the spindle lock.
The saw blade spindle is locked when the spindle lock is pressed inward.
(2) Remove the bolt, washer (C) and collar.
(3) Before mounting the saw blade, carefully clean and re-install the collar. The collar
has out -side diameters of 30mm (1-3/16") as shown in Fig. 31.
Fig. 31
(4) Lift the safety covers (safety covers and sub cover) and mount the saw blade.
WARNING:
When mounting the saw blade, confirm that the rotation indicator
mark on the saw blade and the rotation direction of the saw are
properly matched.
(5) Thoroughly clean washer (C) and the bolt, and install them onto the saw blade
spindle.
(6) Press in the spindle lock and tighten the bolt by turning it to the left by 10mm box
wrench as indicated in Fig. 30-b.
15.9mm (5/8")
30mm (1-3/16")
Washer (C)
Collar
Saw blade
Washer (C)
Bolt
10mm box wrench
Fig. 30-a
Spindle lock
Fig. 30-b
Loosen
Washer (C)
Bolt
Tighten
01Eng_C8FSC_Eng
29/5/07, 17:55
24


